Inserting Seeq Content
Any Seeq content can be added to an Organizer Topic.
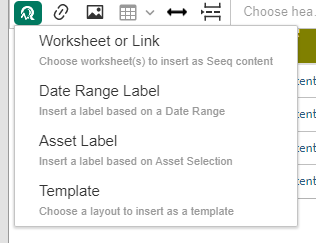
Insert Content options
Use the Seeq icon in the toolbar at the top of the screen to insert Seeq content. This can be done by searching for a specific worksheet or by pasting a URL from Seeq. Multiple worksheets can be inserted at the same time.
Worksheet: Opens a series of pop-ups to navigate to the Seeq content by selecting an analysis and then a worksheet. Multiple worksheets can be selected.
Link: Opens a single pop-up where the user can paste a URL from a specific Seeq view. Any formatting on that view will be applied.
In R60 the Worksheet and Link are combined into a single selection.
Date Range Label: Inserting a Date Range Label will insert a text blurb that can be associated with any date range configured to display in line and update the date range.
Asset Label: Inserting an Asset Label will insert a text blurb that can be associated with any asset selection configured to display in line when asset selection is changed.
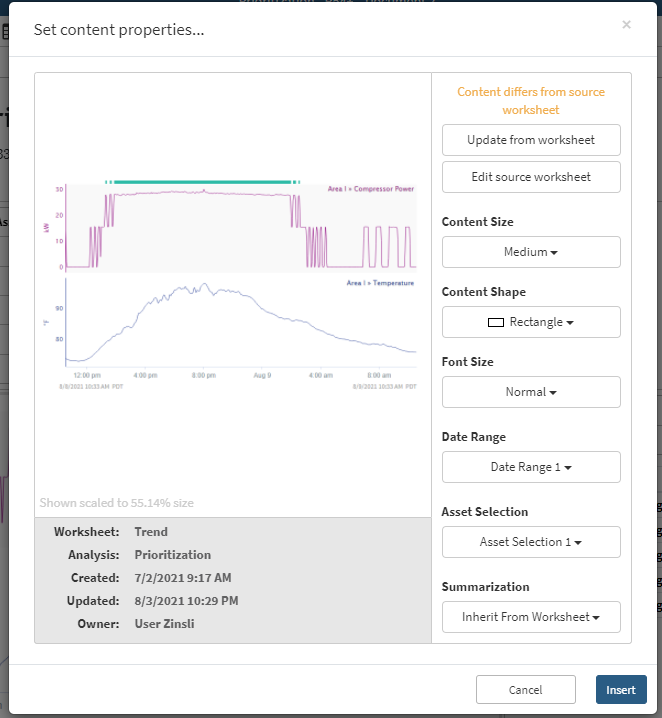
Set Content Properties: Either way Seeq content is selected, the user is able to set properties such as image size and date range. Properties can be individually set for each piece of content in a single insert. The default properties are the most recently used properties.
Inserting content from a Worksheet
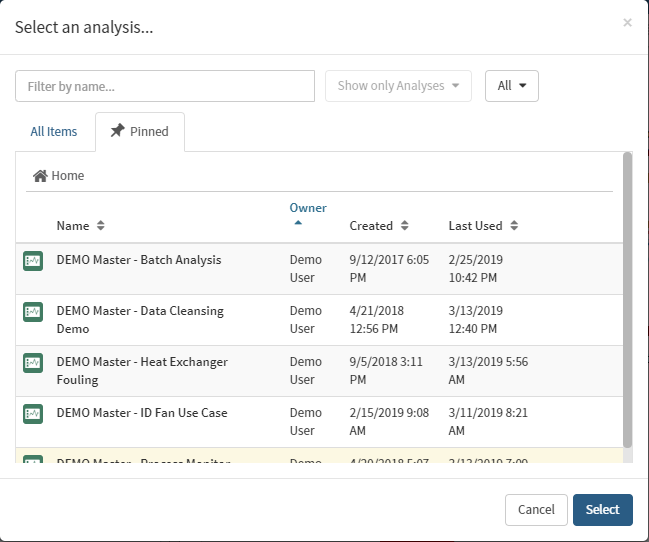
Select an analysis...
First navigate to and select the Analysis of interest. Note all filtering and search functions available on the home page can be applied (Public Items, My Items, etc.). Pinned workbooks are also available through this interface.
An Analysis can be selected by clicking on it, then the next pop-up will automatically appear.
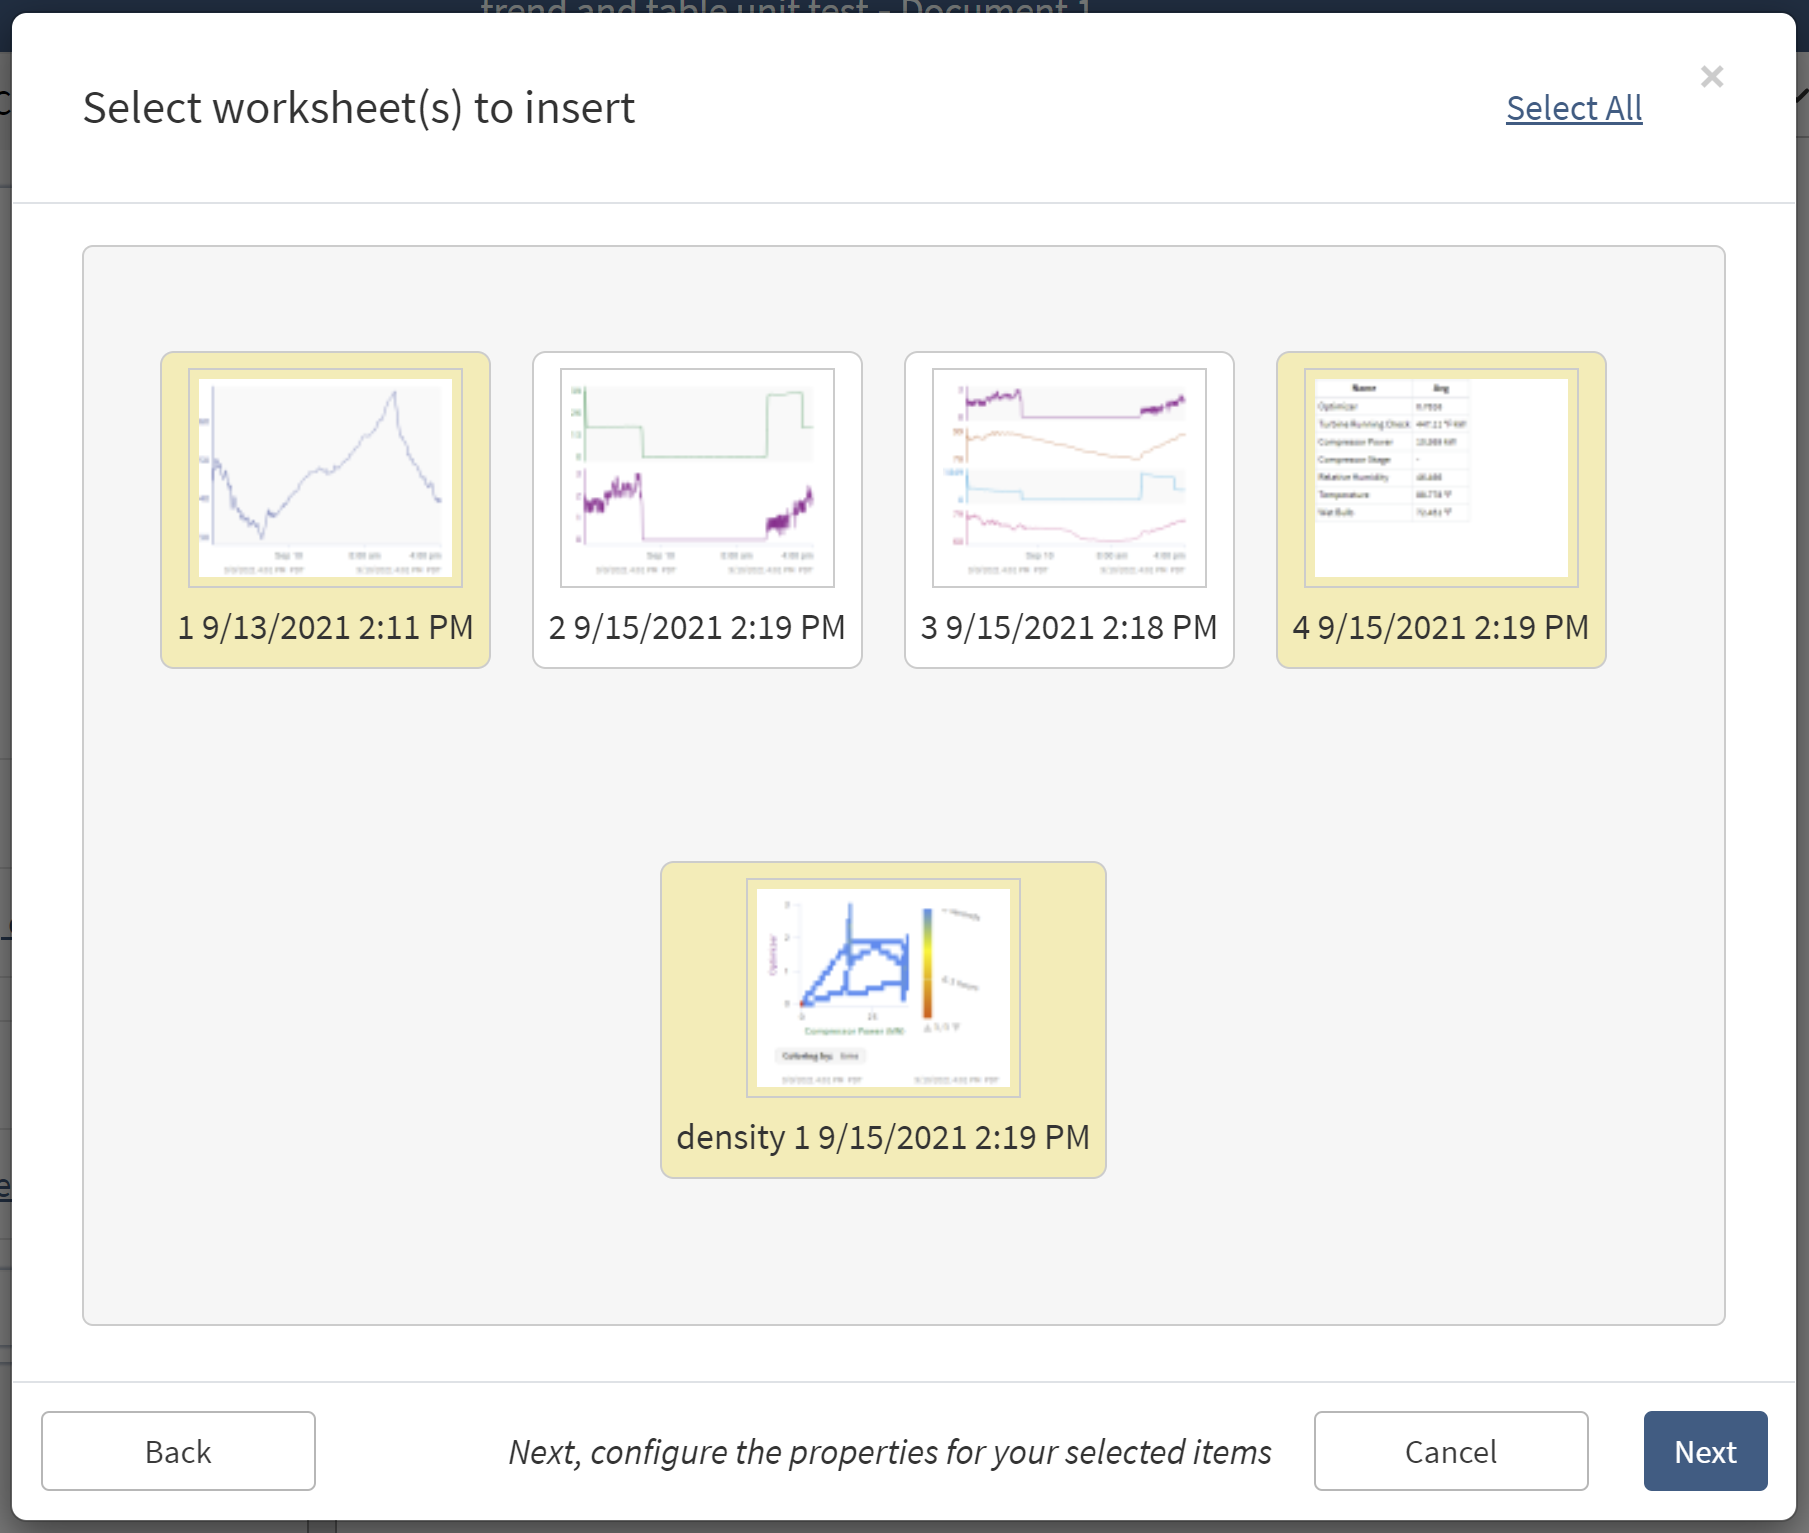
Select a worksheet...
Find and select the worksheet within the Analysis that will be inserted into the Organizer Topic. Double click or single click and then click "Select." Multiple worksheets can be selected or unselected with single clicks, or the select/unselect all button in the top right. Then click “Next”.
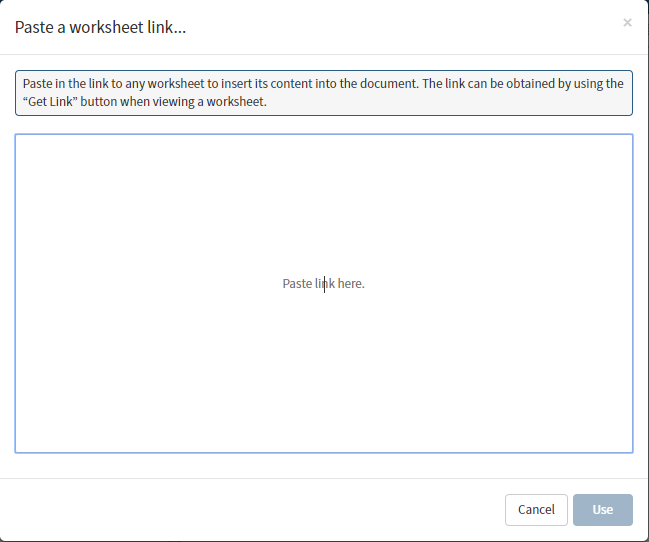
Inserting Content from a Link
Copy the URL from the Seeq worksheet to be inserted into the Organizer Topic and paste into the pop-up. The box where the URL is pasted will turn green if it is a valid Seeq link. Invalid links will not be inserted. To insert a URL that does not originate from Seeq, use the 

Set Content Properties
Interactive: Some content can be interactive in Organizer. Histogram, Compare View, and Treemap are not yet interactive. Interactive content will display dates that follow the viewer’s browser settings, so a user in the US will see MM/DD/YYYY while someone in Europe would be more likely to see DD/MM/YYYY on the same Organizer.
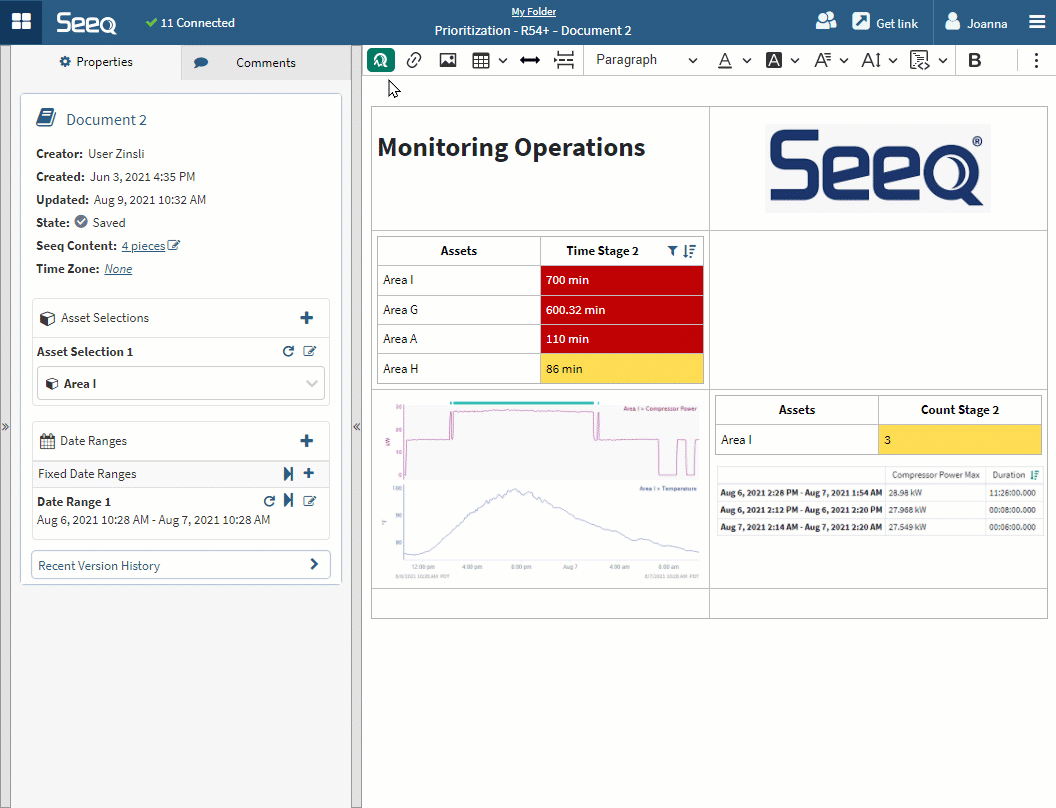
Tables can be inserted as interactive content. These interactive tables will display more clearly and can be copied from the Topic to paste elsewhere. Tables can be updated to change between interactive and not interactive.
XY plots can be inserted as interactive such that hovering over them will show labels if configured in Workbench.
Trends that do not include histograms can be interactive such that hovering over them will show labels if configured in Workbench.
Content Size: Select from the dropdown menu Small, Medium, Large, or Custom to determine the size of the image. Images can be manually resized after inserted by dragging corners, but an image inserted as Small will be granular if stretched too large. Default is Rectangle. Selecting Custom will remove the subsequent shape option and let the user define the content by pixel count. Default is Medium. When the content is in table view, there will be no option for Content Size because Font Size will determine the size of the table.
Content Shape: Select from the dropdown menu Strip, Rectangle or Square to change the shape of the image. Default is Rectangle. When the content is in table view, there will be no option for Content Shape because the table contents will determine the shape of the table.
Font Size: Select from the dropdown menu Small, Normal, Large, X-Large, or Huge to determine the size of the details inside of the image. This can be used if the image is too grany or the details are too small. For example the topic is displayed on a dashboard you might increase the font size so that the text is readable at a distance.
Date Range: Select a date range to apply to the image. Default is Inherit From Worksheet, but more than one date range can be configured to enable a document to have the same trend with varying dates, or a combination of trends and tables with different date references.
Asset Selection: Select an asset selection to apply to the content. Default is Inherit From Worksheet, but an Asset Selector can be configured to enable content to be updated to display data from a different asset than what is displayed in the original worksheet.
Summarization: Visual summarization can be applied to show fewer samples than displayed on the original analysis. Read more about signal summarization here.
All the above properties can also be updated for more than one piece of content at a time as described in Modifying Seeq Content.
Date Range and Asset Labels
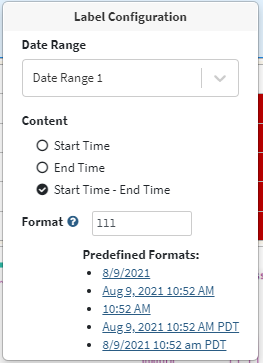
After inserting a Date Range Label, clicking on it will open the Label Configuration menu. Select any configured Date Range from the dropdown and then specify formatting of the display using the selector below.
When a Date Range Label is associated with a condition based date range, capsule properties will also be available to select under the Content section.
Change the color, font or size of the text displayed by modifying as you would any other text in the Document with the toolbar options at the top.