Add-on Tool Administration and Development
To use Seeq Add-on Tools, you must have Seeq Data Lab installed and configured. If not, please contact your Seeq Sales Representative to learn how.
Overview
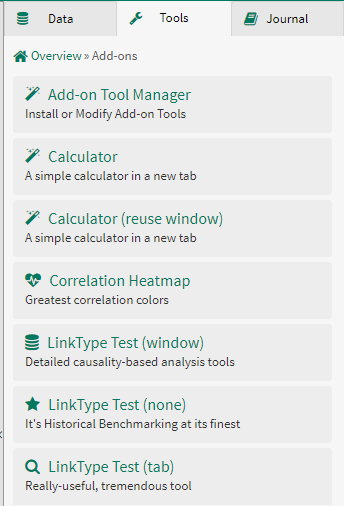
Add-on Tools appear in an “Add-ons” group on the Seeq Tools panel. These tools open an app-mode SDL notebook.

Configuration
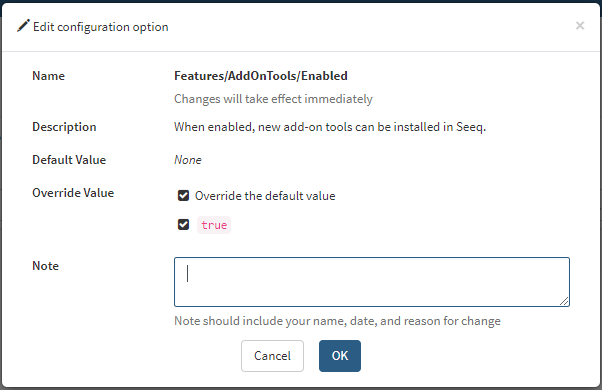
An admin user can enable Add-on Tools through the Administration panel from the hamburger menu in the top right of Seeq. Navigate to the “Configuration” tab, change the “Advanced” column to “yes” and switch Features/AddOnTools/Enabled to true.

Managing Add-on Tools
Add-on tools are managed by using the Add-on Tool Manager notebook.
Installation
To begin installation, open a Seeq Data Lab Project and Upload the Add-on Tool Manager notebook notebook to that project:

Open the Jupyter Notebook. You should now see an “Add-on Mode” (previously “Appmode”) button to open the Add-on Tool Manager notebook in application mode. Click on this and a UI as shown below should open after the code runs:

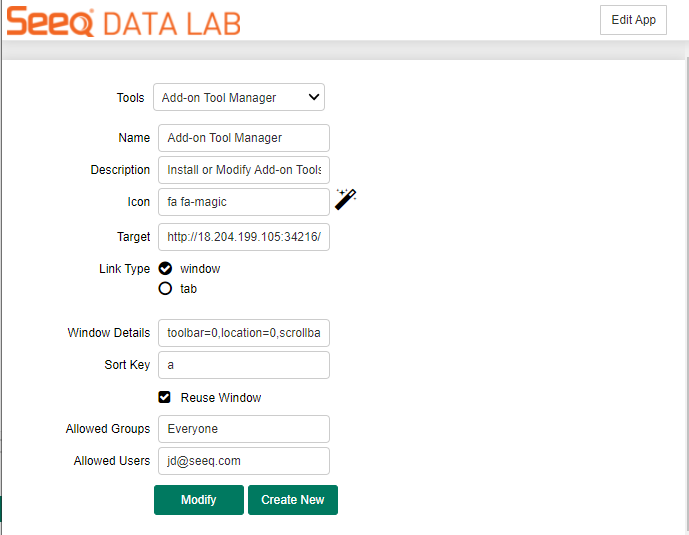
Fill out the tool for “Add-on Tool Management as follows, using the complete URL for the current Notebook in appmode as the “Target” (see description of Target in “Installing New Add-on Tools” section below for details of adding query parameters related to the Analysis from which the Add-on Tool was opened):
Name: Add-on Tool Management
Description: Install and Modify Add-on Tools
Icon: fa fa-wrench
Target: <URL>
Link Type: window
Window Details: toolbar=0,location=0,scrollbars=1,statusbar=0,menubar=0,resizable=1,height=600,width=600
Sort Key: a
Reuse Window: checked
Allowed Groups: <user groups as desired, separated by commas>
Allowed User: <usernames as desired, separated by commas>
Press “Create New” and once the Notebook has finished executing, refresh Seeq Workbench and “Add-ons” with “Add-on Tool Management” option should now be available to the users selected in the “allowed groups/users”.
Installing New Add-on Tools
After installing the Add-on Management Tool as the first add-on tool, the UI can be used to install additional Add-on Tools. This section goes through the various inputs for each of the tools.
Click here to view a video guide on how to install New Add-on Tools.
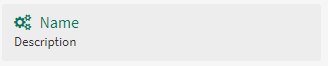
Name: The name of the tool shown in green text in the Add-on Tool button.
Description: The description shown in black text underneath the Name. Long descriptions will wrap to the next line and increase the height of the Add-on Tool button.
Icon: Any Font Awesome icon to show in green next to the Name. Potential Font Awesome icons can be found at the website https://fontawesome.com/v4.7.0/icons/ and take the form of “fa fa-<icon>”
Target: The target is the URL that you want opened. This can link to a website or most commonly is a Seeq Data Lab Notebook in Add-on Mode (previously Appmode). In order to get the Target URL for a Seeq Data Lab Notebook, open the desired Notebook in Add-on Mode and copy the URL that includes “/addon/” (previously “/apps/”) that indicates the Notebook is in Add-on Mode. For example:
https://explore.seeq.com/data-lab/F75365B4-C764-4236-8B5B-AE3AC54FE0E6/addon/Add-on%20Tool%20Management%20UI-TEST.ipynb?The workbookId, worksheetId, workstepId, and/or seeqVersion parameters from the launched workbook can be passed through the the URL as query parameters after the ".ipynb?". For example:
https://explore.seeq.com/data-lab/F75365B4-C764-4236-8B5B-AE3AC54FE0E6/addon/Add-on%20Tool%20Management%20UI-TEST.ipynb?workbookId={workbookId}&worksheetId={worksheetId}&workstepId={workstepId}&seeqVersion={seeqVersion}Link Type: Choose whether the Add-on Tool should launch a new tab or window.
Window Details: Choose the characteristics of the window that opens. Options are available at the website https://developer.mozilla.org/en-US/docs/Web/API/Window/open#Window_features. An example of this is shown below:
toolbar=0,location=0,scrollbars=1,statusbar=0,menubar=0,resizable=1,height=600,width=600Sort Key: Add-on Tools will sort in alphabetical order based on this sort key.
Reuse Window: Only used if window is selected for Link Type. False means that a new window is opened each time the tool card is clicked.
Allowed Groups/Users: Groups and users that have permission to see and use the add-on tool. If the Add-on Tool Target points to a Data Lab Notebook, then any permissions set on the Add-on Tool will also be added to the target Data Lab Project as users are required to have at least write permissions on the Data Lab Project to run the Notebook.
Deleting Existing Add-on Tools
With the spy.addons version of the Add-on Management UI, an uninstall button is provided for uninstalling add-ons. In previous iterations this is not available, and Add-on Tools should be deleted using the API with the System Endpoint.
Navigate to System >> GET/system/configuration/addOnTools:
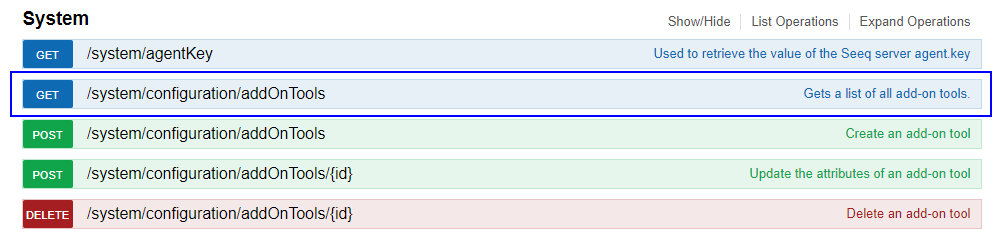
Hit the “Try it out!” button and go down to the response body:
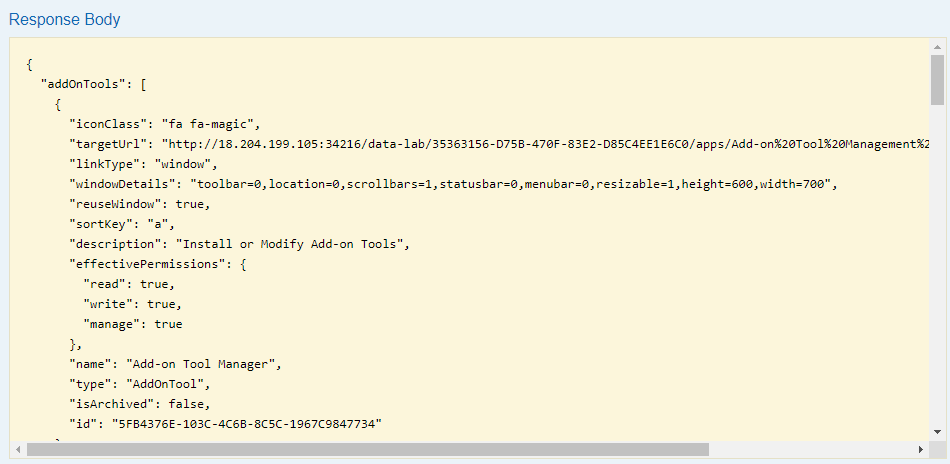
You want to grab the “id” value of the Tool you want. For example, in the above, if I wanted to delete the Add-on Tool Manager add-on tool, I would take the id of 5FB4376E-103C-4C6B-8C5C-1967C9847734. Copy that ID into the DELETE/system/configuration/addOnTools/{id} endpoint and hit “Try it Out!”:
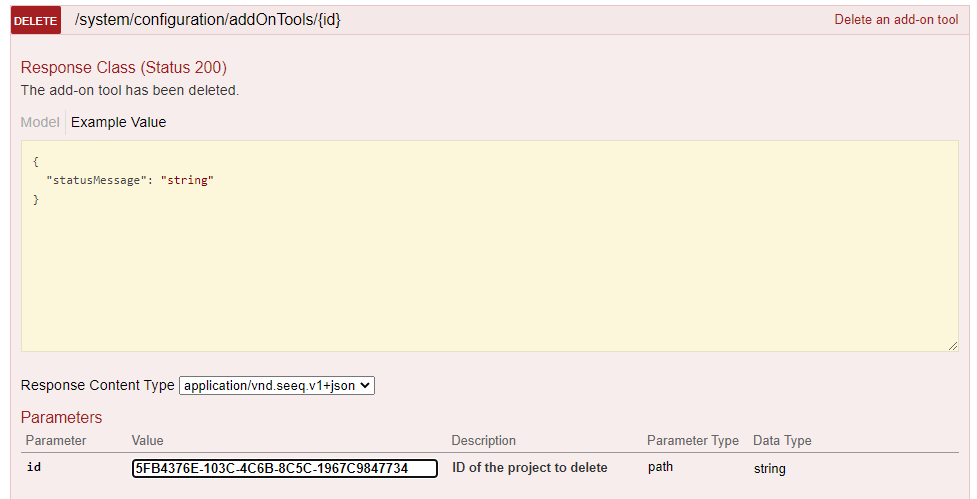
Assuming you don’t get an error response, you should be able to go back to workbench, refresh the page, and it should be removed.
Common Code Snippets for use in Add-on Tools
The following snippets can be used by Add-on Tool creators to extract and make use of the query parameters or otherwise modify the state of the Add-on Tool.
Retrieve parameters (e.g. workbook ID, worksheet ID) from Target URL:
import urllib.parse as urlparse
from urllib.parse import parse_qs

url = jupyter_notebook_url
parsed = urlparse.urlparse(url)
workbook_id = parse_qs(parsed.query)['workbookId'][0]
worksheet_id = parse_qs(parsed.query)['worksheetId'][0]
Retrieve all items on current workbook display:
from seeq import spy
import urllib.parse as urlparse
from urllib.parse import parse_qs

url = jupyter_notebook_url
parsed = urlparse.urlparse(url)
workbook_id = parse_qs(parsed.query)['workbookId'][0]
worksheet_id = parse_qs(parsed.query)['worksheetId'][0]
host = spy.client.host[:-3]
URL = host+'workbook/'+workbook_id+'/worksheet/'+worksheet_id
worksheet_items = spy.search(URL)
Retrieve start and end timestamps from current workbook display and store as values in ipydatetime widgets:
from seeq import sdk
import urllib.parse as urlparse
from urllib.parse import parse_qs
import ipydatetime

url = jupyter_notebook_url
parsed = urlparse.urlparse(url)
workbook_id = parse_qs(parsed.query)['workbookId'][0]
worksheet_id = parse_qs(parsed.query)['worksheetId'][0]
workstep_id = parse_qs(parsed.query)['workstepId'][0]

# Pull the workbook
wb = spy.workbooks.pull(workbook_id)

# Find the current worksheet based on the worksheetId in the query parameters
current_worksheet = [ws for ws in wb[0].worksheets if ws.id ==worksheet_id][0]

# Get Display Range
display_range = current_worksheet.display_range

# Insert values into ipydatetime widget
start_select = ipydatetime.DatetimePicker(description='Start Time: ', value=display_range['Start'])
end_select = ipydatetime.DatetimePicker(description='End Time: ', value=display_range['End'])