Getting Support
Viewing log files is often the first step in troubleshooting issues with Seeq. You can upload the log files to a Seeq hosted server and thus avoid issues with emailing large files.
Viewing Logs
Server logs can be viewed in the Seeq application
If you are troubleshooting connectors, consider reading Troubleshooting a Datasource Connection article.
Log into the Seeq application.
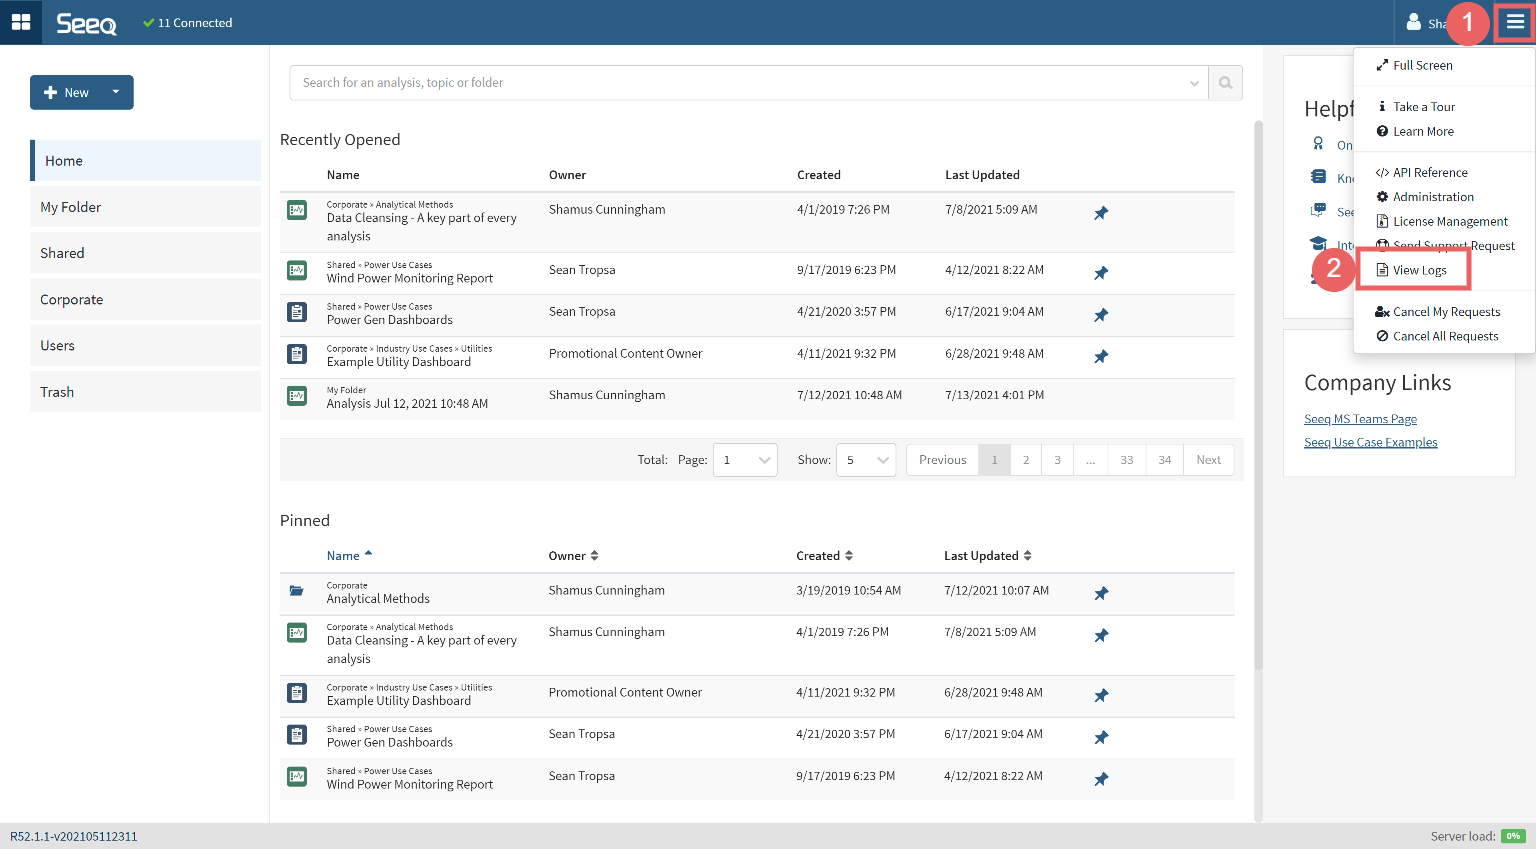
Click on the three horizontal bars in the upper right corner of Seeq.

Select View Logs.
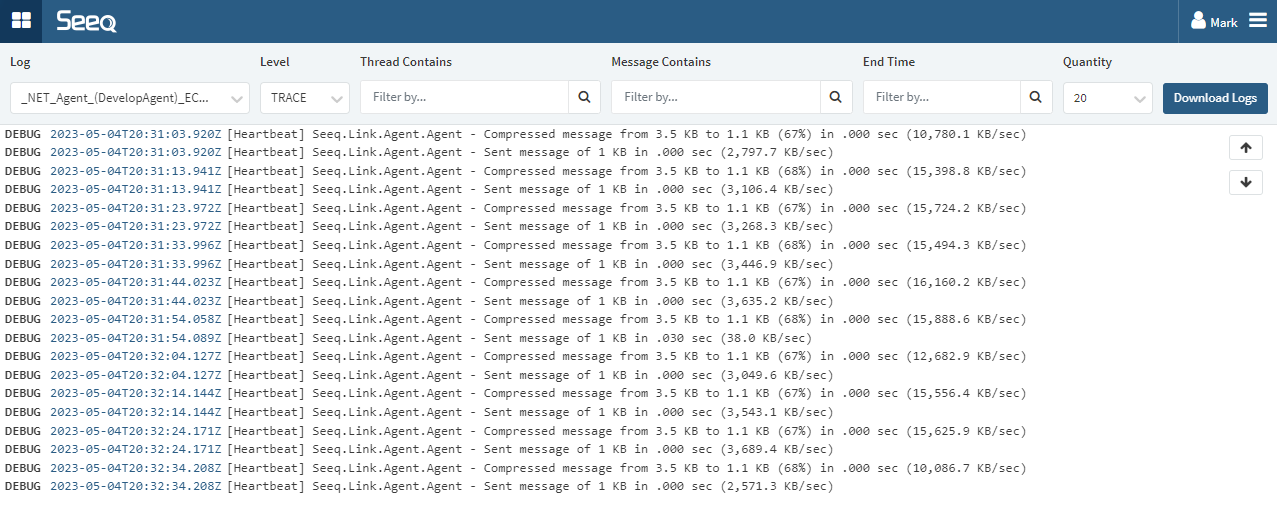
From this interface, you can select a particular component from the Log dropdown in the top left. Most commonly, you will want to look at logs for a NET Agent or JVM Agent. Remote Agent logs are included in this user interface and differentiated by the machine name hosting the Remote Agent.

Sending Logs to Seeq
Seeq support personnel will so
Follow the Viewing Logs instructions above.
Click on Send/Download Logs.
.png?inst-v=24398e2c-4afd-4d11-bbab-39d4717193c2)
Enter your name, email, and a short description and press "Send".
If the "Send" operation fails, you will be notified. You can instead click "Download Logs" and Seeq will create a ZIP file that you can upload to the following site:
Sending Server Logs via the Support Portal
On the Seeq website, www.seeq.com, hover over RESOURCES in the upper right corner and select SUPPORT. You will be taken to the Seeq Customer Success Center.
2. From the Seeq Customer Success Center, there are two options for submitting logs:
If you do not have an account on the Seeq Customer Success Center, click on To Raise a Support Request, please go here: Seeq Support Portal
Select Analytics Help
Enter the problem details. If you are providing logs for an existing support case, reference the SUP number in the Summary
Attach the Seeq logs
If you already have an account on the Seeq Customer Success Center, click Log in in the upper right corner
Enter your login credentials
Click on Requests in the upper right corner. Select to view your requests or all requests in your company
To add logs to an existing support case, select the support case and attach the logs
To create a new support case, click create new request. Enter the problem details and attach the Seeq logs
Registering on the Seeq Customer Success Center
Creating an account on the Seeq Customer Success Center allows you the convenience of being able to access your support cases from one location. You can view the status of your cases, add updates and attachments to existing cases, and open new cases. You also have the ability to view cases that have been opened by others in your company.
To create an account, do the following from the Seeq Customer Success Center:
Click Log in in the upper right corner.
2. Select Sign up
3. Enter your email address
You will receive an email. Click the Sign up link in the email to complete your registration.
