
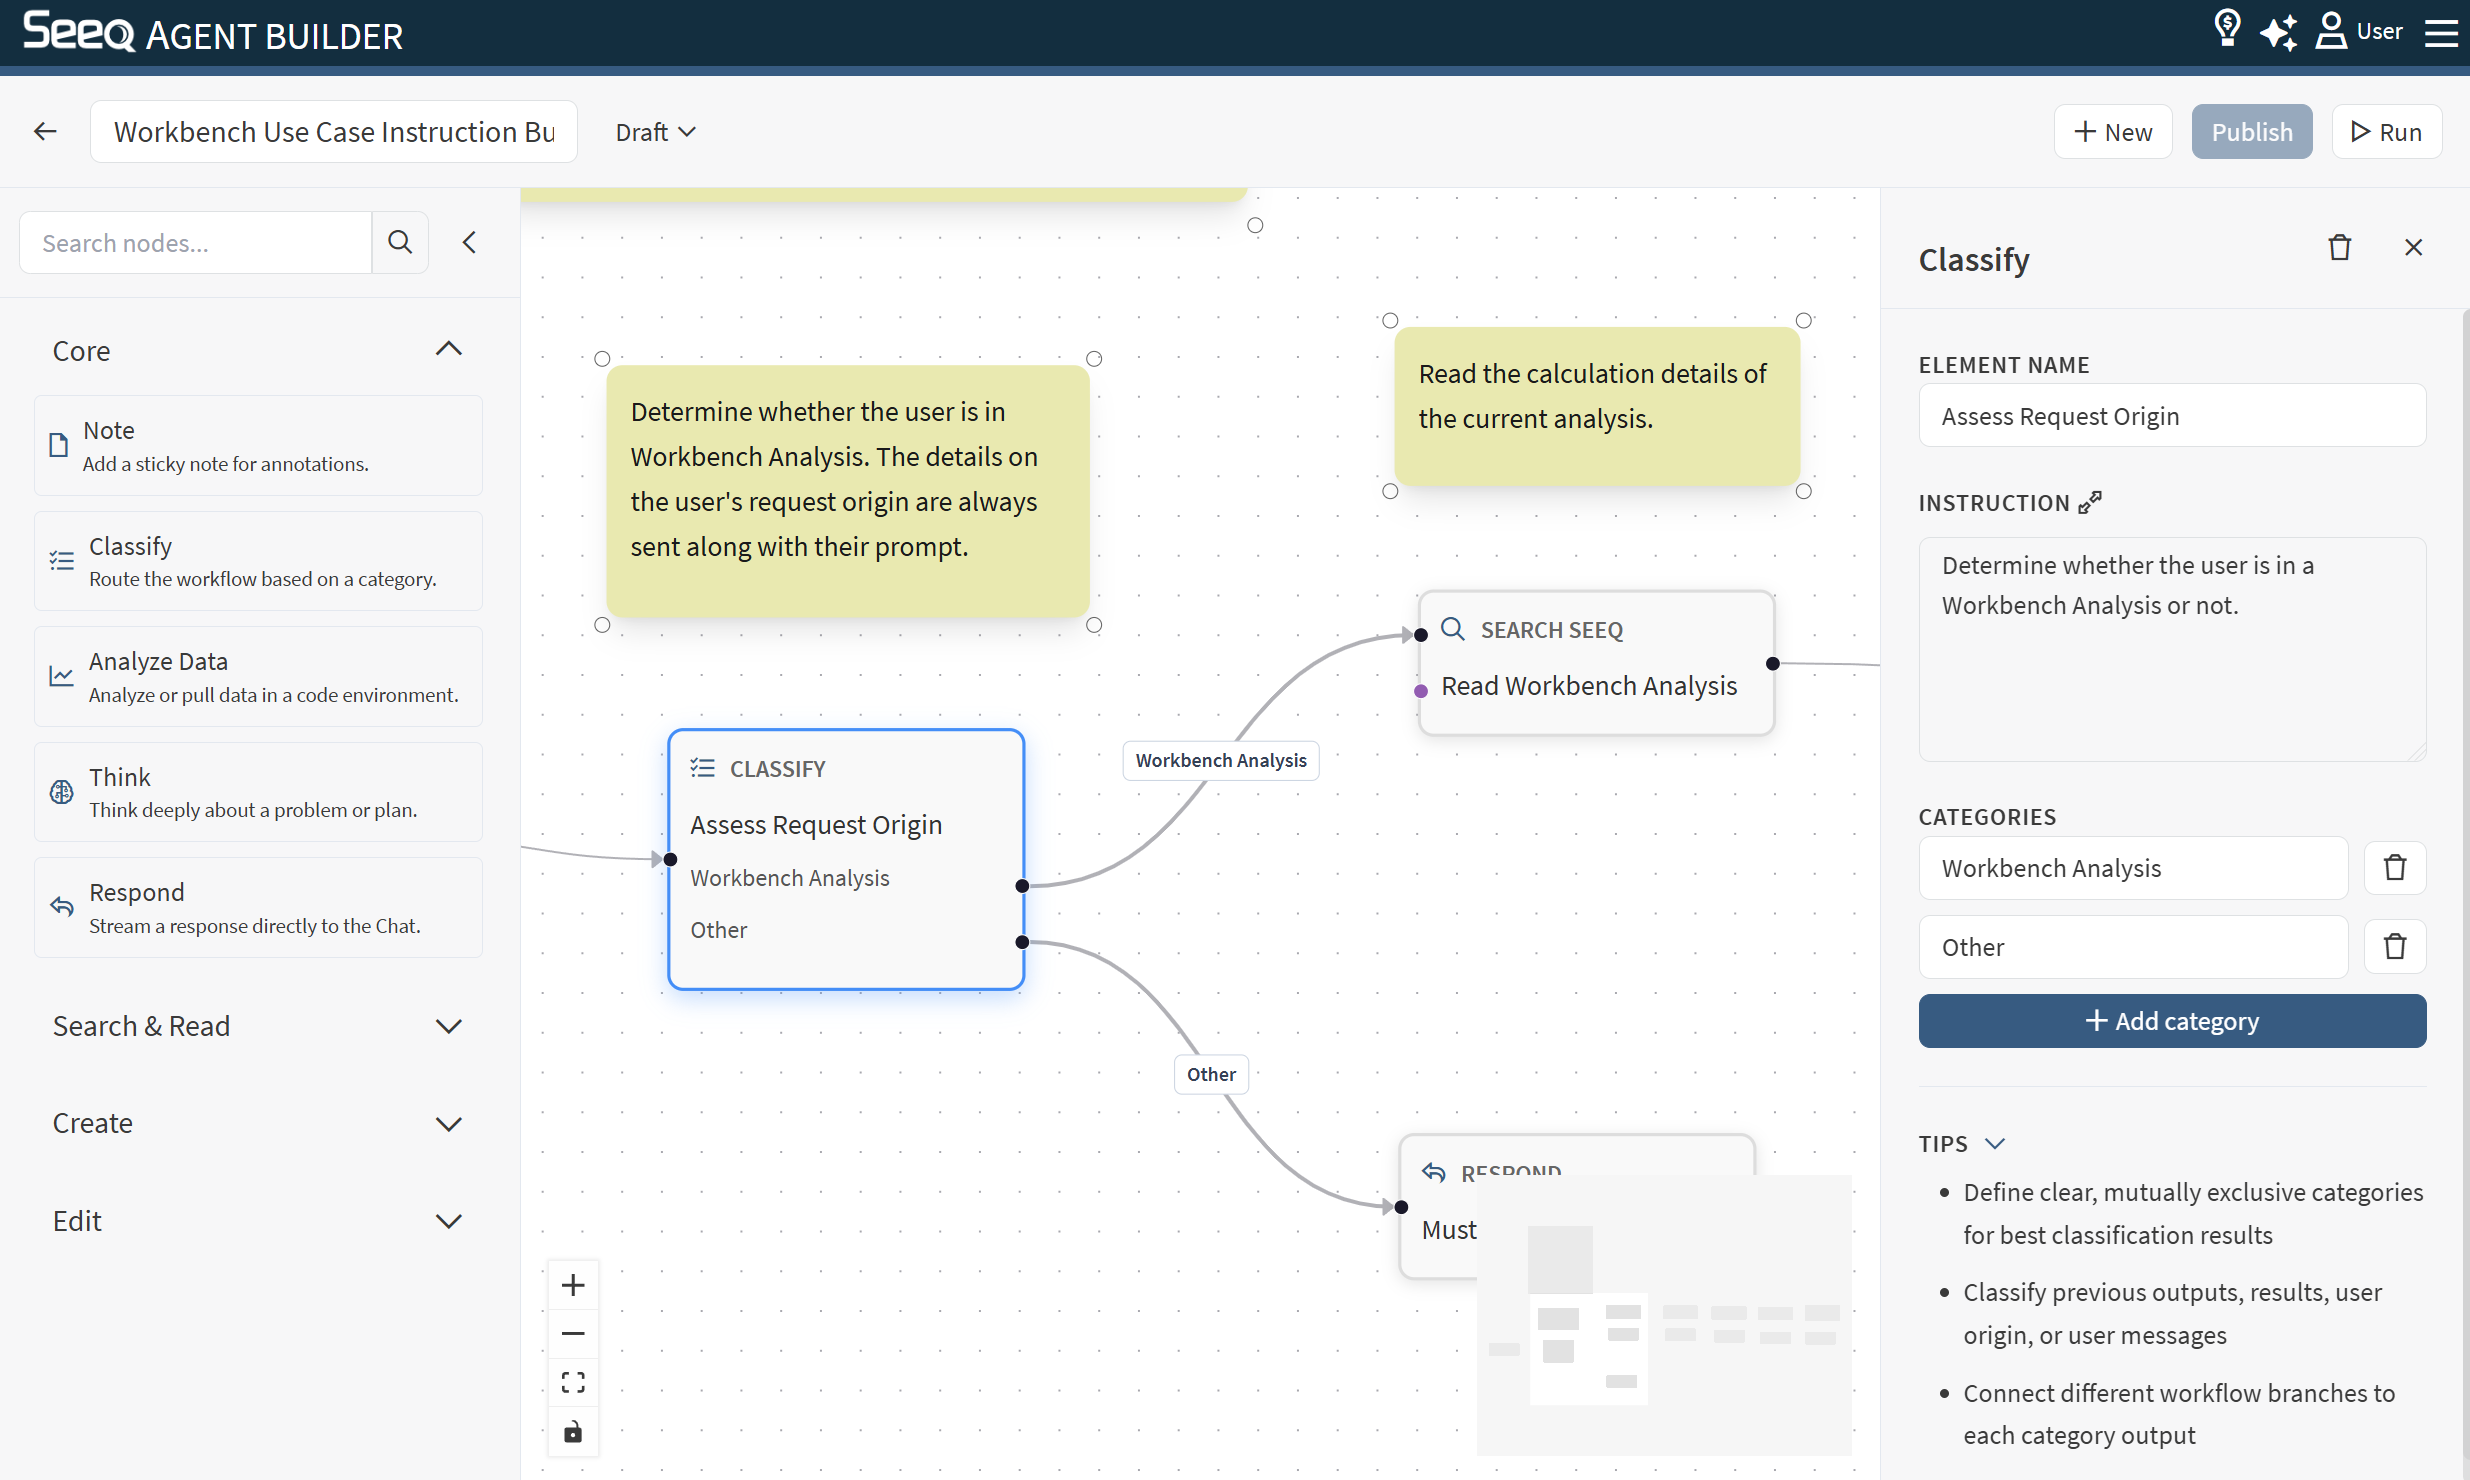
Use Classify to route the workflow to different branches based on the user’s request.
When to use
-
You want different handling for different intents (e.g., “search” vs “analyze” vs “write”).
-
You want different behavior based on the area of Seeq the user is working in (Workbench, Organizer, Data Lab, Vantage). If a custom agent is expecting to be running with context on the page from Workbench, you can add a classify node to exit the agent if the active browser is on a different application.
-
You want a safe “gate” before taking actions that create or change content.
How it works
-
The Classify node reads the conversation context and its instruction.
-
It selects one category from the list you define.
-
The workflow continues down the edge connected to that category. Other branches are skipped.
Configuration
In the Classify inspector you can set:
-
Element name: A friendly title (recommended).
-
Instruction: What should the classifier consider when choosing a category.
-
Categories: The list of allowed routes (at least one).
Connecting branches
Each category creates an output handle (appearing as a dot on the right side of the node). Connect each category handle to the first node in its branch.
Tip:
-
Include an “Other” category and connect it to a safe fallback path (often respond).
What happens at runtime
-
The node returns exactly one category.
-
The workflow continues down the edge for the selected category.
-
Nodes reachable only from unselected branches are skipped.
Common issues
-
Missing categories (must have at least one).
-
Selected category has no outgoing edge (the run will fail).
-
Overlapping/ambiguous category labels (can lead to unexpected routing).