
This quickstart walks you through creating a simple chat-triggered workflow that finds relevant Seeq content and responds with a summary. You can also see the Templates for additional inspiration.
1) Open Agent Builder
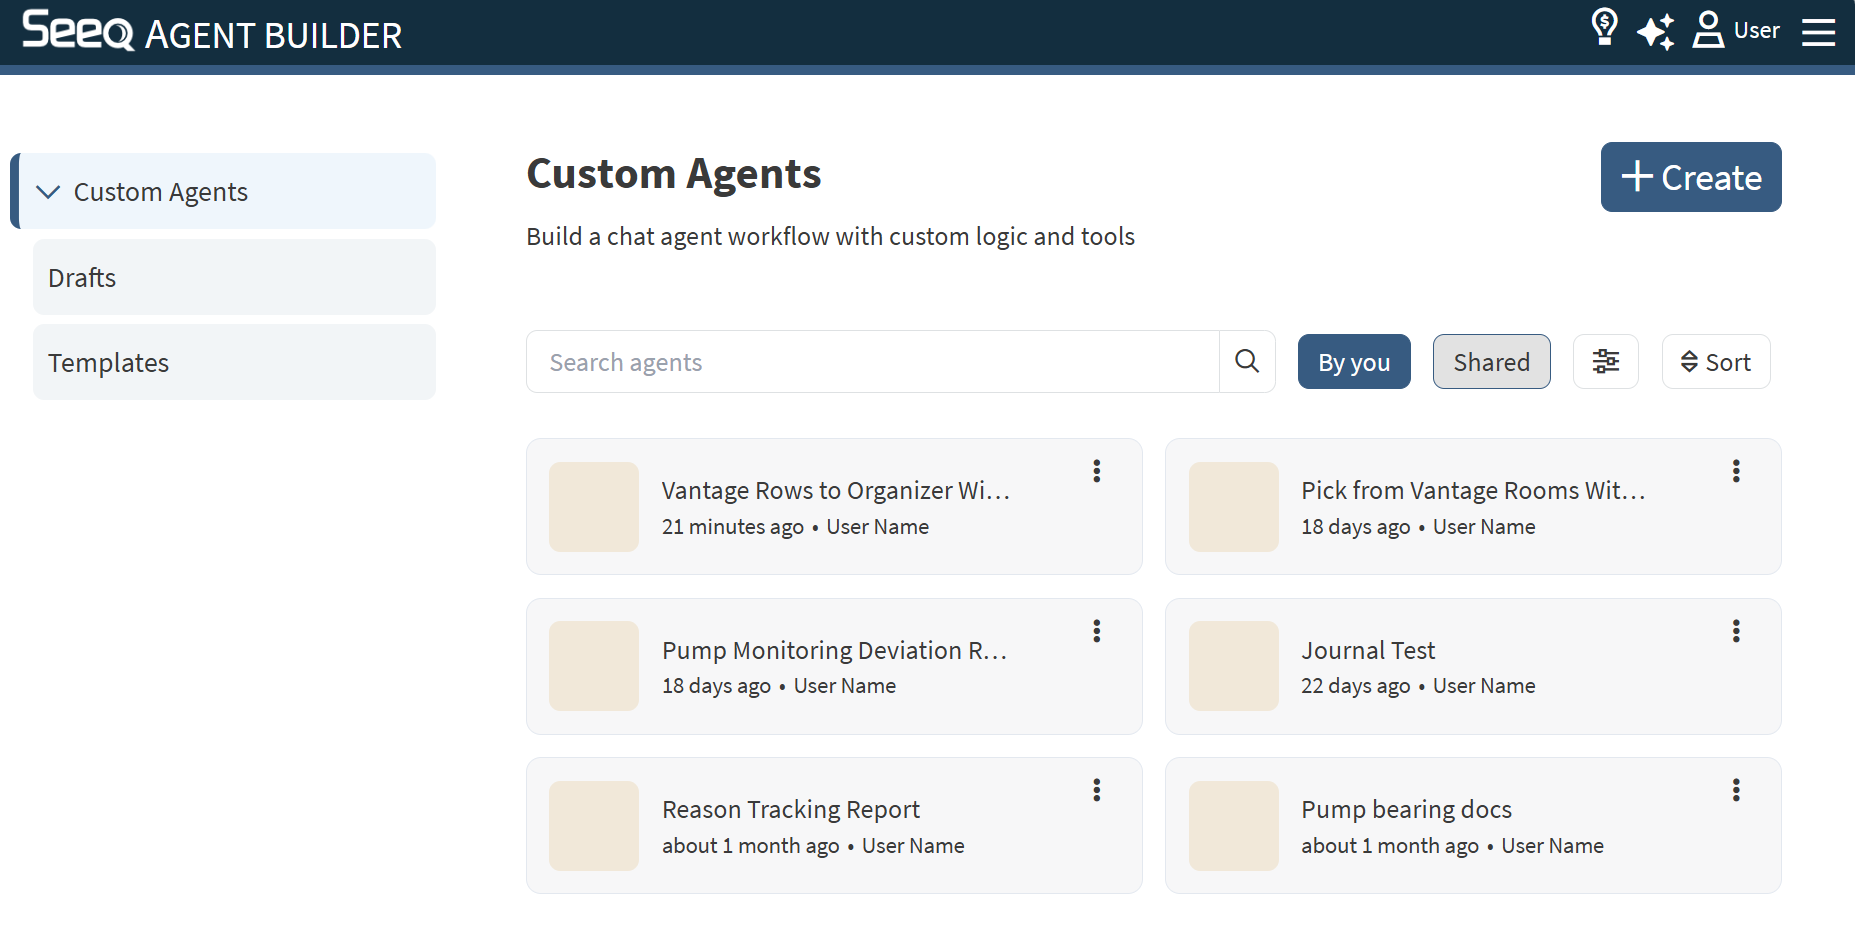
Open Agent Builder from the Home Screen to view existing agents that you have created or that have been shared with you.
2) Create a New Agent
-
Click + Create.
-
Give your workflow a name (e.g., “Workbook helper”).
3) Set the trigger to Chat
-
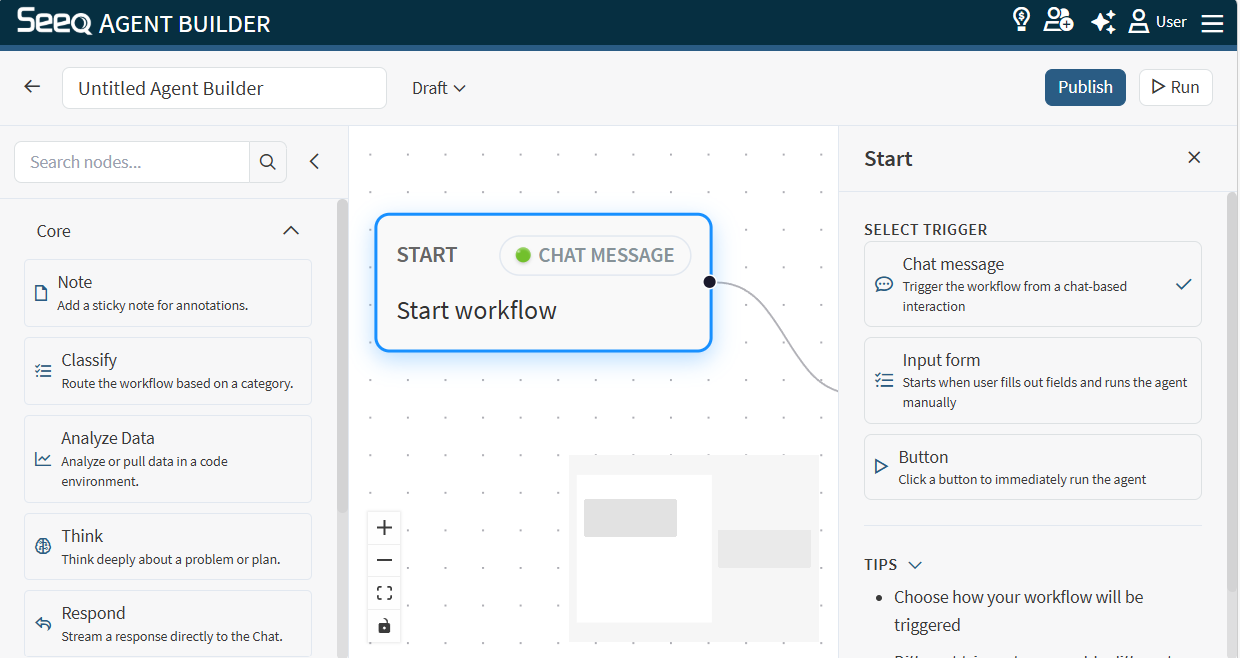
Click the Start node.
-
In the inspector, select Chat message.
3) Add nodes and connect them
-
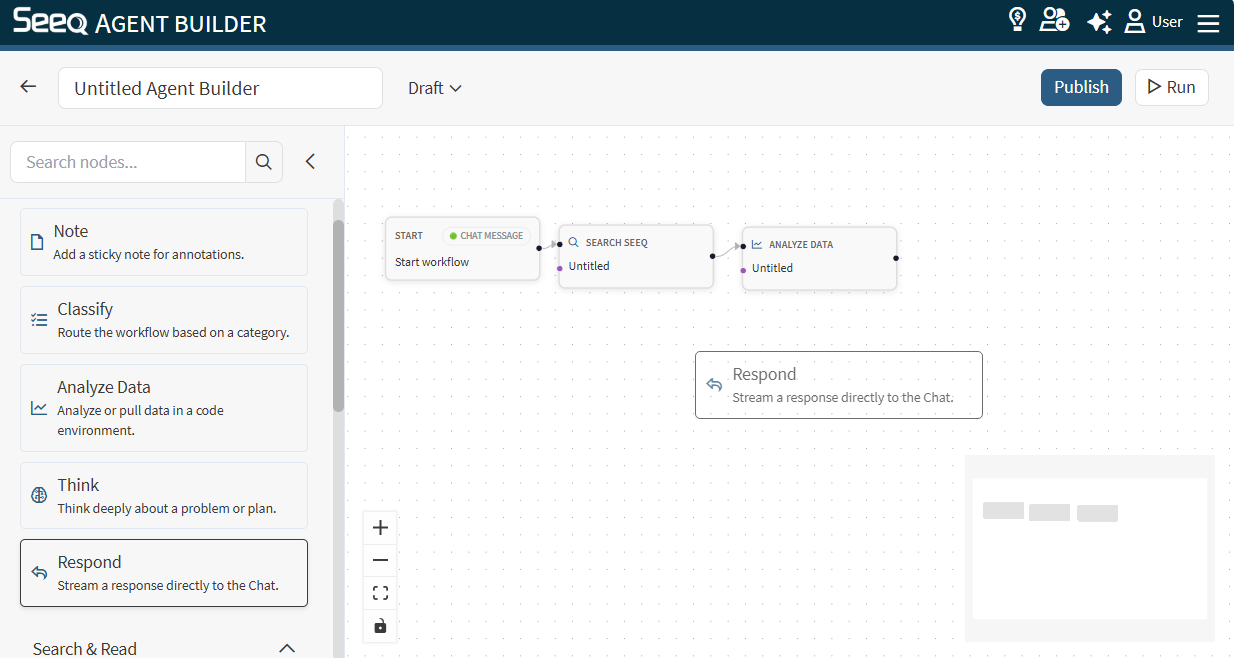
Add Search Seeq Content and connect:
Start → Search Seeq Content. -
Add Analyze Data and connect:
Search Seeq Content → Analyze Data. -
Ensure you have a Respond node at the end and connect:
Read Seeq Content → Respond.
Tips:
-
You can drag nodes from the palette, or click a palette item to add it.
-
Dragging a connection to empty canvas creates a “New Node” placeholder you can replace from the palette.
4) Write instructions for each node
Click each node and fill in its Instruction:
Search Seeq Content (example)
-
“Perform a workbook search to find the most relevant workbook and worksheet for the user’s question. Return the workbook/worksheet name and link.”
Analyze Data (example)
-
“Read the relevant worksheet and summarize the key findings and relevant context needed to answer the user.”
Respond (example)
-
“Answer the user concisely. Include links to the workbook/worksheet you used.”
5) (Optional) Attach a Seeq context
If you want to ensure the workflow uses a specific workbook or project instead of performing a search each time:
-
Select a node that supports context (e.g., Search Seeq).
-
Drag from the node’s purple context handle to empty canvas to create a Seeq context node.
-
Open the Seeq context node and navigate to the target workbook or Data Lab project.
6) Publish and run
-
Click Publish to create a new version.
-
Enable Deploy to production. If the agent is not deployed to production, you won’t see it in the Custom Agents menu in the AI Assistant.
-
Click Run and enter a prompt in the AI Assistant.
Next: Learn more about context and browse the nodes reference.