OSIsoft PI
.NET AGENT
Item Type Support
SIGNALS
Overview
The OSIsoft PI connector enables Seeq to access data from the PI Data Archive. This connector does not retrieve data from OSIsoft PI Asset Framework (AF), which can be connected via the OSIsoft Asset Framework (AF) connector.
Prerequisites
The following prerequisites need to be installed and configured on the Seeq Remote Agent machine prior to connecting the PI server(s) to Seeq.
PI System Management Tools
The PI System Management Tools (PISMT) need to be installed on the Seeq Remote Agent machine.
PISMT Installation
Download the PISMT (PISMT_2018_SP2_.exe or later). Follow the instructions in the OSIsoft support portal (A login to OSIsoft support is required).
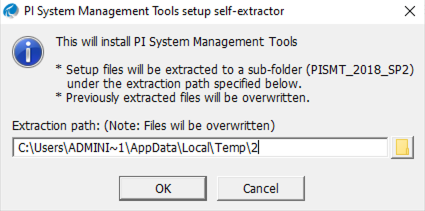
Double-click the PISMT_2018_SP2_.exe file to start the installation and follow the installation wizard.
The wizard will show you the path for files extraction,
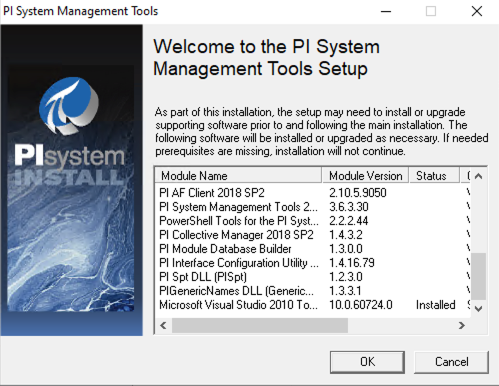
and the supporting software that is already installed and will be installed in your system.
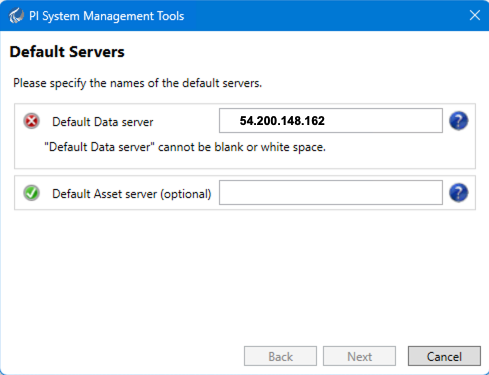
Then, it will ask for the name of the default server. Enter the IP or FQDN of the default Data server. If you need to connect to more than one PI server, you can add connections later (see Configuring additional PI servers)
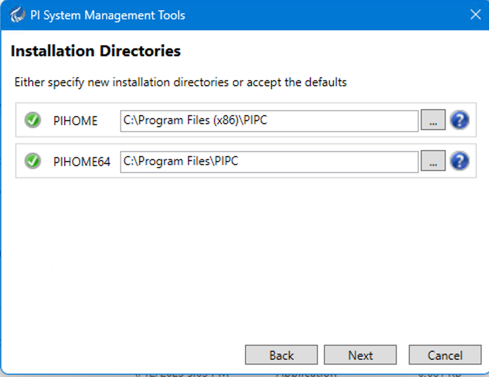
There is an option to change the Installation Directories if needed.
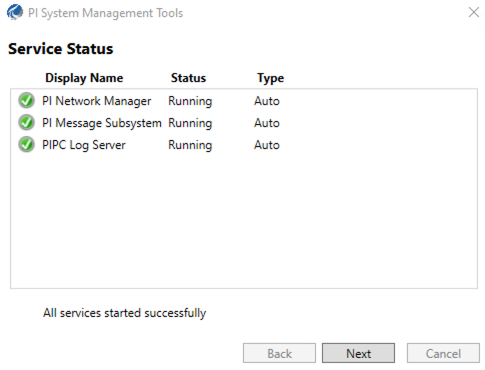
A Service Status confirmation dialog pops up:
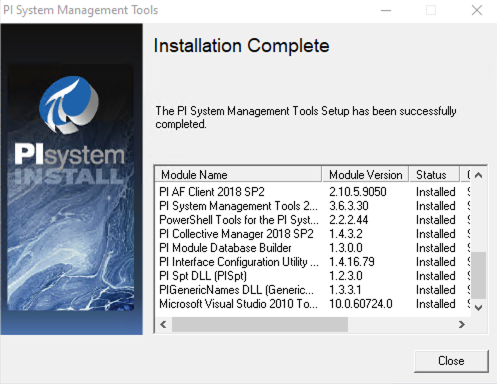
Finally, a confirmation that the installation is complete should appear.
Connecting to PI server(s)
A default data server name is requested during the installation of the PISMT. However, the installer does not check for connectivity to that server. The instructions below allow you to check for connectivity from the Seeq Remote Agent machine to the default server, as well as to add more connections if more than one PI server needs to be connected to Seeq. Once this default server is configured correctly, Seeq will automatically connect to this default server upon startup and index its tags. If more than one server needs to be connected, the connections need to be enabled for the first time in the OSIsoft PI Connector.json file. Step-by-step instructions on how to properly configured your PI servers for Seeq are described below.
Configuring the default server
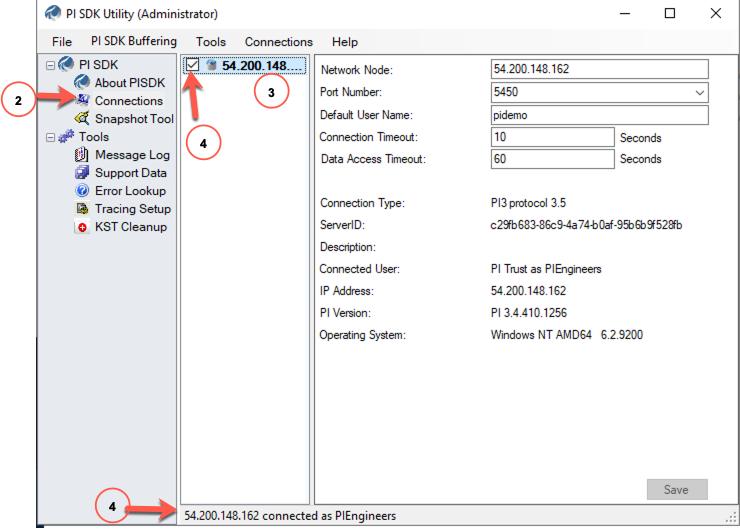
Open the PISDKUtility software (In Windows desktop: Start > PI System > PISDKUtility)
Navigate to PI SDK > Connections on the left panel.
You should see at least one connection in the central panel for the default server set up during installation. By selecting this connection (but NOT ticking the checkbox) you can adjust the connectivity properties in the right panel (e.g. Network Node, Port Number, or Default User Name)
Tick the checkbox of the connection to test connectivity to the PI server. If the connection is successful you should see a message at the bottom of the window
Configuring additional PI servers
If Seeq needs to connect to other servers (besides the default PI server), then you will have to add those connections in the PI SDK Utility.
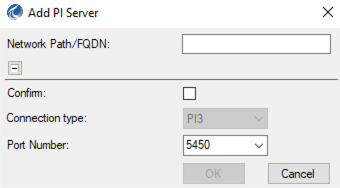
In the same PI SDK Utility, go to the Connections tab in the main menu and click on Add Server…
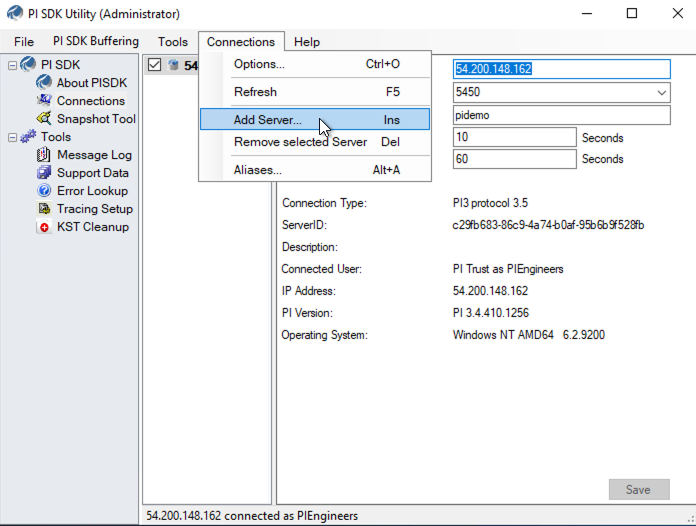
Enter the IP or FQDN for the PI server you want to connect to. Uncheck the Confirm checkbox and hit OK.
Tick the checkbox of the connection to test connectivity to the PI server. If the connection is successful you should see a message at the bottom of the window.
If you have more PI servers to add just repeat steps 1-3.
Connectivity Recommendations
It is recommended that you create an ActiveDirectory domain account that has read-only access to PI (read/write if setting up exporting to PI Data Archive) and the tags that you wish to appear in Seeq. You can run the Seeq Remote Agent as a Windows Service using those credentials, which will dictate the way that Seeq logs in to PI.
There are two ways to authenticate this connector with the PI Server: PI Trust or Windows Integrated Security. For those familiar with PI System administration, this connector's authentication is set just as a PI interface security would be set. Seeq recommends using a PI Trust. While it is possible to use PI WINS, this also results in all Seeq processes running under that user.
OSIsoft PI Trust
PI Trusts are a convenient and Seeq-recommended way to authenticate services that connect to PI. Trusts use various computer network and process name properties to identify "the trust" and assign a PI Identity to the connection. Below is a sample trust, as configured with PI System Management Tools (we removed part of the IP Address for privacy). There is no additional configuration required on the Seeq Server for PI Trusts.
PI Collective Member Priority
If you are utilizing a PI Collective with multiple PI Servers as members, it is important to set the collective member priority appropriately in the PI SDK Utility that is installed on the same machine as the Seeq Remote Agent.
Bring up PI SDK Utility on that machine and click File > Connections,
Click on the collective in the list and go to the Connection menu and then Member Setup…
You'll see the list of servers in the collective and you can set the Priority field. 1 is the highest priority, 2 is the next highest, and so on. Use -1 if you never want this machine to connect to a particular server.
Replication of tag security from PI
Seeq supports replicating tag security into Seeq’s integrated security model. Detailed information can be found in here.
Configuration
The configuration of the Seeq OSIsoft PI connector is automatically discovered by Seeq once you have configured the PI server connections in the PI SDK Utility (see Prerequisites). Follow these steps to make sure the configuration discovery process is completed successfully.
Restart the Seeq remote agent
In the machine where the remote agent is installed, open the Seeq Command Prompt (from Windows desktop: Start > Seeq Server> Seeq Command Prompt) and run the commandseeq restart(Note that this will restart the remote agent and users will temporarily lose connectivity to any datasources handled by this agent).Enable all PI connections
Restarting the Seeq remote agent allows Seeq to discover all established PI server connections on the machine and make entries in the OSIsoft PI Connector.json for each connection. However, only the default PI server connection will be enabled in this file. Any additional PI server connections will have disabled entries. To enable these PI connections:
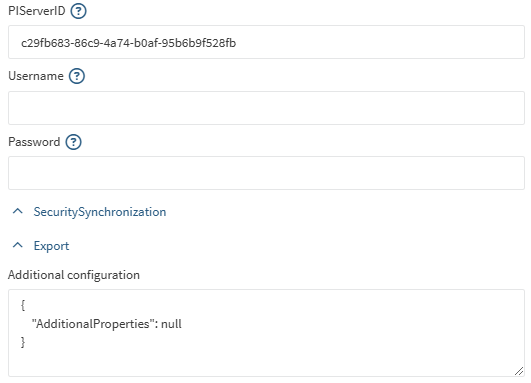
Navigate to the Seeq data folder (typically C:\ProgramData\Seeq) and open the file configuration\link\OSIsoft PI Connector.json with a text editor such as Notepad or Notepad++. When Seeq Server first starts, it looks for all established PI server connections on the machine and makes disabled entries in this file. These entries look similar to this example:CODE{ "Version": "Seeq.Link.Connector.PI.Config.PIConnectorConfigV3", "Connections": [ { "Name": "52.27.42.233", "Id": "a2d1d1e3-9ed1-452e-8fb5-fac4e3049cf1", "Enabled": false, ... }, { "Name": "ec2-54-42-148-162.us-west-2.compute.amazonaws.com", "Id": "c29fb683-86c9-4a74-b0af-95b6b9f528fb", "Enabled": true, ... } ] }Change the Enabled field to true and save the file.
Verify all PI servers are connected to Seeq
Open the Seeq UI in a browser. Navigate to the Datasources tab on the Administration page and verify that one datasource for each connected PI server has been added and indexed correctly.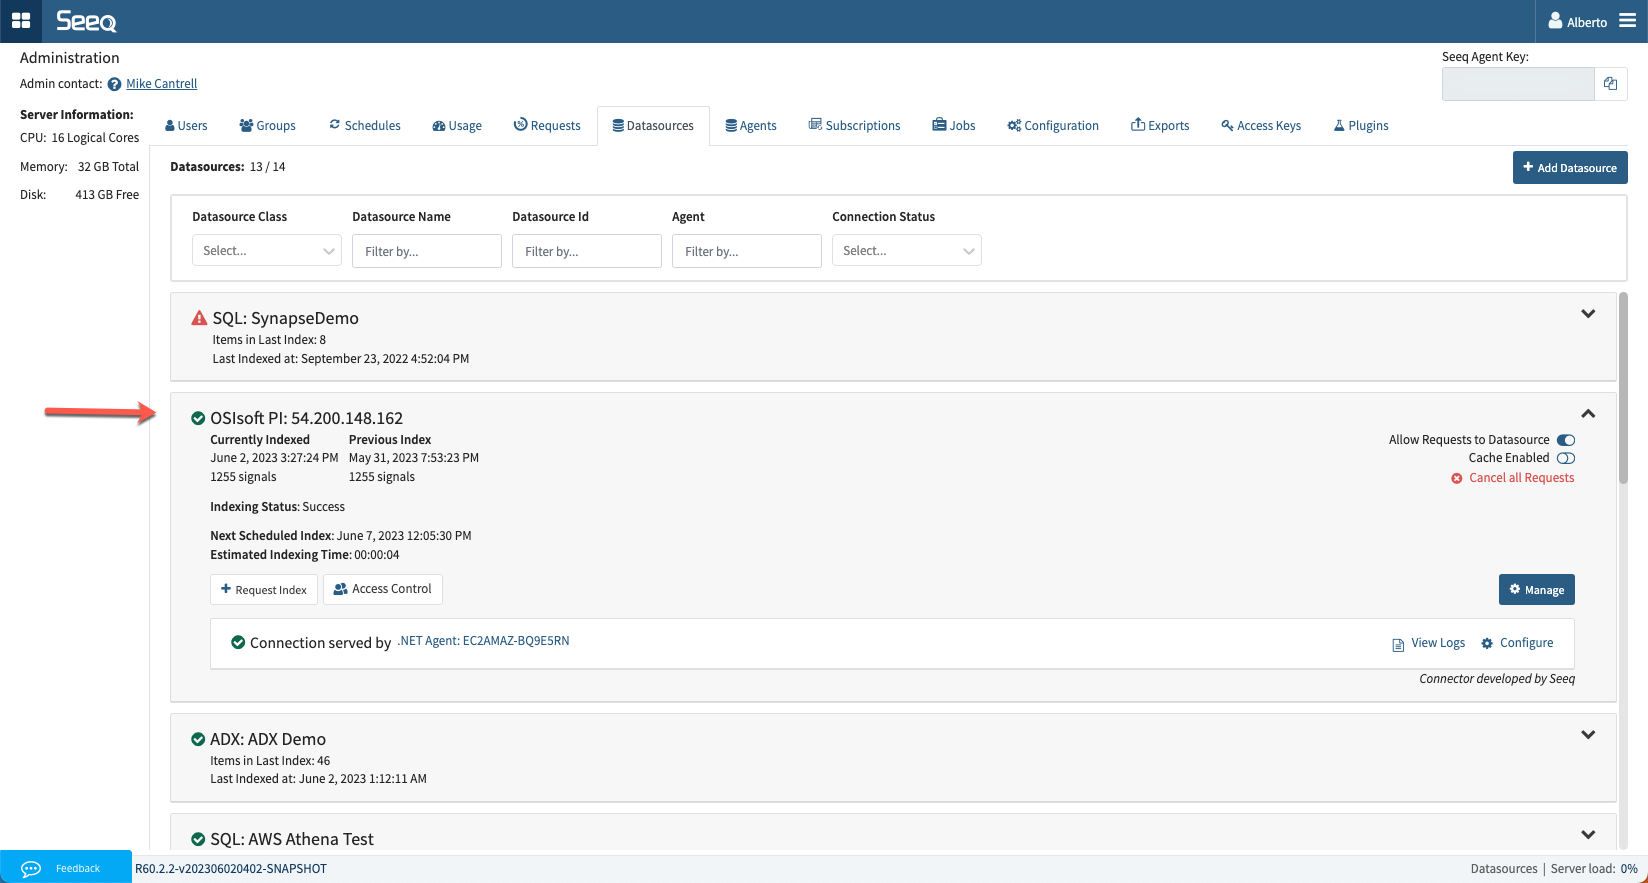
OSIsoft PI Configurable Options
Selecting Configure for a connected OSIsoft PI datasource in the Datasources tab of the Seeq Administration page displays a modal with several configuration options. This section covers specifically the options that are unique to the OSIsoft PI Connection.
The following tables provide a description of all the properties in the Configuration modal.
Known Issues
There are no known issues for the OSIsoft PI connector. Please report any issues you find to our support portal.
Troubleshooting
These are the known possible configuration issues and their solution.
String-valued samples appear incorrectly in Seeq
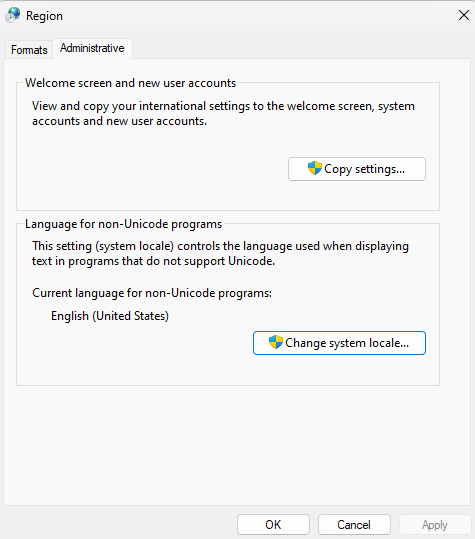
Because PI stores strings as raw bits without an attached encoding, in rare cases a PI interface may write values to PI that are not parsed correctly by the AF Client of the machine hosting the Seeq Remote Agent. For example, you may see the string ƒnƒ“ƒo�[ƒK�[ when you expect to see ハンバーガー. This is because the string was written to PI in the Shift JIS encoding, but the remote agent host has its system locale set to English (United States) or similar, so that the bits of the string are decoded with Windows-1252 or similar instead of the proper Shift JIS. To correct this, you must change the system locale to the appropriate locale to interpret the bits of the PI Point value correctly. The setting is found in the Region window of the Settings or Control Panel. You must switch to the Administrative tab and and choose “Change system locale…”, as shown here:
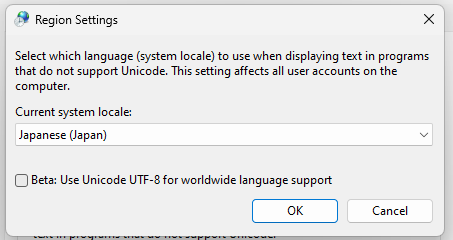
After selecting the correct locale, you must also uncheck the checkbox for “Beta: Use Unicode UTF-8 for worldwide language support”:
Finally, after making the change, you must reboot the remote agent host machine. Upon restarting, the strings will be correct for newly-queried data - you will need to clear cached values to cause Seeq to make requests to the PI server for previously-queried data instead of using the Seeq cache.
If you are running into other issues with connecting to or accessing data from OSIsoft PI, view our guide for troubleshooting datasource issues.
Performance considerations
PI Server 2017 R2 has a known issue that can severely restrict network throughput, especially when there is significant latency between Seeq and the PI server. This issue is fixed in PI Server 2018.
Seeq recommends upgrading your PI server to PI 2018 if you are using an affected version. Additionally, view our guide on optimizing datasource performance for general guidance.