
Introduction
SCIM is an open specification to help facilitate the automated management of user identities and groups (i.e. roles) in cloud applications using RESTful APIs.
About SCIM Provisioning in Seeq
SCIM lets you use an identity provider (IdP) to create users in Seeq, assign and remove them from groups, and remove access (deprovision them) when they leave your organization or no longer need access to Seeq.
Currently, Seeq supports the SCIM 2.0 protocol which has been tested with Okta and Microsoft Azure AD (Entra). Seeq also supports other identity providers assuming they support SCIM 2.0.
The users configured with SCIM are defined by the configured user name in the identity provider, if this is different from the subject claim in the token returned by the OpenID connect login, you might see some odd behaviour. This can be remedied by defining a claim in OpenID that matches the user name in provided by your identity provider via SCIM https://seeq.atlassian.net/wiki/spaces/SD/pages/2819785976/OpenID+Connect#OpenID-Connect-Additional-Configuration.
In Seeq, SCIM can only be enabled for OAuth 2.0-based connections.
Configuring SCIM in Seeq
Prerequisites
Configure an OpenID Connect Authentication provider via OAuth 2.0.
Enable SCIM
-
As a Seeq Administrator, log into Seeq and navigate to the Administration page.
-
On the Datasources Tab expand your configured OAuth 2 connnection

-
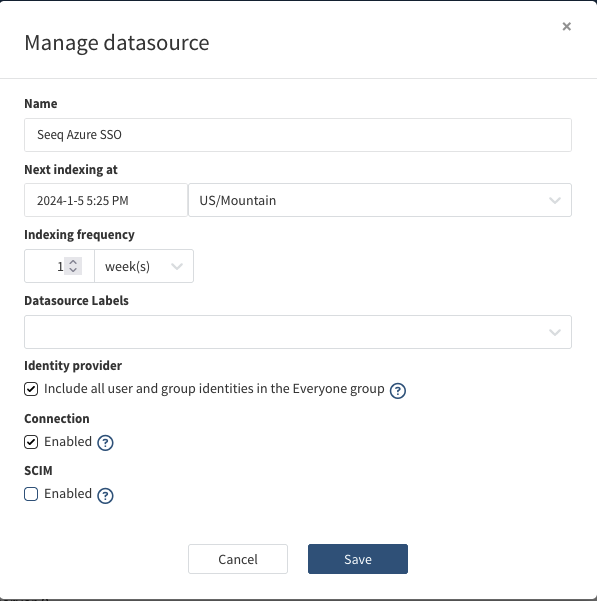
Click on the Manage button
-
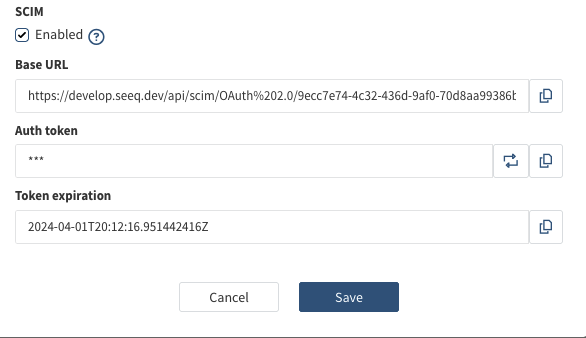
Click the checkbox next to SCIM to enable it.
-
The Base URL will appear, to generate the token click the
Generate tokenbutton and select the token validity.
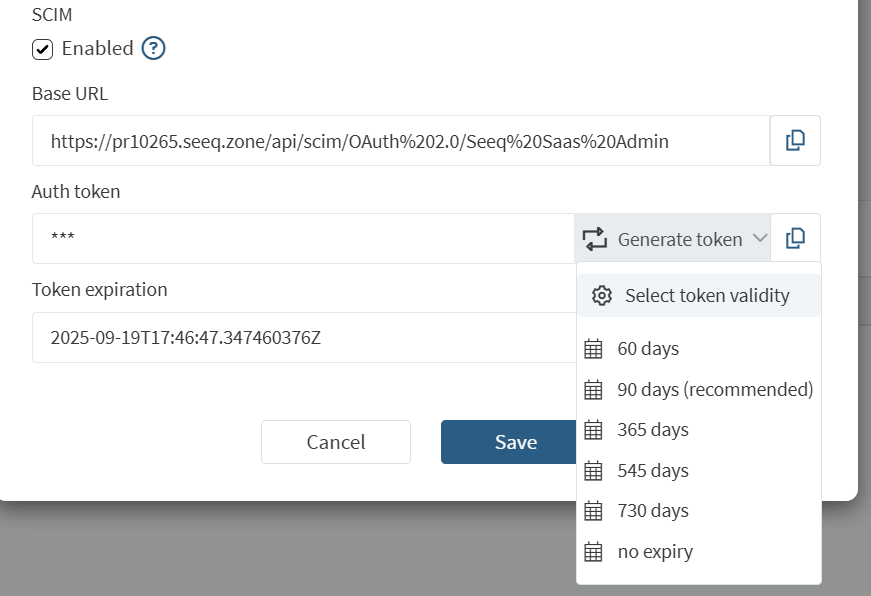
The Auth token will only be shown once. It will be valid for the selected period, but it can be regenerated at any time. You will need to update your identity provider’s SCIM configuration with this new token.
Once you have these values, you can configure your identity provider.