Ignition Module
JVM AGENT
Item Type Support
SIGNALS ASSETS
Overview
The Seeq Ignition Module integrates Seeq's trending, visualizations, calculations, analytics, cleansing, modeling, advanced monitoring and reporting into Inductive Automation's Ignition platform.
Seeq Ignition Module v7 has been deprecated since Ignition Gateway 7.9 has reached end of life.
The Seeq Ignition Module runs directly on the Ignition Gateway and does not run as a connector on the Seeq Remote Agent. The front-end Ignition Gateway must reside at the DMZ (Level 3.5) or higher in the Purdue network architecture to communicate with Seeq SaaS. Refer to this Ignition KB for a reference architecture.
Setup
Module Installation
The Seeq Ignition Module runs directly on the Ignition Gateway and not in a Seeq Remote Agent. It acts as an Agent itself.
The Ignition Gateway with the Seeq Ignition Module must be installed at the DMZ level or higher to have Internet access.
Download the appropriate Seeq Ignition Module module file from the Seeq Product Download page.
You must choose the
v8module if you are using Ignition 8.0 or 8.1.You must choose the
v83module if you are using Ignition 8.3.
When upgrading from Ignition 8.0.x to Ignition 8.1.x, the Ignition installer will give you the option to upgrade the Seeq module. You don’t need to-- choose Keep as-is.
When upgrading from Ignition 8.1.x to Ignition 8.3.x, the Ignition installer will give you the option to upgrade the Seeq module. Choose Upgrade and select the v83 .modl file.
Some browsers like Internet Explorer 11 may rename the module file such that it has a .zip extension. You will have to use Windows Explorer to change the extension to .modl.
In a web browser, open the Ignition Gateway configuration site and log in with administrator credentials.
Browse to the Modules section of the SYSTEM (Ignition 8.0/8.1) or Platform (Ignition 8.3) admin pages.
Click the Install or Upgrade a module link/button.
Click Choose File and browse to the .modl file you downloaded in Step 1.
Click Install and allow the module to load.
In Ignition 8.3, the Gateway must restart to finish loading the module. It should prompt you to do so.
Add Agent in Seeq
As a datasource administrator in Seeq, go to the Administration page, under the Agents tab, click on the Add Agent button, and supply fields as follows:
For Machine Name, provide the machine name of the Ignition Gateway.
Click on Advanced and for Agent Name specify
Ignition Module Agent. If you don’t specify exactly this name, the connection will not work.Submit the form and copy the generated one time password to your clipboard or otherwise store it off for use in later steps.
Seeq Settings Page
Configuration of the Seeq Ignition Module Agent is achieved via the Seeq Settings page within the Ignition Gateway administration website.
In Ignition 8.0 or 8.1, the Seeq Settings page is found in Config → SEEQ → Settings.
In Ignition 8.3, the Seeq Settings page is found in Connections → Seeq → Settings.
Connecting
Browse to the Seeq Settings page in the Ignition Gateway admin interface.
In the Seeq Server Hostname textbox, enter the DNS name of the Seeq SaaS service. E.g.:
mycompany.seeq.host. (Do not includehttps://or anything after the DNS name.)Ensure that port 443 is not blocked by a firewall and has access to the internet.
In the Agent One Time Password field, paste the one time password that you created earlier.
Click Save Changes.
Refresh your Seeq Workbench screen and you should see your Ignition tags in the Data tab. Indexing all the tags may take some time. Check out the Browsing Ignition Tags from Seeq Workbench article while you wait.
Configuration
Filtering Tag Providers
By default, Seeq will index all tag providers that are defined on the gateway. If more than one tag provider is indexed, then the asset tree in Seeq Workbench will include the tag providers near the top.
You may wish to filter down to a particular set of providers, perhaps because you don't need to see all the providers in Seeq or because some of the providers are unavailable.
To filter the set of providers, take the following steps:
In the Ignition Gateway configuration site, navigate to the Seeq Settings page.
In the Tag Providers section, add a comma-delimited list of all tag providers you want Seeq to index. For example:
CODEdefault,Orlando,DallasClick Save Changes.
Seeq will begin re-indexing and the tag providers listed will be the only ones showing in Seeq.
Remote Tag Providers and Tag History Splitters
If you are utilizing the Gateway Network features of the Ignition system and have the Seeq Ignition Module installed on a "central" gateway that accesses tags on a remote gateway via the Remote Tag Provider feature, Seeq can access data from such tags if the central gateway has a database connection to the historical data. If the name of the database connection on the central gateway is identical to the history provider that is defined for the remote tags, Seeq will automatically find the correct connection to use for historical data queries. Otherwise, errors will appear in Seeq Workbench when you attempt to access that tag data. You can rectify these errors by specifying a Database Mapping. For example, let's say you have a relatively complex topology involving Tag History Splitter providers. If you receive an error in Seeq like Datasource 'Splitter01' is not defined on this gateway, and you want Seeq to use a database connection called "Central_Historian" for any tags that are historized to the Splitter01 history provider, you can navigate to the Seeq Settings page of the Ignition Gateway and add a Database Mapping entry like so:
Splitter01 => Central_HistorianThis will inform Seeq to use the "Central_Historian" connection whenever it encounters a tag whose history provider is "Splitter01". You can add as many mappings as necessary, with each one on its own line.
In the event that you have multiple Database Connections that share a name, you may also provide the Remote History Provider name in the first field so each connection will have a unique identifier. For example, assume you have two Remote History Providers (“Provider_A” and “Provider_B”) and both have historians named “Historian” in their gateway configuration. On the Central Gateway, these historians are accessed by Database Connections named “Historian_A and Historian_B”. In your mapping, you would then create two entries to reflect this:
Provider_A,Historian => Historian_A
Provider_B,Historian => Historian_B
Secondary (Read-Only) Databases
In some cases, you may have decided to replicate an Ignition SQL Tag Historian database to a secondary SQL database server so that you can isolate ad-hoc analytics activity to the secondary server. In many cases, SQL replication schemes require that the secondary database is read-only. During indexing, Seeq requires a writable connection to the historian so that it can manage Tag Fingerprints (below). You can make a Database Mapping entry in the Seeq Settings page like so:
Primary_Historian =>> Secondary_HistorianNotice the double arrows in the mapping syntax (in contrast to prior examples of database mappings). In this case, all historical queries (which are read-only in nature) that would normally be levied against Primary_Historian will now instead be issued against Secondary_Historian.
Tag Fingerprinting
Tag Fingerprinting is a feature that overcomes a limitation of Ignition whereby tag history is lost when a tag is renamed or moved in the hierarchy. The “OPC Item Path” for a tag (if present) is used as a unique identifier for tag history. Seeq creates a fingerprint column in the sqlth_te table of the SQL Tag Historian database and maintains cross-references between OPC Item Paths and Ignition Tag Paths. Wherever possible, this cross-reference is used to retrieve all history for an OPC Tag, regardless of where it lived in the Ignition tag hierarchy.
Tag Fingerprinting thus requires write access to the SQL Tag Historian database. If you cannot provide write access to the database, or you otherwise want to turn off the Tag Fingerprinting feature, uncheck the Tag Fingerprinting checkbox in the Seeq Settings page and click Save Changes. When the feature is turned off, tag history will be lost when tags are renamed or moved.
Tag Quality Code Format
Tag quality code format in the Seeq Settings page allows you to specify how you want to handle tag quality code.
Format | |
|---|---|
V8 | Handles the tag quality value as specified for Version 8. |
Property Transforms
You can use Property Transforms to make changes to tag properties as they are indexed by the Seeq Ignition Module. Follow the instructions in the Property Transforms article and put the transforms JSON in the Transforms field of the Seeq Settings page, but with an important difference from the article's examples: Exclude the Transforms: label. For example:
[
  {
    "Inputs": [
      {
        "Property": "Interpolation Method",
        "Value": "linear"
      }
    ],
    "Outputs": [
      {
        "Property": "Interpolation Method",
        "Value": "step"
      }
    ]
  }
]
Property Transforms will not be applied until an indexing operation has completed.
Skipping Archiving
Seeq will normally archive items that aren’t found in the latest indexing, but this can be disabled using the Archiving Enabled option in the Seeq Settings page.
Redundant Gateways
If Ignition is configured for redundancy, both the master and backup gateways require separate One Time Passwords in the Seeq Settings page. Follow the steps in Add Agent in Seeq for each gateway connected to Seeq. Each OTP must be mapped to its corresponding gateway hostname.
The configuration uses one line per gateway in the format:
<hostname> => <one time password>For example:
master-hostname => otp-for-master-gateway
backup-hostname => otp-for-backup-gateway
The hostnames must exactly match the Ignition Gateway computer names.
On Windows, you can open a command prompt and execute set COMPUTERNAME to determine the computer name.
On Linux, you can use a shell and execute hostname to determine the computer name.
Indexing select tag provider paths more frequently
The option Custom Indexing Frequencies can be used to configure more frequent incremental indexing (i.e., without archiving) for select paths, to allow their assets and signals to appear sooner in Seeq. It is specified with lines in the format [Tag Provider Name]Name/…/Name => Duration, like in the following example:
[Provider 1]Area A/Sector 1 => 2h
[Provider 1]Area B          => 12h
[Provider 2]                => 1d
In this example, the path [Provider 1]Area A/Sector 1 will be indexed every 2 hours, the path [Provider 1]Area B will be indexed every 12 hours and the whole tag provider Provider 2 will be indexed daily. These indexings are incremental, so items will not be archived, and they happen in addition to the normally scheduled full indexing of all enabled tag providers.
Wildcards are not supported in paths and any tag providers mentioned must also appear in the Tag Providers option, otherwise the paths will be ignored.
Upgrading the Ignition Module
To ensure a smooth upgrade of Seeq and the Seeq Ignition module follow the below steps in order:
Disable all Seeq Ignition Module Agents by going to the Seeq Settings page and deselecting the Enabled checkbox.
Upgrade the Seeq Ignition Module.
Enable the Module.
Troubleshooting
Log Files
Troubleshooting information for the Seeq Ignition Module uses the Ignition logging system. It is accessed from the Status → DIAGNOSTICS → Logs (Ignition 8.0/8.1) or Diagnostics → Logs (Ignition 8.3) section of the Ignition Gateway configuration interface.
In the Filter text box, enter com.seeq to limit output to only the Seeq Ignition Module and filter out Ignition Gateway logs and logs from other modules.

By default, the logs will include INFO level information. You can adjust the logging level by clicking on the Settings button (pictured above) in the Logs interface. In the resulting Log Configuration modal dialog, enter com.seeq in the Filter text box and set the com.seeq entry to the desired logging level. Setting the level this way will set all child packages to the same level and will save any changes made so they can be restored if the Seeq Ignition Module is restarted. This setting will also affect the logs that are available to be seen in the Seeq Logs viewer facility in Seeq. Close the dialog when all updates are complete.

You can download the logs to an .idb file and send them to Seeq personnel for further examination by clicking the Download Logs button (pictured to the left).
SSL Certificate Issues
You may see issues in the logs related to SSL certificates in the following scenarios:
You’re still running Seeq Server on-premise with a self-signed certificate.
Your corporate firewall is doing SSL certificate replacement.
You may need to trust the certificate after the initial connection attempt. The certificate is stored on the Gateway <ignition_install_folder>/data/seeq/keys/untrusted, and you must move it to <ignition_install_folder>/data/seeq/keys/trusted.
Ignition Gateway Failover
The Ignition module is designed to support failover from a master gateway to a backup gateway. On Ignition v8, requesting failover has been observed to leave both the master and the backup in a state of “Activity level=Active”, and this can sometimes lead to the Seeq server sending data requests to the master instead of the backup gateway. If this occurs, take the following action:
Ignition 8.0/8.1: Click Restart on the Seeq module in Config > SYSTEM > Modules.
Ignition 8.3: Click Restart Agent in the Seeq Settings page.
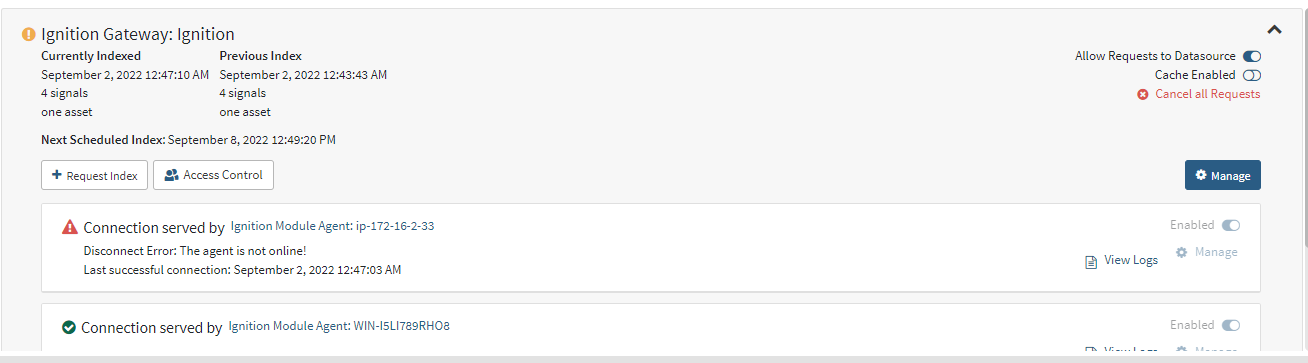
This should only happen once - if the Seeq module needs to be restarted more than once following a failover, please contact Seeq support. A failover that occurs as a result of the master gateway service being stopped leads to complete transfer of module responsibility to the backup gateway. In the Seeq Administration Datasources tab, Ignition Gateway datasources will show a connected connection to any gateways with “Activity level=Active” and a disconnected connection to any backup gateways that have ever entered an “Activity level=Active” state long enough for a connection to Seeq to be established. This will appear similar to the following in the Datasources tab:
Tags Not Appearing in Seeq
If a tag does not appear in the Seeq asset hierarchy or when you perform a search on the Data tab, here are some possible reasons why:
The tag is not historized. Seeq can only make use of tags that have been configured to utilize a Tag History Provider to store historical values. It will ignore tags that are not historized. You can tell if a tag is historized because it will have a scroll icon to the right of it in the Ignition Designer's Tag Browser pane.
The tag provider is being filtered out. Administrators can configure the Seeq Ignition Module to only index certain providers, so a tag may be ignored due to that configuration setting.
You’re accidentally searching for or looking at the wrong tag, or have input the tag name incorrectly into Seeq. Confirm that there is no tag name mix-up and that the tags missing in Seeq have the history as the other tags.
You're trying to index tags on a Remote Tag Provider running Ignition v7.x and a Gateway running Ignition v8.0. Kindly upgrade the Gateway to Ignition 8.1+.
Duplicated Tags
You may encounter a situation where you have accidentally duplicated an Ignition asset tree in Seeq. The problem is usually because a new Ignition Gateway has been set up, perhaps as a development or backup gateway, or perhaps you are just moving things around in your Gateway Network. You have to be careful to retain the same Datasource ID within Seeq Settings page on the new gateway in order to avoid duplication and maintain appropriate linkages for the various worksheets that are using the tags.
In order to recover from accidental duplication, first fix the Datasource ID such that it is correct: You will likely just need to copy the Datasource ID from one instance of the Seeq Ignition Module's settings to the other. Make sure the Ignition Module in the "old" gateway is disabled, and test to make sure tag data can be called up in Seeq from the new gateway. Then, to remove the duplication, follow Removing a Datasource -- being careful to use the Datasource ID that does not match the accurate Datasource ID (but may have the same Datasource Name).
If you are running into other issues with connecting to or access data from Ignition, view our guide for troubleshooting datasource issues.
Performance considerations
The speed with which data is retrieved from the Ignition SQL Tags Historian can be greatly affected by a couple of Ignition configuration items as described in the following sections.
Data Partition Size
Ignition will split historical data into separate tables according to the Partition Length and Units specified for the Tag History Provider. You will want to choose a partition size that results in about 20 million rows. If the row count is larger, it will take a long time to traverse the index for the table and produce the historical data for a particular tag and time range. See Data Partitioning and Pruning in the Ignition documentation for more information.
Default Transaction Isolation Level
A database connection within Ignition can be queried by many simultaneous requests from an application like Seeq. It is important to use the minimum necessary transaction isolation level so that simultaneous queries are minimizing the amount of time they are blocking each other from progressing. In Ignition's Connection Initialization parameters for the database connection (under the Advanced Properties checkbox), set the Default Transaction Isolation Level to Read Uncommitted.
Max Concurrent Requests
By default, the Seeq Ignition Module will process 2 historical queries simultaneously. Other requests will queue up and be processed as others finish.
You can choose to increase the Max Concurrent Requests parameter in Seeq Settings page to improve overall responsiveness within Seeq Workbench, especially when users have several signals onscreen. However, each database connection in the Ignition Gateway has "connection pooling" and is configured (under the Advanced Properties for the connection) to have Max Active connections in the pool. If all of the connections in the pool are used, Ignition may struggle to write data to the historian and perform other duties. Therefore, it is critical that Seeq's Max Concurrent Requests is smaller than the smallest Max Active value set on any database connection on the gateway. For example, if the smallest Max Active value is 8 (which happens to be the default), you should probably not allow Seeq to utilize more than 4 connections, and therefore Max Concurrent Requests should be set to 4 (at most). If you can increase Max Active to something larger, you can increase Seeq's Max Concurrent Requests by a commensurate amount.
Additionally, view our guide on optimizing datasource performance for general guidance.
Optimizing Gateway Memory Allocation for Improved Data Retrieval in Ignition
If data retrieval is slow and it has been confirmed that Ignition is not the bottleneck, it is advisable to examine the memory allocation of the gateway. This allocation represents a portion of the memory available in the Ignition Gateway virtual machine. Consequently, even if the virtual machine indicates low usage, the Remote Agent may be constrained by the gateway memory, as it operates as a module.
It is recommended to allocate an equivalent amount of RAM as that of a standard Remote Agent. For detailed instructions on how to modify this allocation, please refer to Inductive Automation’s documentation.
Still having issues?
Please report any issues you find to our support portal.