Managing Datasources
Prerequisites
You are an administrator in Seeq.
You have already installed remote agents that can access the datasources you would like to connect to.
You have gathered the information needed to configure your datasource.
Adding a Datasource
Navigate to Datasources tab of the Administration page, and click on the blue Add Datasource button in the top right corner.
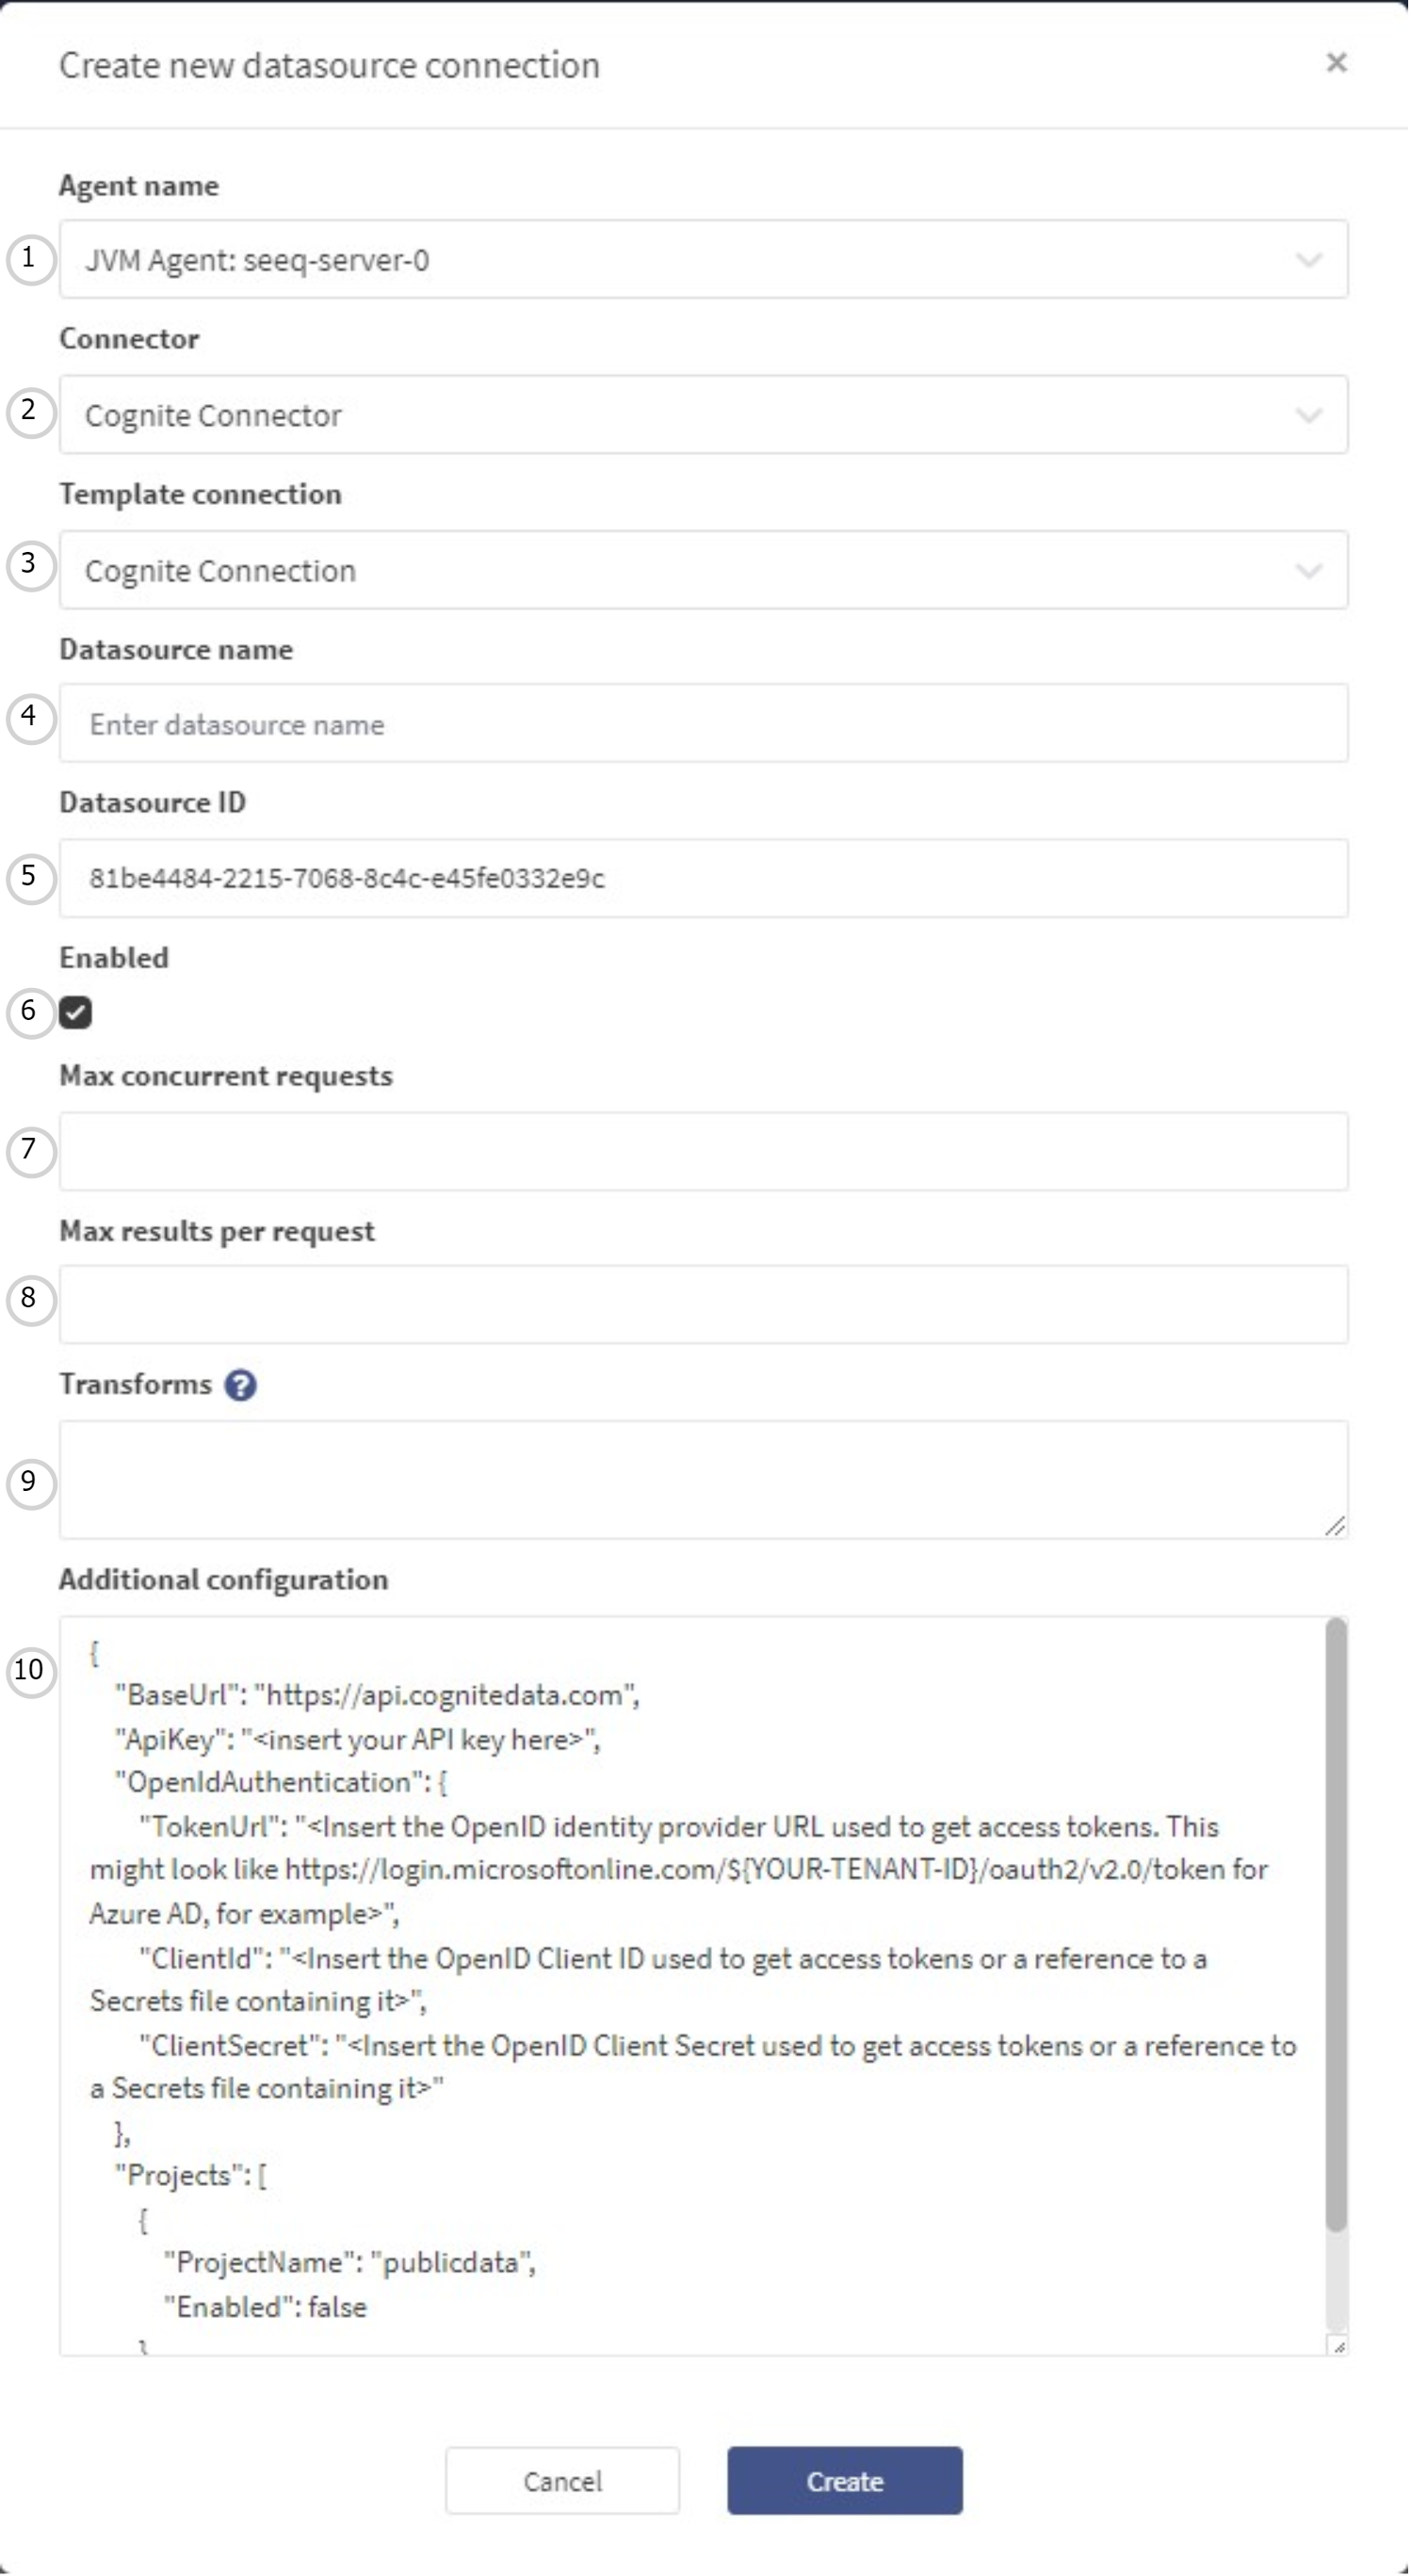
Select the agent that will be used to connect to your new datasource.
Select the connector that will be used to connect to your new datasource. The connector type can be found in the Reference pages for the datasource you are configuring.
Select a template connection if one exists for your datasource. The template connection field will populate the configuration fields below as a quick way to get started. Note that the template connection dropdown will also include configurations for any existing connections. This enables you to reuse your existing configuration across similar datasources easily.
Enter a unique datasource name that contains four or more characters.
The datasource ID field will be automatically generated for you. It does not need to be updated, and is primarily useful only if you are moving a datasource from agent to another.
The enabled checkbox is selected by default. If enabled, the datasource connection will attempt to connect as soon as you click ‘Create’. If disabled, the datasource will be created but no attempts to verify configuration or connect to your data will be made.
The Max Concurrent Requests field can be used to throttle the activity associated with a datasource by limiting the number of queries that are allowed to hit the datasource at the same time. If this field is unset, there is no limit to the number of max simultaneous requests. Unless you see a performance impact with your datasources, there is no need to enter a max concurrent requests value (See Throttling Request Activity for more information).
The Max Results Per Request field can be used to throttle the activity associated with a datasource by breaking up queries into smaller chunks. If this field is unset, up to 1,048,576 results (1 MB) will be returned per request. Unless you see a performance impact with your datasources, there is no need to enter a max results per requests value (See Throttling Request Activity for more information).
See Connector Property Transformsfor more information. It is recommended that you confirm connectivity by creating the datasource in Seeq prior to adding Transforms.
The remainder of the form contains all configurable fields unique to this datasource. See the Reference page for your datasource to learn more about them.
Click ‘Create' to create your datasource. This may take some time, but a datasource card will appear in the meantime. You can update your datasource configuration and view errors or indexing information here.
Updating a Datasource
Managing Datasource Properties
Navigate to Datasources tab of the Administration page.
Locate the datasource card for the datasource you wish to remove and click to expand it.
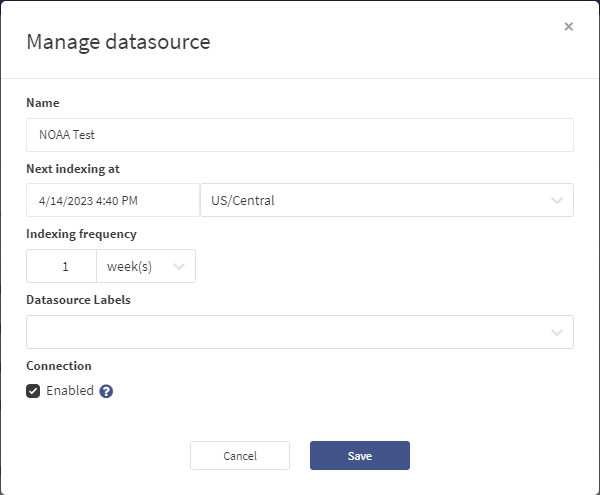
Click the Manage button in the lower right corner of the datasource card.
Datasource Labels may be added to aid in filtering datasources in the Datasources administration tab. Existing labels will appear as you type or can be selected from the dropdown if you click on the down arrow at the right of the field. A similar field appears in the filters header for the list of datasources, which functions in the same fashion, except that it does not allow new labels to be added.
Updating Datasource Configuration
Navigate to Datasources tab of the Administration page.
Locate the datasource card for the datasource you wish to remove and click to expand it.
Click the Configure button in the lower right corner of the datasource card.
Removing Datasources
Navigate to Datasources tab of the Administration page.
Locate the datasource card for the datasource you wish to remove and click to expand it.
Click on the Manage button in the lower right corner of the datasource card.
In the modal that pops up, uncheck the Enabled checkbox under the Connection section, then click Save. A newly disabled datasource will move to the end of the datasources list, so you may have to scroll to the bottom of the page.
Click the Archive Datasource button that now appears in the datasource card.

On the confirmation popup, click Archive. This may take some time.
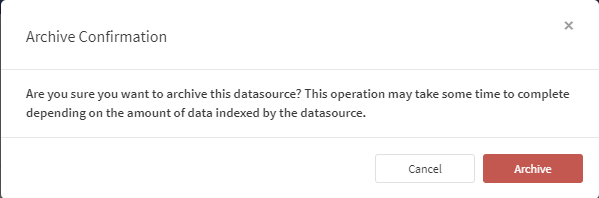
Upon the datasource’s successful archival, the corresponding datasource card will disappear from the Datasources tab.
Monitoring Datasources
Datasources can be monitored through the Seeq Monitors asset tree in Workbench:
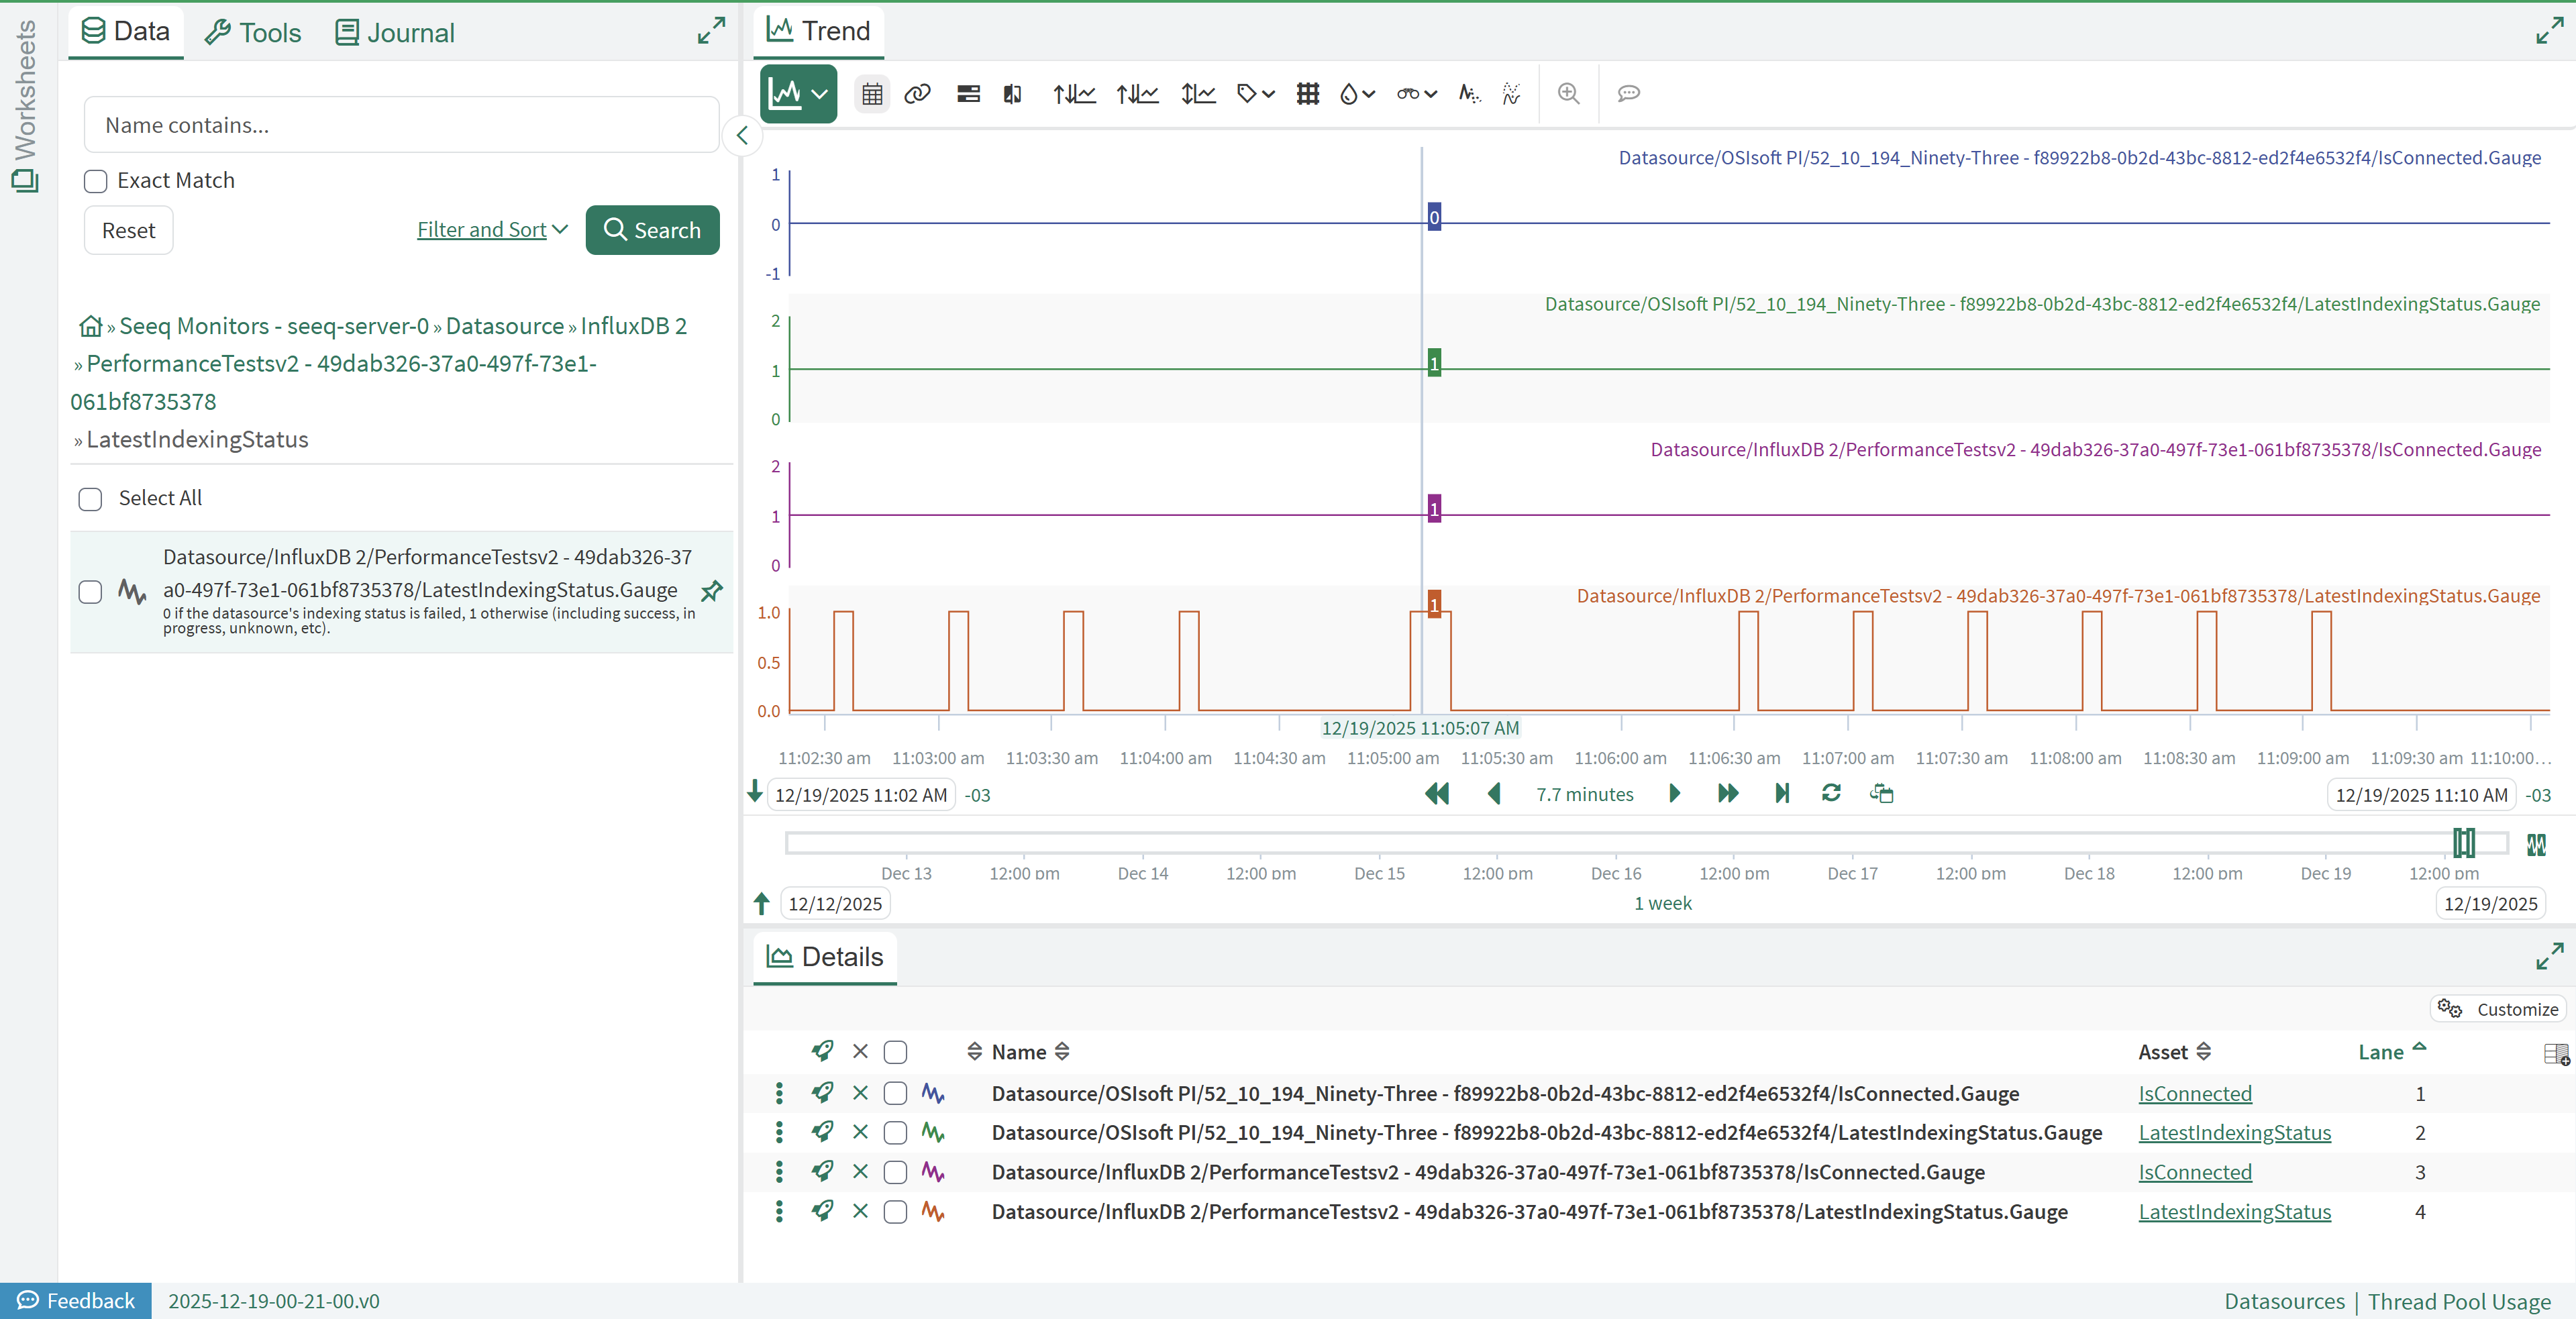
For each datasource:
The monitor
Seeq Monitors > Datasource > [Class] > [ID] > IsConnectedprovides a signal that has value1if the datasource is connected and0otherwise.The monitor
Seeq Monitors > Datasource > [Class] > [ID] > LatestIndexingStatusprovides a signal that has value0if the latest indexing of the datasource failed and1otherwise.
Currently, both types of monitors have a 5 to 10 minute delay.
Administrators can create conditions and notifications based on these signals using Workbench, to be notified (for example) when a datasource becomes disconnected or indexing fails.