Adjusting Date/Time Ranges
Multiple date ranges can be configured in the Organizer Topic to update Seeq content without opening the linked Workbench Analyses. Create fixed-date reports or live updating documents for continuous monitoring. Documents that automatically update will also need a Schedule.
Configure a Date Range
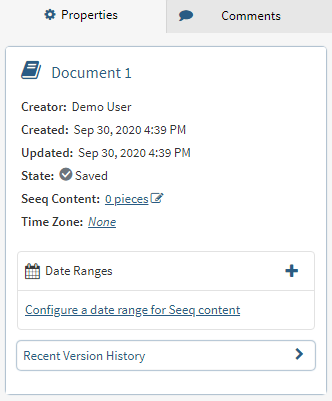
Configure a new date range through the Properties tab in an Organizer Topic. A pop-up steps the user through the configuration. Each date range configured will be named Date Range 1, 2, 3, etc. by default unless the user renames them. Step through the wizard to configure a date range within the Organizer Topic.
After configuring a new date range you will automatically be prompted to assign this date range as a new property to as many pieces of content as needed by selecting pieces of content from a table and selecting the "Attach" button. To see more properties, click the double arrows on the right side of the pop-up. The new date range will be automatically populated in the date ranges dropdown.
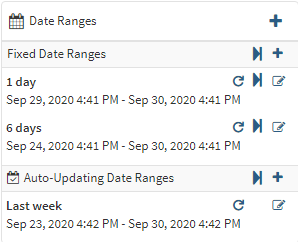
Fixed Date Range
(Optional) Name date range
Identify Duration and Start or End date as in the Workbench Analysis Display Range
Click Save after these changes are complete.
There is a
Auto-Updating Date Range
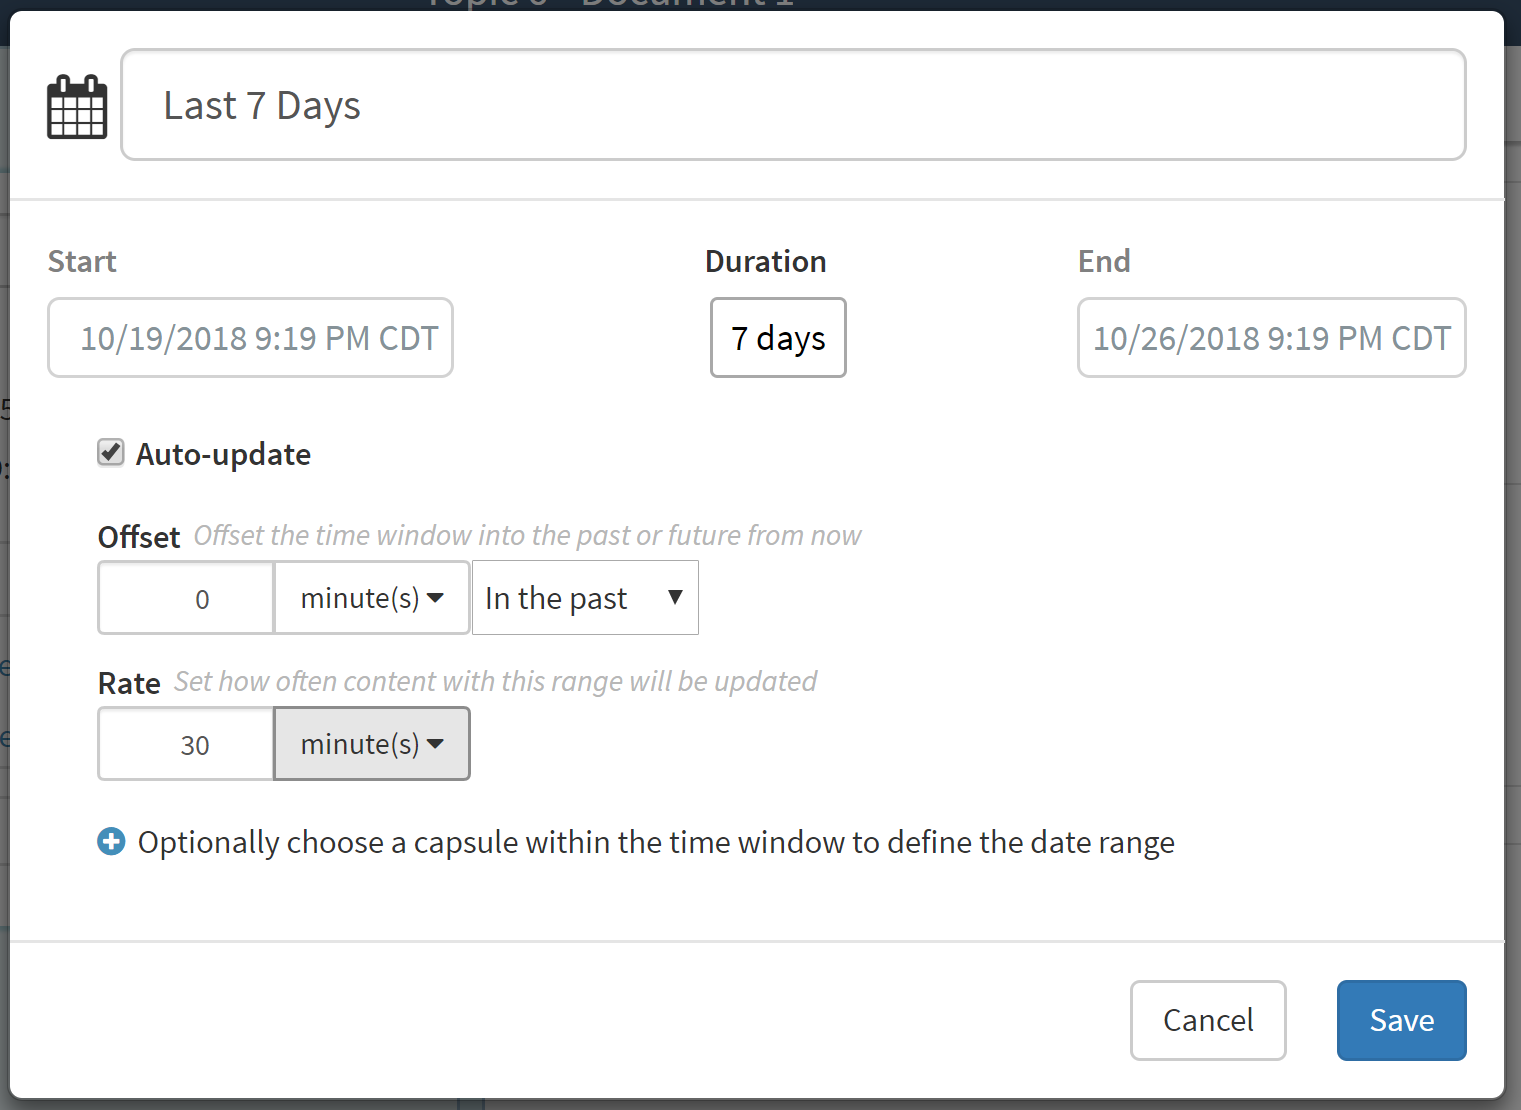
Another option is to create a rolling time period (such as the last 7 days).
(Optional) Name date range
Identify Duration
Select the Auto-update box.
The start and end dates will no longer be editable, but the duration will still apply unless a condition is specified.
(Optional) Offset - define the difference to display if you would like to offset the time window into the past or future.
Select the Rate - Set how often content with this range will be updated.
Click Save after these changes are complete.
There is a
This kind of date range requires a Schedule to determine the update frequency.
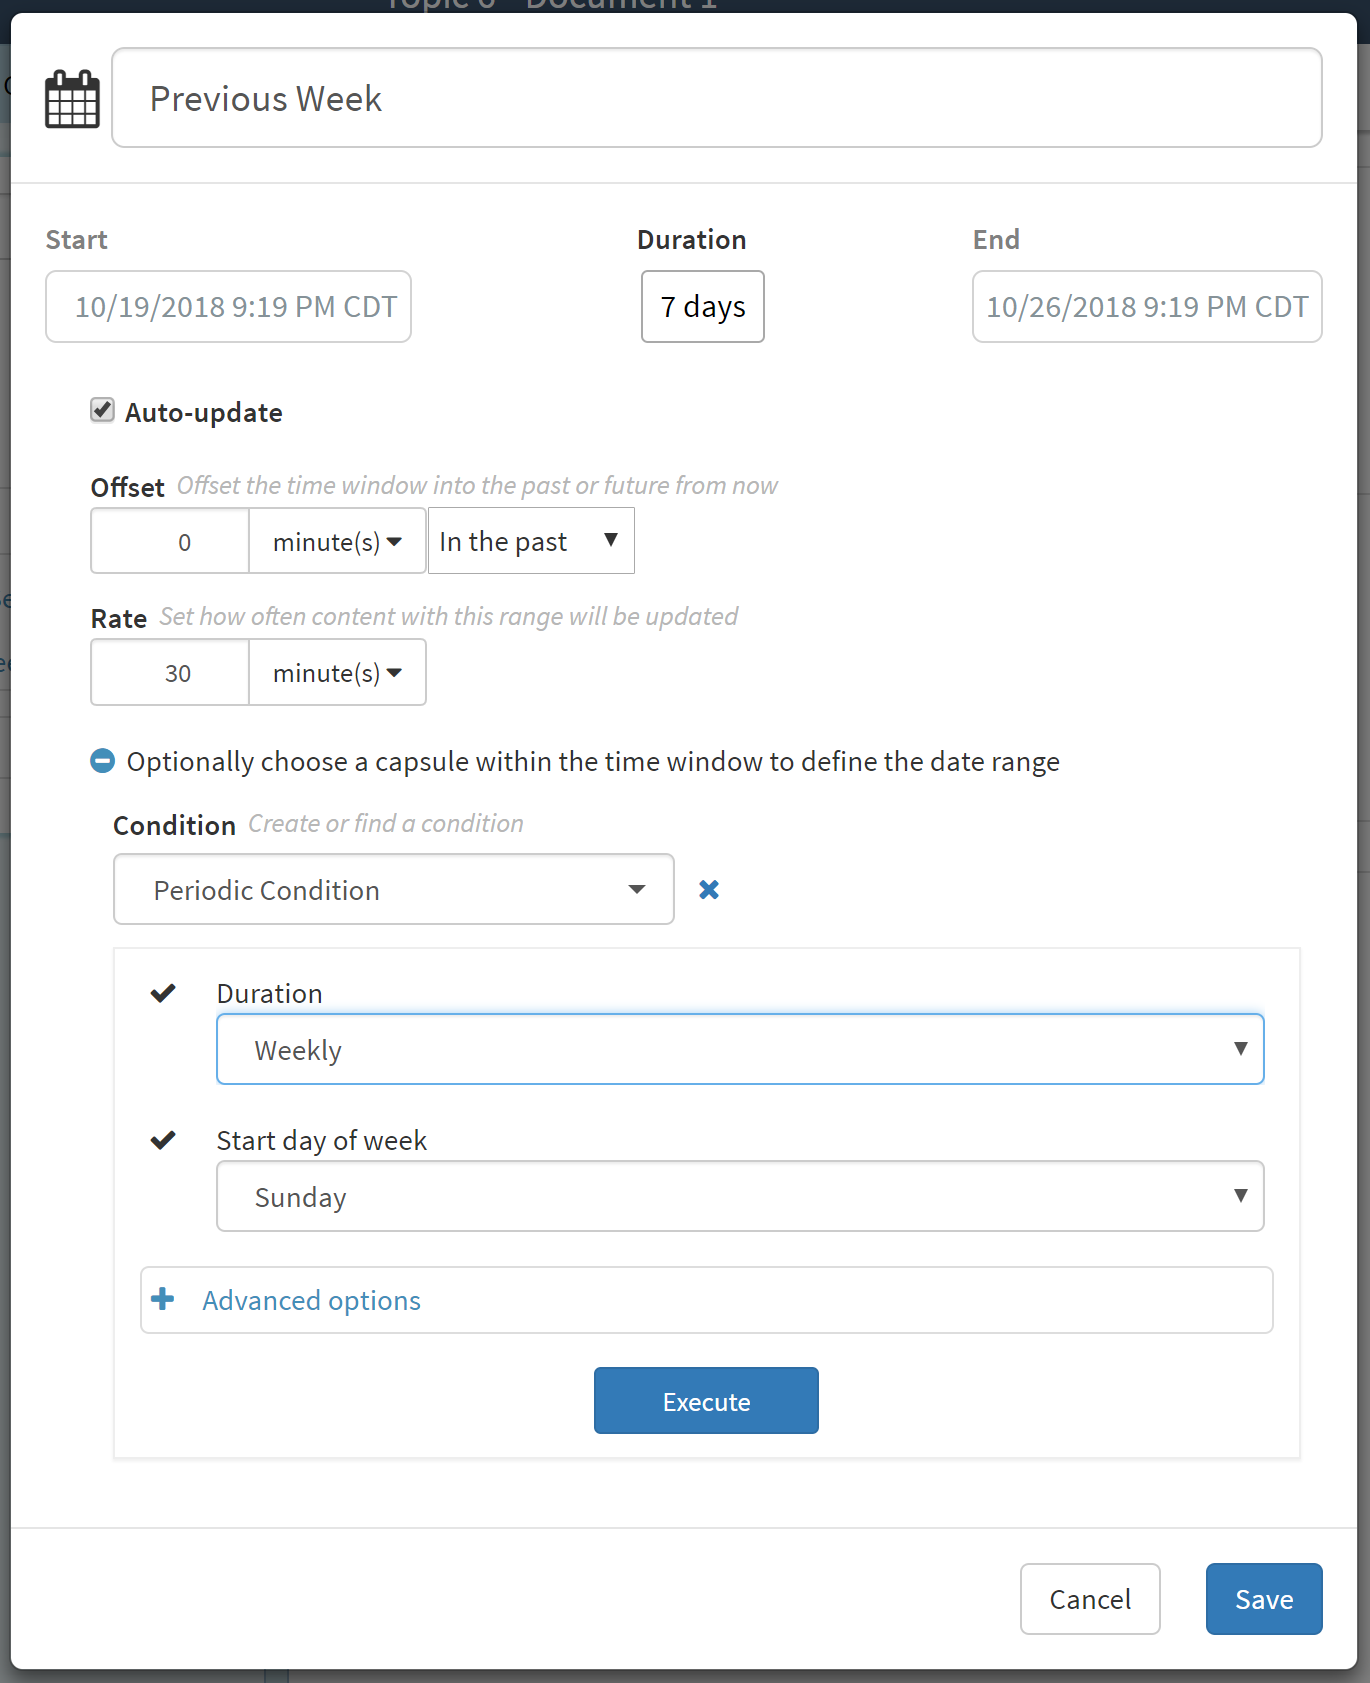
Periodic Date Range
This selection is very similar to Periodic Conditions. One Example would be the previous week (Sunday to Saturday no matter what day today is).
(Optional) Name date range
Click plus icon to reveal the Condition drop-down
In the drop-down list, choose Periodic Condition
Choose Duration
Hourly: No additional options. The subsequent selections will be hour-long time periods.
Hours: Specify the # of hours in the periodic capsules and offset for the capsules relative to midnight. The subsequent selection will be available for those hours per day with duration and offset from user inputs.
Daily: Specify all days or specific days of the week. The subsequent selection will be day-long time periods.
Weekly: Specify the start of the week. The subsequent selections will be week-long time periods starting from the specified day of the week.
Workweek: No additional options. The subsequent selections will be 5-day time periods spanning Monday to Friday.
Weekend: No additional options. The subsequent selections will be 2-day time periods spanning Saturday to Sunday.
Monthly: Specify all months or specific months of the year. The subsequent selections will be month-long time periods.
Quarterly: Specify all quarters or specific quarters of the year. The subsequent selections will be quarter-long capsules.
Yearly: No additional options. The subsequent selections will be year-long time periods.
Advanced options: Provide interface to shift the start of each capsule or select a time zone specific for the date range if different from the worksheet source data.
Click Execute
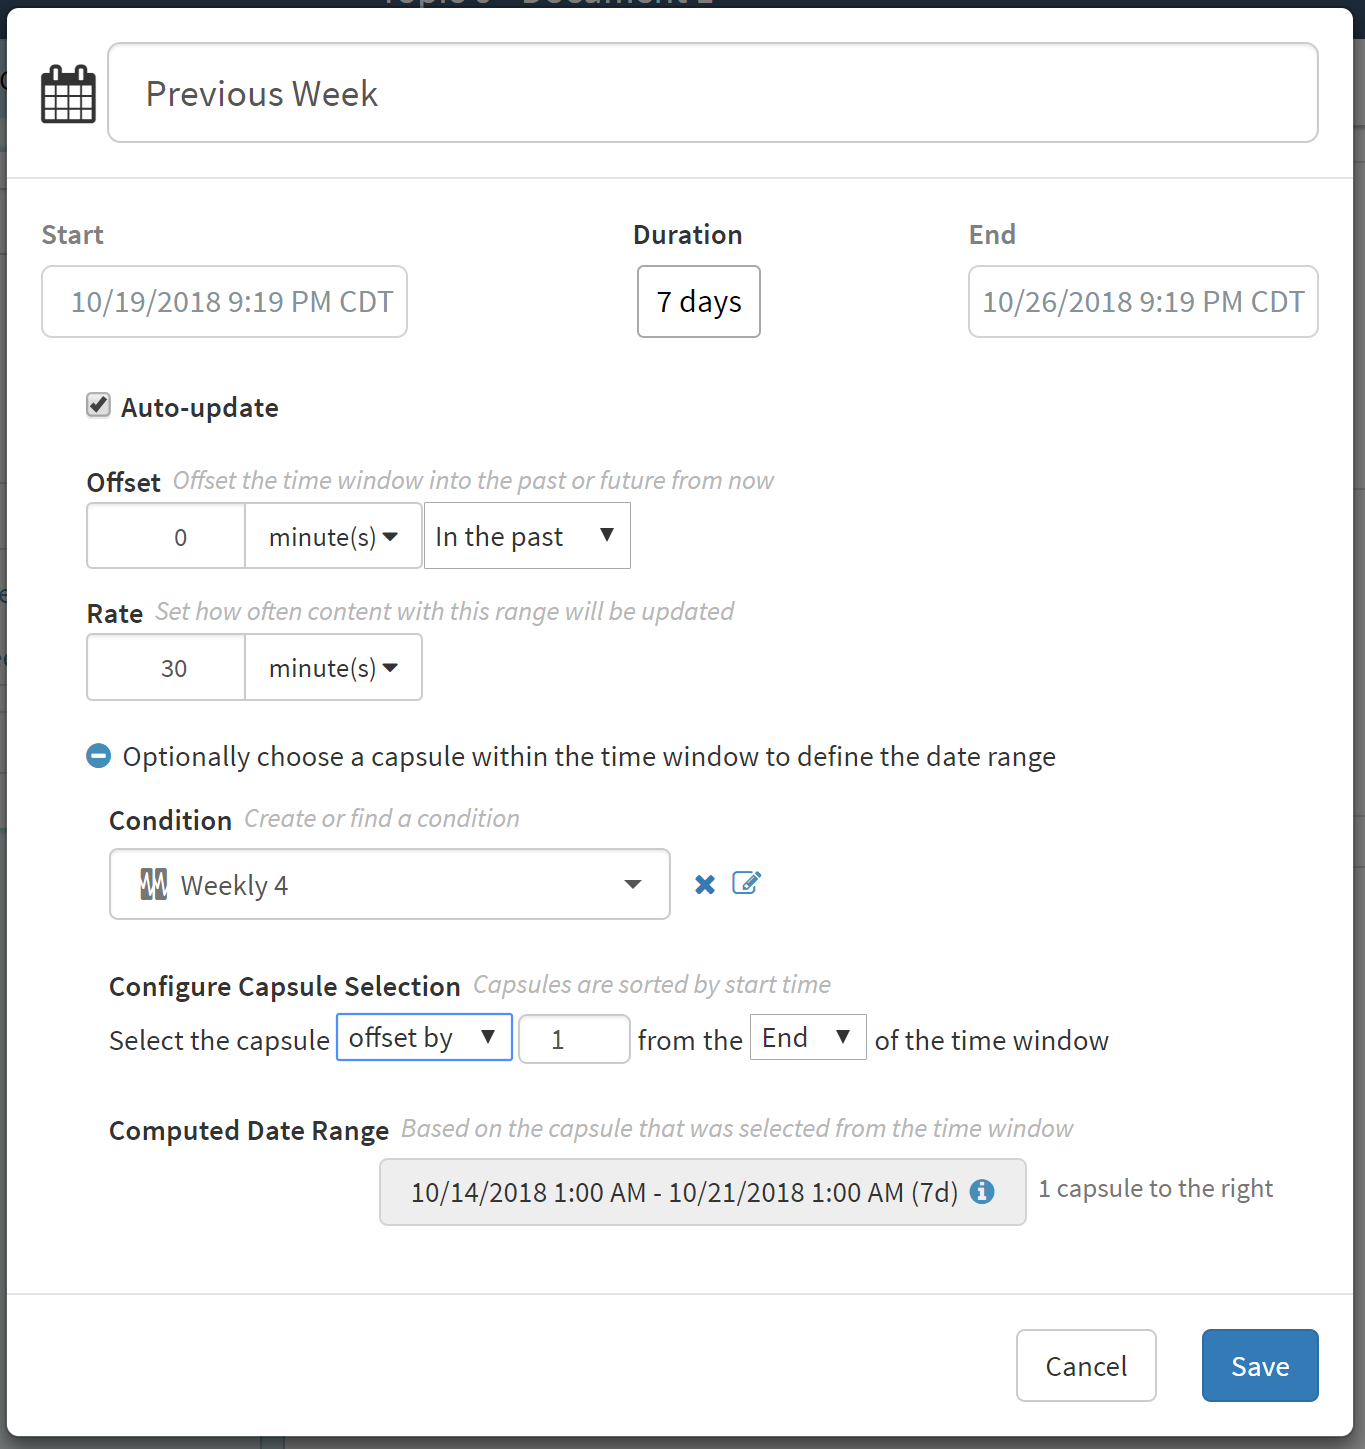
Adjust the Computed Date Range until it matches your desired date range by changing two options:
Duration - This is the window of time you are searching (similar to the Display Range in Workbench Analysis). Make sure it is large enough to have the capsule you are interested in within the range.
Configure Capsule Selection - This adjusts which capsule within the specified duration is selected based on its position in the time window.
(Optional) Check the Auto-update box if you would like the date range to update automatically. (For example, to always show the previous day midnight to midnight)
Click Save after these changes are complete.
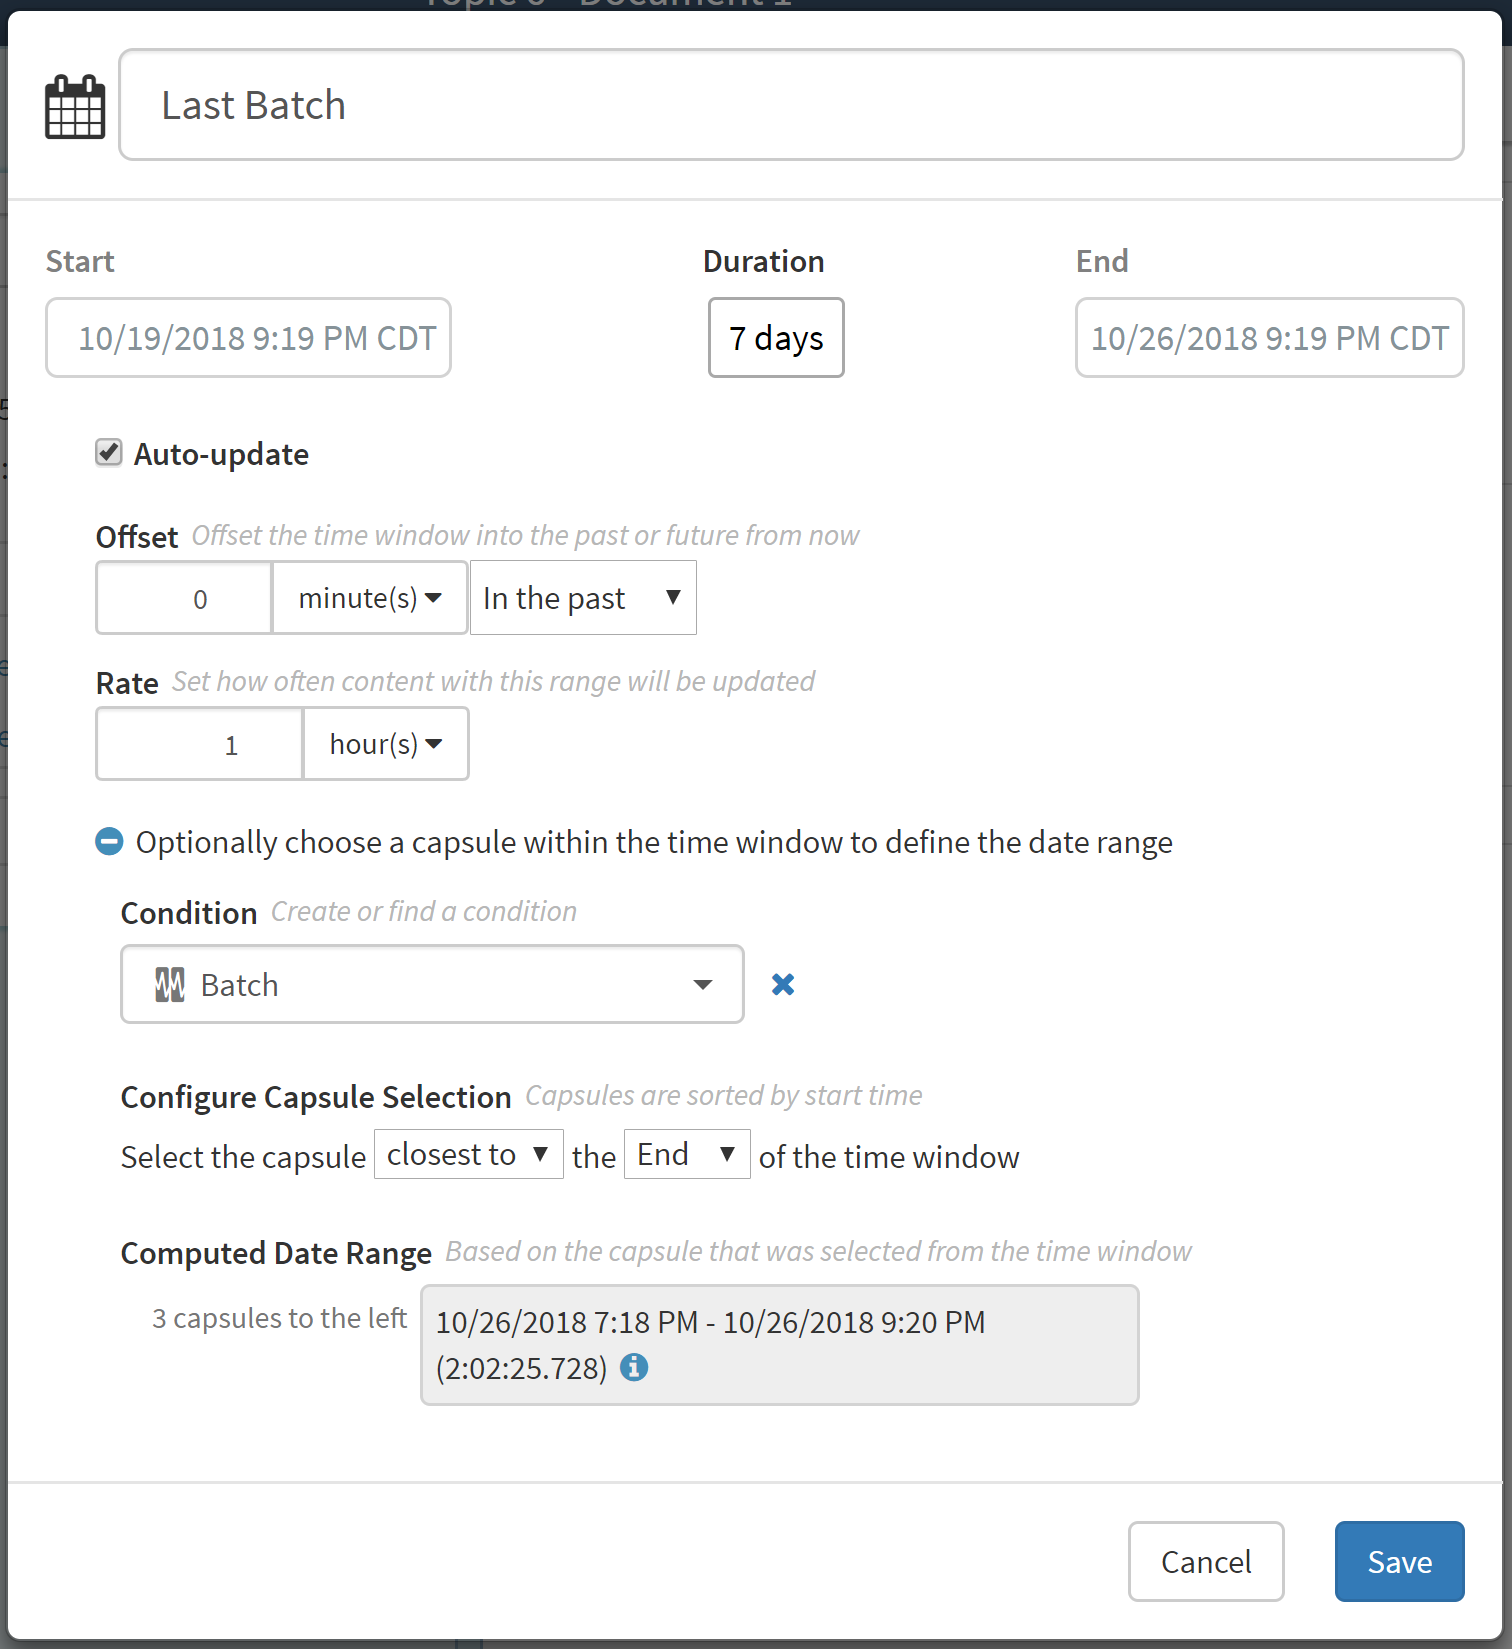
Condition-Based Range
Condition-based ranges can be very useful in reports and dashboards. A few examples of when to use this range are to show the last startup, compare the last batch to the previous one, or to show the last 3 deviations.
(Optional) Name date range
Click plus icon to reveal the Condition drop-down
In the drop-down list, choose Existing Condition
Use the search box or the Recently Accessed menu to select the appropriate condition. Note that to use a condition to set a date range, the condition must be made public by checking the Available outside this analysis box in the Workbench Analysis.
Adjust the Computed Date Range until it matches your desired date range by changing two options:
Duration - This is the window of time you are searching (similar to the Display Range in Workbench Analysis). Make sure it is large enough to have the capsule you are interested in within the range.
Configure Capsule Selection - This adjusts which capsule within the specified duration is selected based on its position in the time window.
(Optional) Check the Auto-update box if you would like the date range to update automatically. (For example, to always show the last startup.)
Click Save after these changes are complete.