Integrating Git
Overview
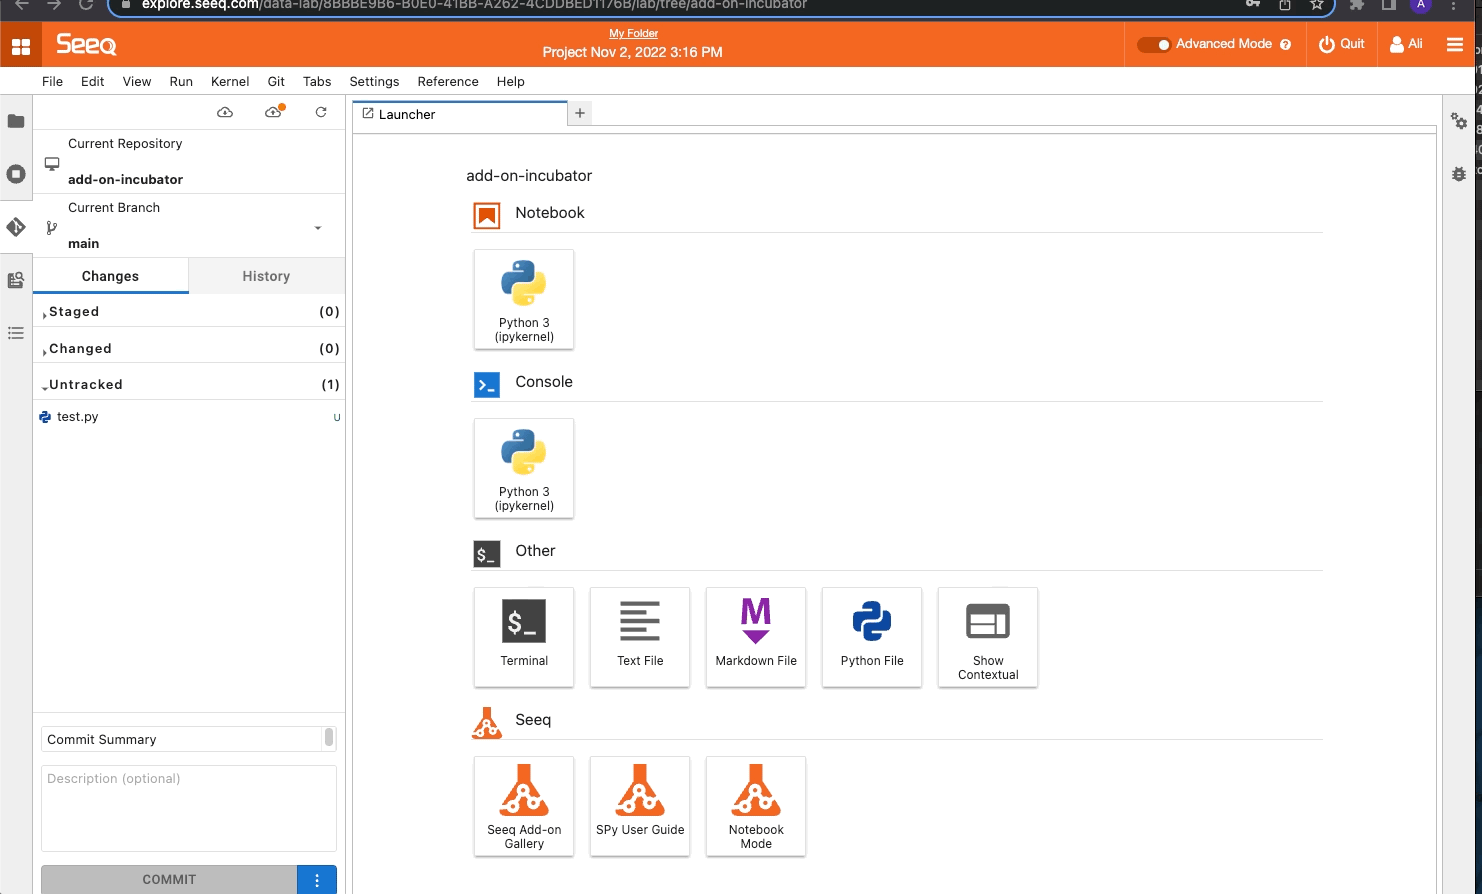
Seeq Data Lab’s Advanced Mode (JupyterLab interface) offers Git integration via a user interface to create, manage, and organize your Data Lab notebooks and files with a remote Git repository.
Note: In current releases, Advanced Mode is the default experience. The header toggle is now labeled “Notebook Mode”; turning Notebook Mode off returns you to Advanced Mode..
Authenticating with GitHub
If you are using GitHub as the remote repository, you will first need to setup your GitHub account for token authentication as GitHub no loner allows password authentication.
To set up a Personal Access Token in GitHub:
Navigate to GitHub and login.
Access the Personal Access Token page
Click the Generate New token button and chose the Classic option.
Create a name for token, check all boxes for ‘repo’ access, and then click the Generate Token button at the bottom of the page.
Make sure to copy the value for the token and save it, as it cannot be retrieved again. If you lose the value, you can generate a new token, and delete the old one.
Cloning a Repository
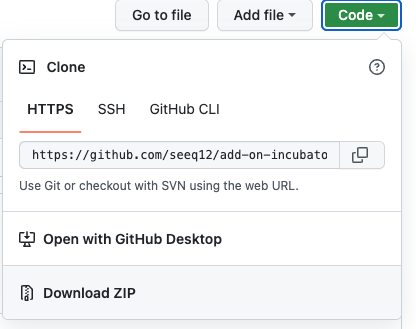
Retrieve the HTTPS url of the repository you wish to clone. If using GitHub, open the repository’s home page and click the green <> button, select HTTPS, and copy the url provided.
Create or open a Data Lab project and switch to Advanced Mode by clicking the grey toggle button on the Seeq Header next to Advanced Mode.
In the file browser, navigate to the desired directory where you would like to clone the Git repository.
Click the Git sidebar tab (:git:) and then Clone a Repository button, or in the tool bar, select Git → Clone a Repository.
Enter the HTTPS Git repository url copied earlier and click Clone.
You should now see your Git repository’s file tree in the file browser.
If you are prompted for credentials, enter the credentials for the remote repository. For GitHub, the username is your GitHub email address and the password is the Personal Access Token. You can optionally check “save my login temporarily” to avoid needing to reenter your credentials again. The credentials are cached in your browser for one hour.
Pushing Changes to the Remote Repository
If you are adding new files, or have made changes to existing files, and you wish to upload or push them to the remote Git repository, there are three steps to follow: Stage, Commit, then Push.
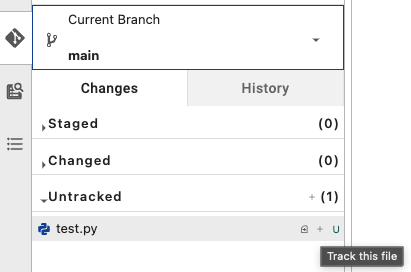
Stage
Navigate to the Git icon in the leftmost toolbar (:git:). Under: Changes → Untracked, you should see the file that was added. When hovering over the file, to the right of the file, click ‘+' to stage or 'Track this file’.
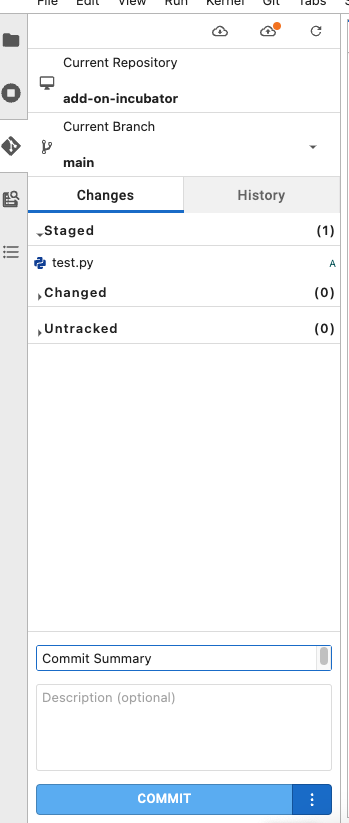
Commit
Enter a commit summary below while still in the Git tab (:git:), and optionally a description of the changes made. This is essentially like saving your work locally (saving everything staged so far).
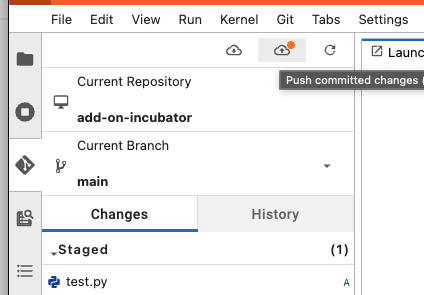
Push
To Push committed changes to the GitHub repository, click the cloud icon with arrow pointing up (:cloud-upload:) just below the toolbar.
Stage, Commit, and Push
Stage, Commit, Push changes
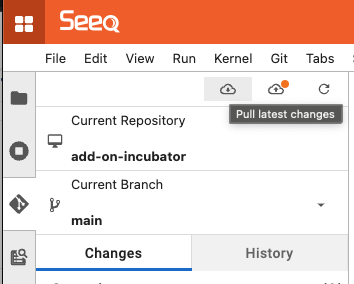
Pulling Changes from the Remote Repository
If its been awhile, and you want to update your Git repository in Data Lab, navigate to the git sidebar tab (:git:), and click the cloud with an arrow pointing down (:cloud-down: ) to “Pull latest changes” from the remote GitHub repository.
Additional Notes
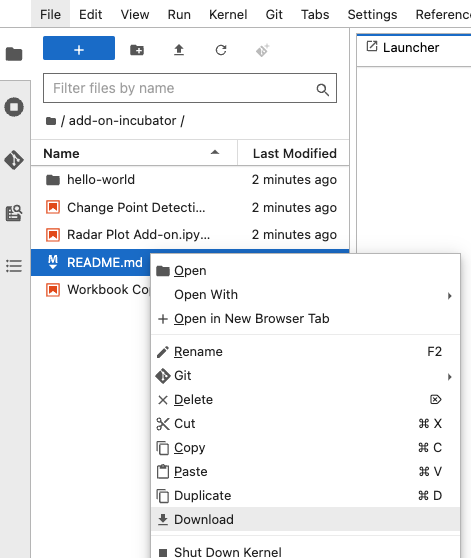
Downloading Individual Files from Repository
Right click on the file you wish to download, and select “Download”
Downloading a Zip file with the contents of a GitHub Repository
If you wish to download files from a GitHub repository, and don’t need to clone, navigate to the repo in GitHub then: select Code → download zip (in the drop down).