Defining your Search
Adding Rows to a Scaling Table
There are 3 options for adding rows to your table: property search, manually selecting items, and stored table search (with the ability to import a csv), plus you can get help from the Seeq AI Actions Agent.
Helpful Tip
Try using the AI Assistant’s Actions Agent to help populate your search. Start with something simple like: “Add all signals named Temperature to the scaling table.” and go from there! If they AI Assistant doesn’t yield the correct search, try using the methods below.
Property Search
When selecting property search as an option, the following UI will be shown.

Select types(s): filter by one or more item types (Condition, Signal, Scalar, Threshold Metric, and Asset)
Filter by Asset: filter by searching only within the specified asset tree or group
Filter by Property: provide the property to filter by selecting from the dropdown or typing in a custom property
Operator: specify what type of match you’d like to perform
Value: specify the value of the property that you’d like to search
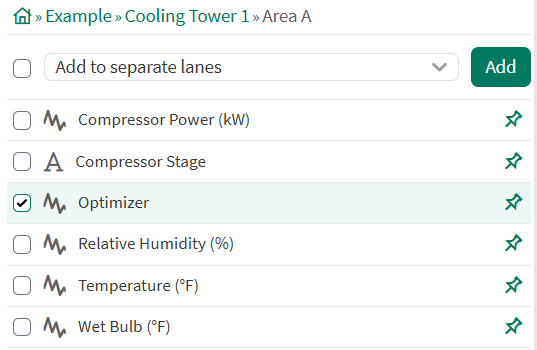
For instance, selecting Signals for the type, adding a property where the property name is “Name”, the operator is “Contains,” and the value is “Optimizer” will find all signals with “Optimizer” in their name. This can also be even further filtered by adding an Asset, which would only find signals with the name “Optimizer” that are under the provided Area A. When executed, this search would result in the following table:

This resulting item was found from the Asset that was provided in the search. Only one item is found with the name “Optimizer” in that Asset.
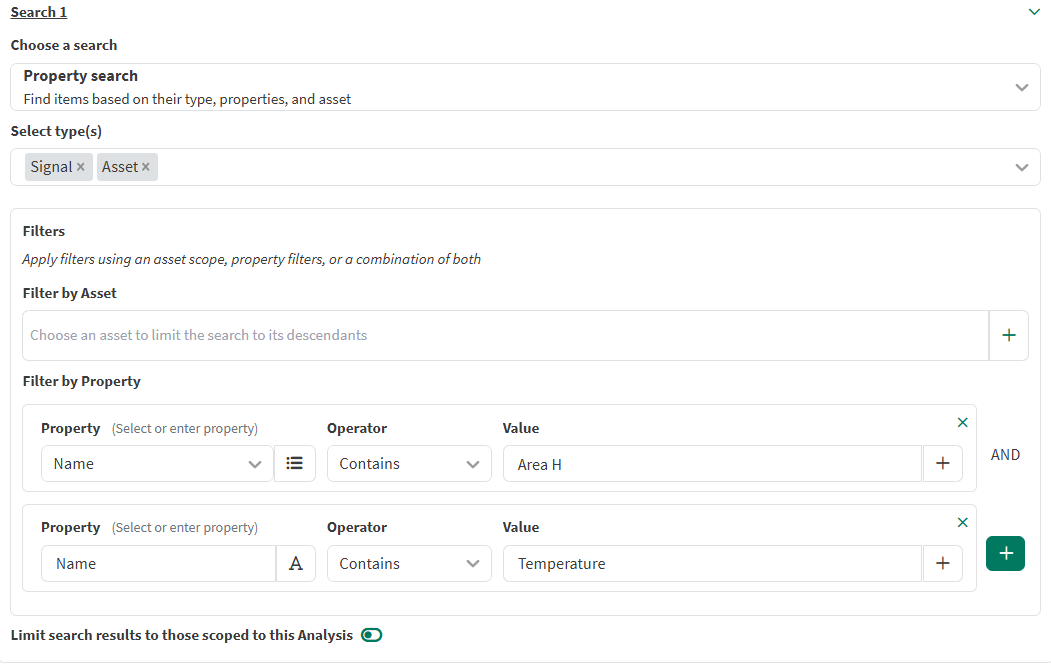
Multiple properties with multiple types can also be used for a single search. This will result in items that are either Assets or Signals where the name contains both “area” AND “temp”.
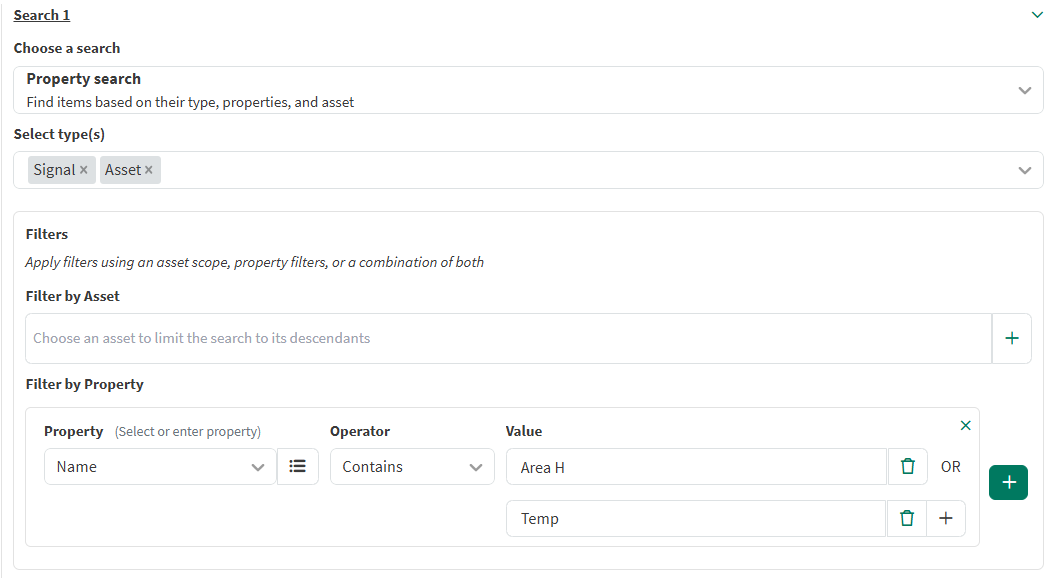
Additionally, multiple values can be created for a single property when the operator value is either “Within” or “Contains.” This results in a table where the items are Signals or Assets with either “area” OR “temp” in their name.
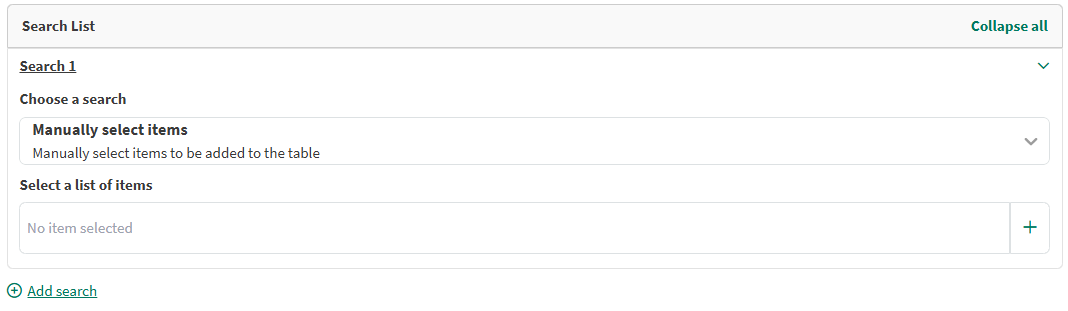
Manually Select Items
When choosing the option to manually select items to add to the table, this is the UI shown:
Upon clicking the input box to select items, a modal to search for and select items is shown:
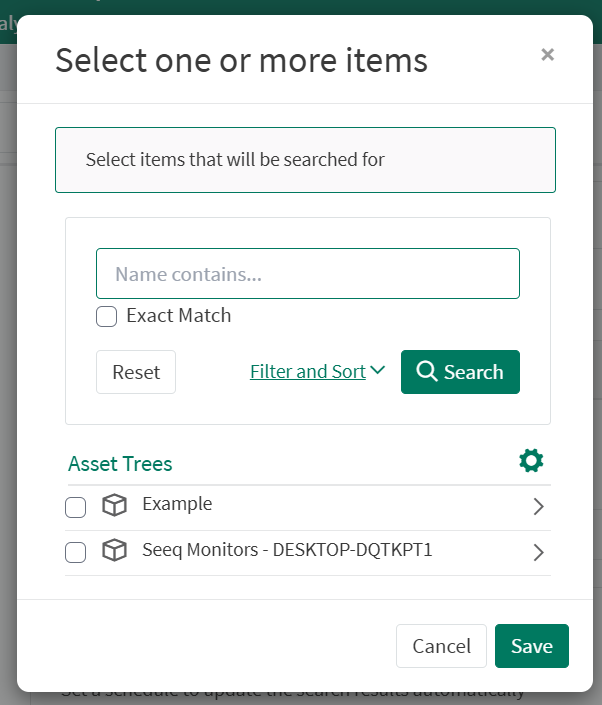
After searching for and selecting the desired items, once executed, the list of items gets added to the table. This is a simple way to quickly add specific items to a table.

Stored Table Search
Scaling Tables also allows importing a CSV file to generate the rows in the table through the Stored Table Search type. When selecting this option, the following interface is displayed:
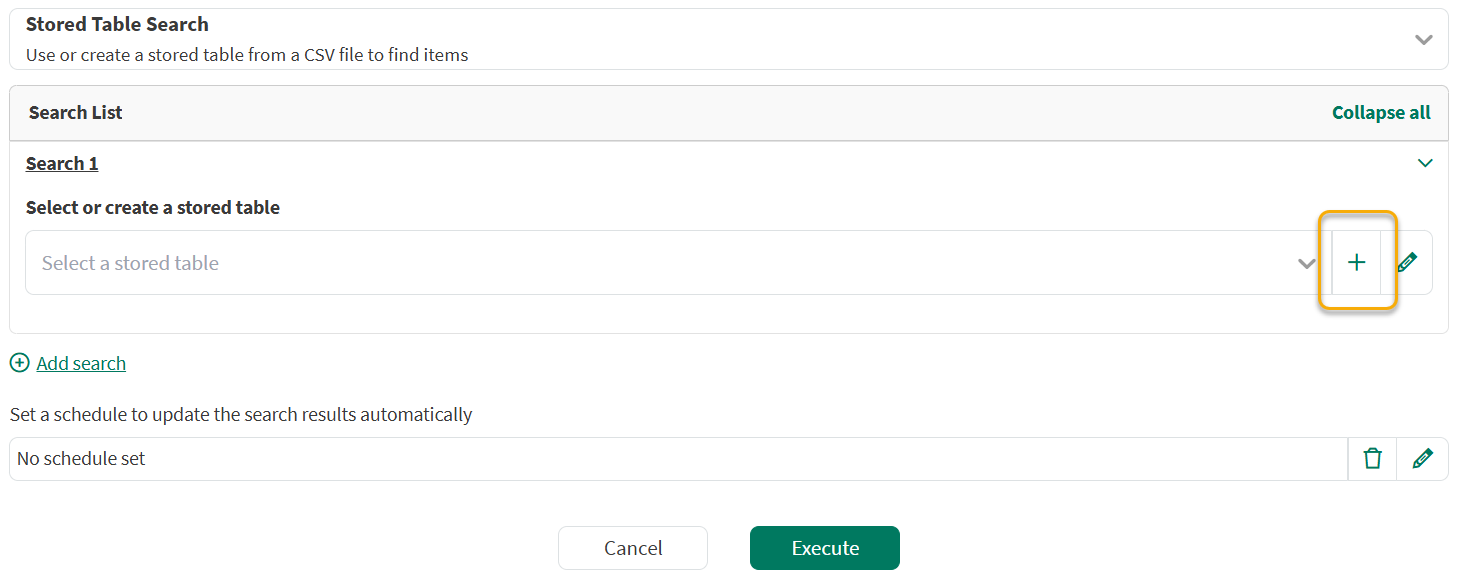
Stored Table flow starting point
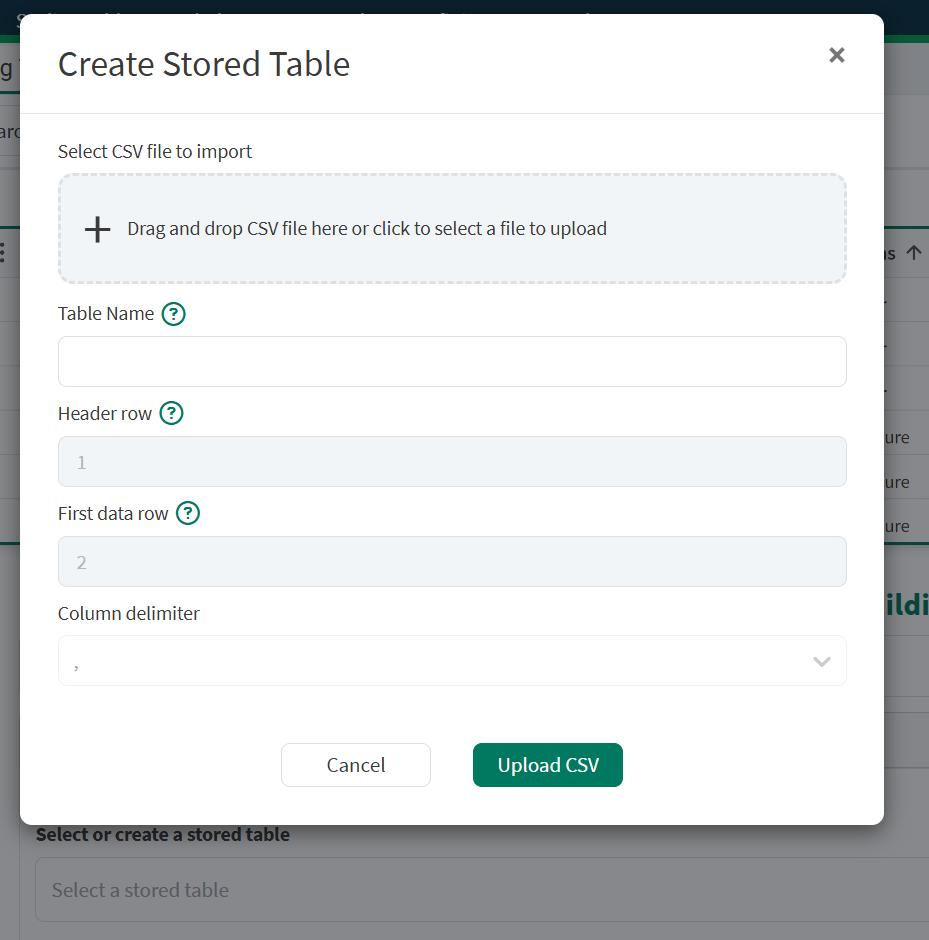
Create a Stored Table by uploading a CSV file
Select or create a stored table: The user selects a table previously uploaded or creates a new one.
CSV file to import: click to select a file or drag in a CSV
Table Name: Gives this uploaded file a unique name to find and reuse later.
Header Row: Specifies the row number in the file where the column names (headers) are located.
First Data Row: Indicates the row number where the actual data begins.
Column Delimiter: Defines the character used to separate values in the file (e.g., comma ,, tab \t, semicolon ;).
Upload CSV: The system processes the CSV based on the provided settings and generates a table with rows and columns aligned to the imported file.
For instance, if the following CSV file was imported and all of the default settings remained the same:
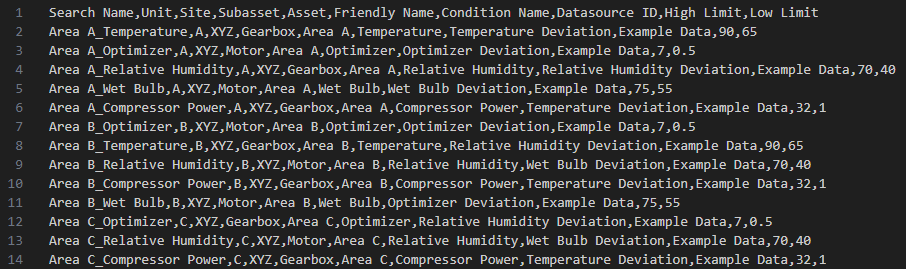
Example CSV file to upload
The user would then be presented with this form:
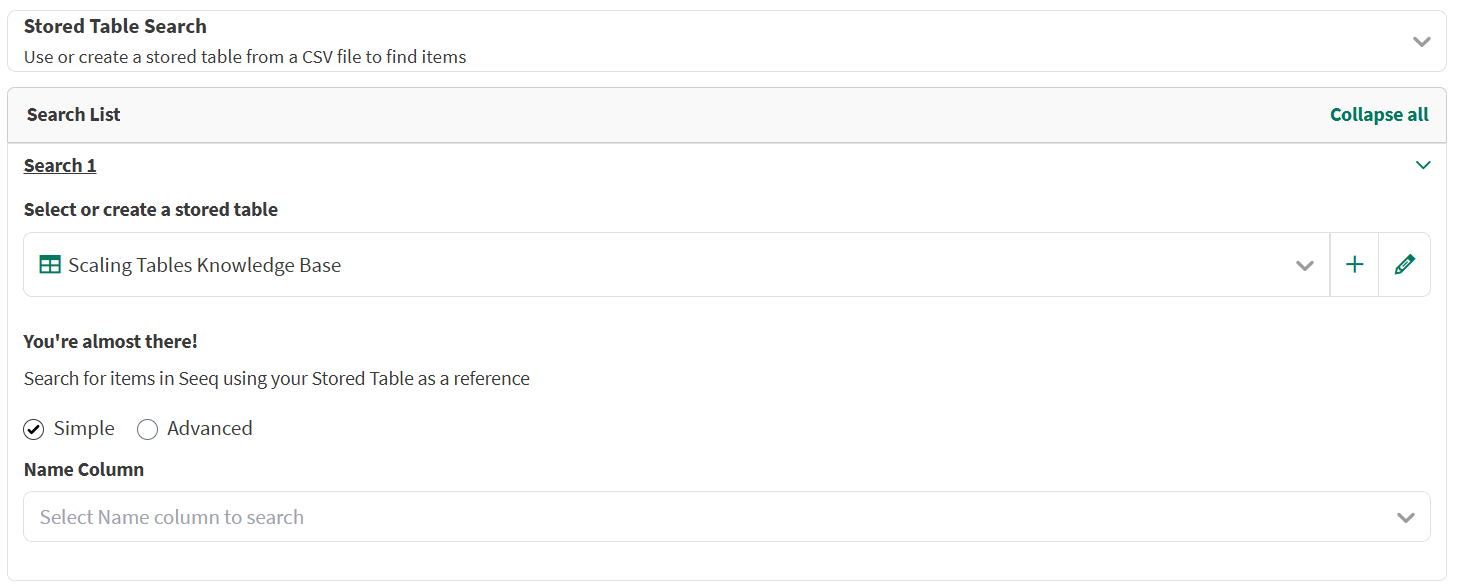
Selecting a Name column to search the Seeq system
The dropdown options are based on the CSV file headers:
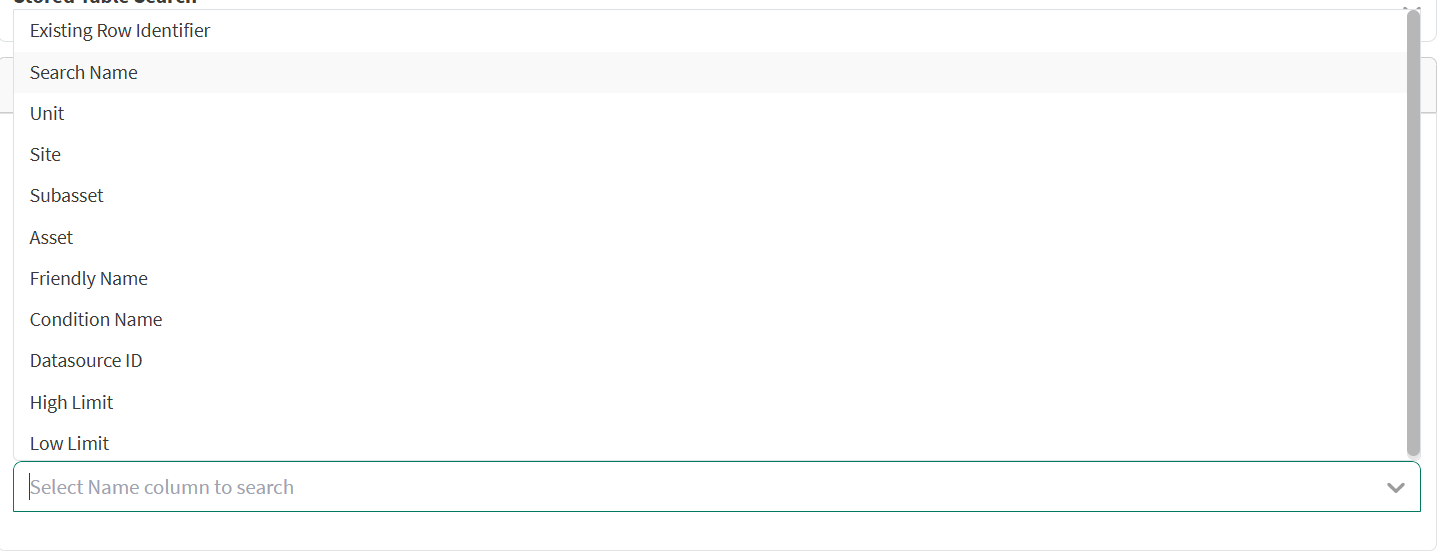
Example dropdown showing Column Headers to choose to search
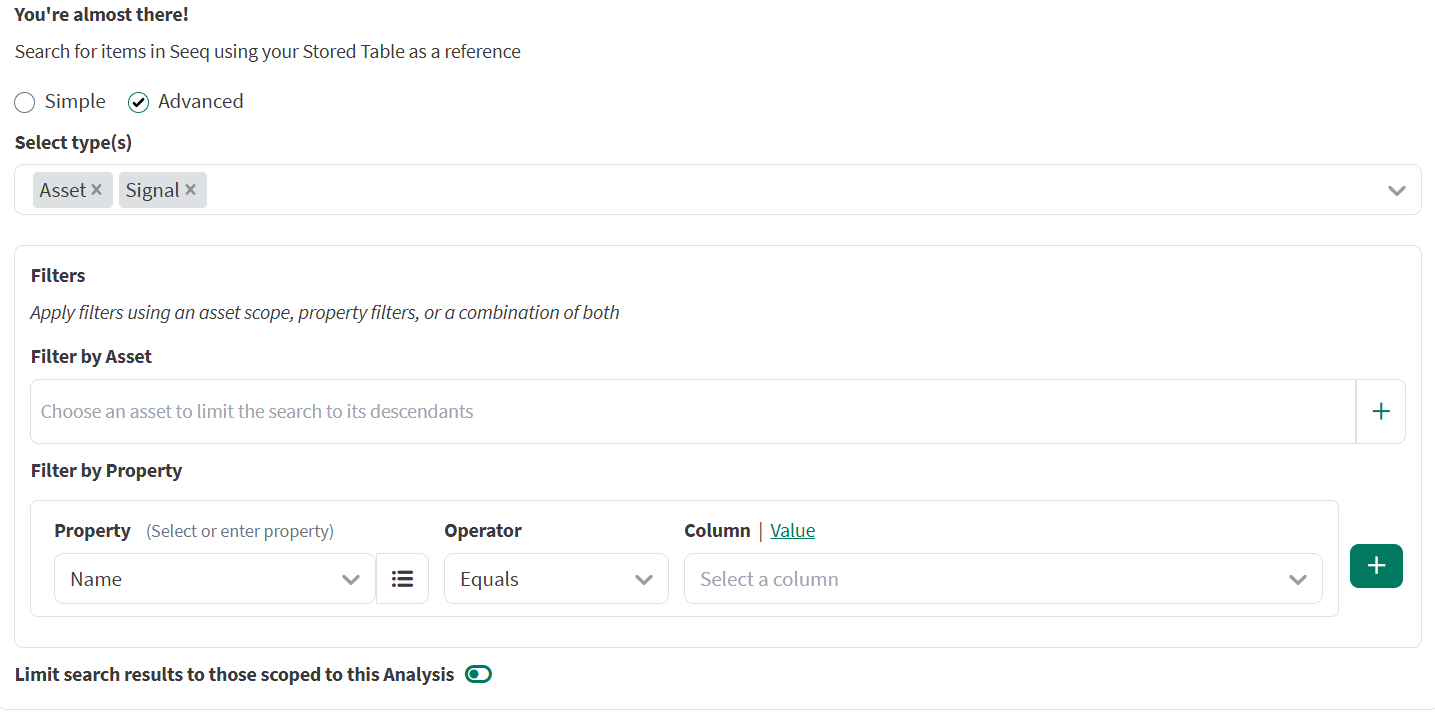
The advanced option allows for further specification for how items should be found. The user can specify a property, such as “Name” and what the column name should be to find items:
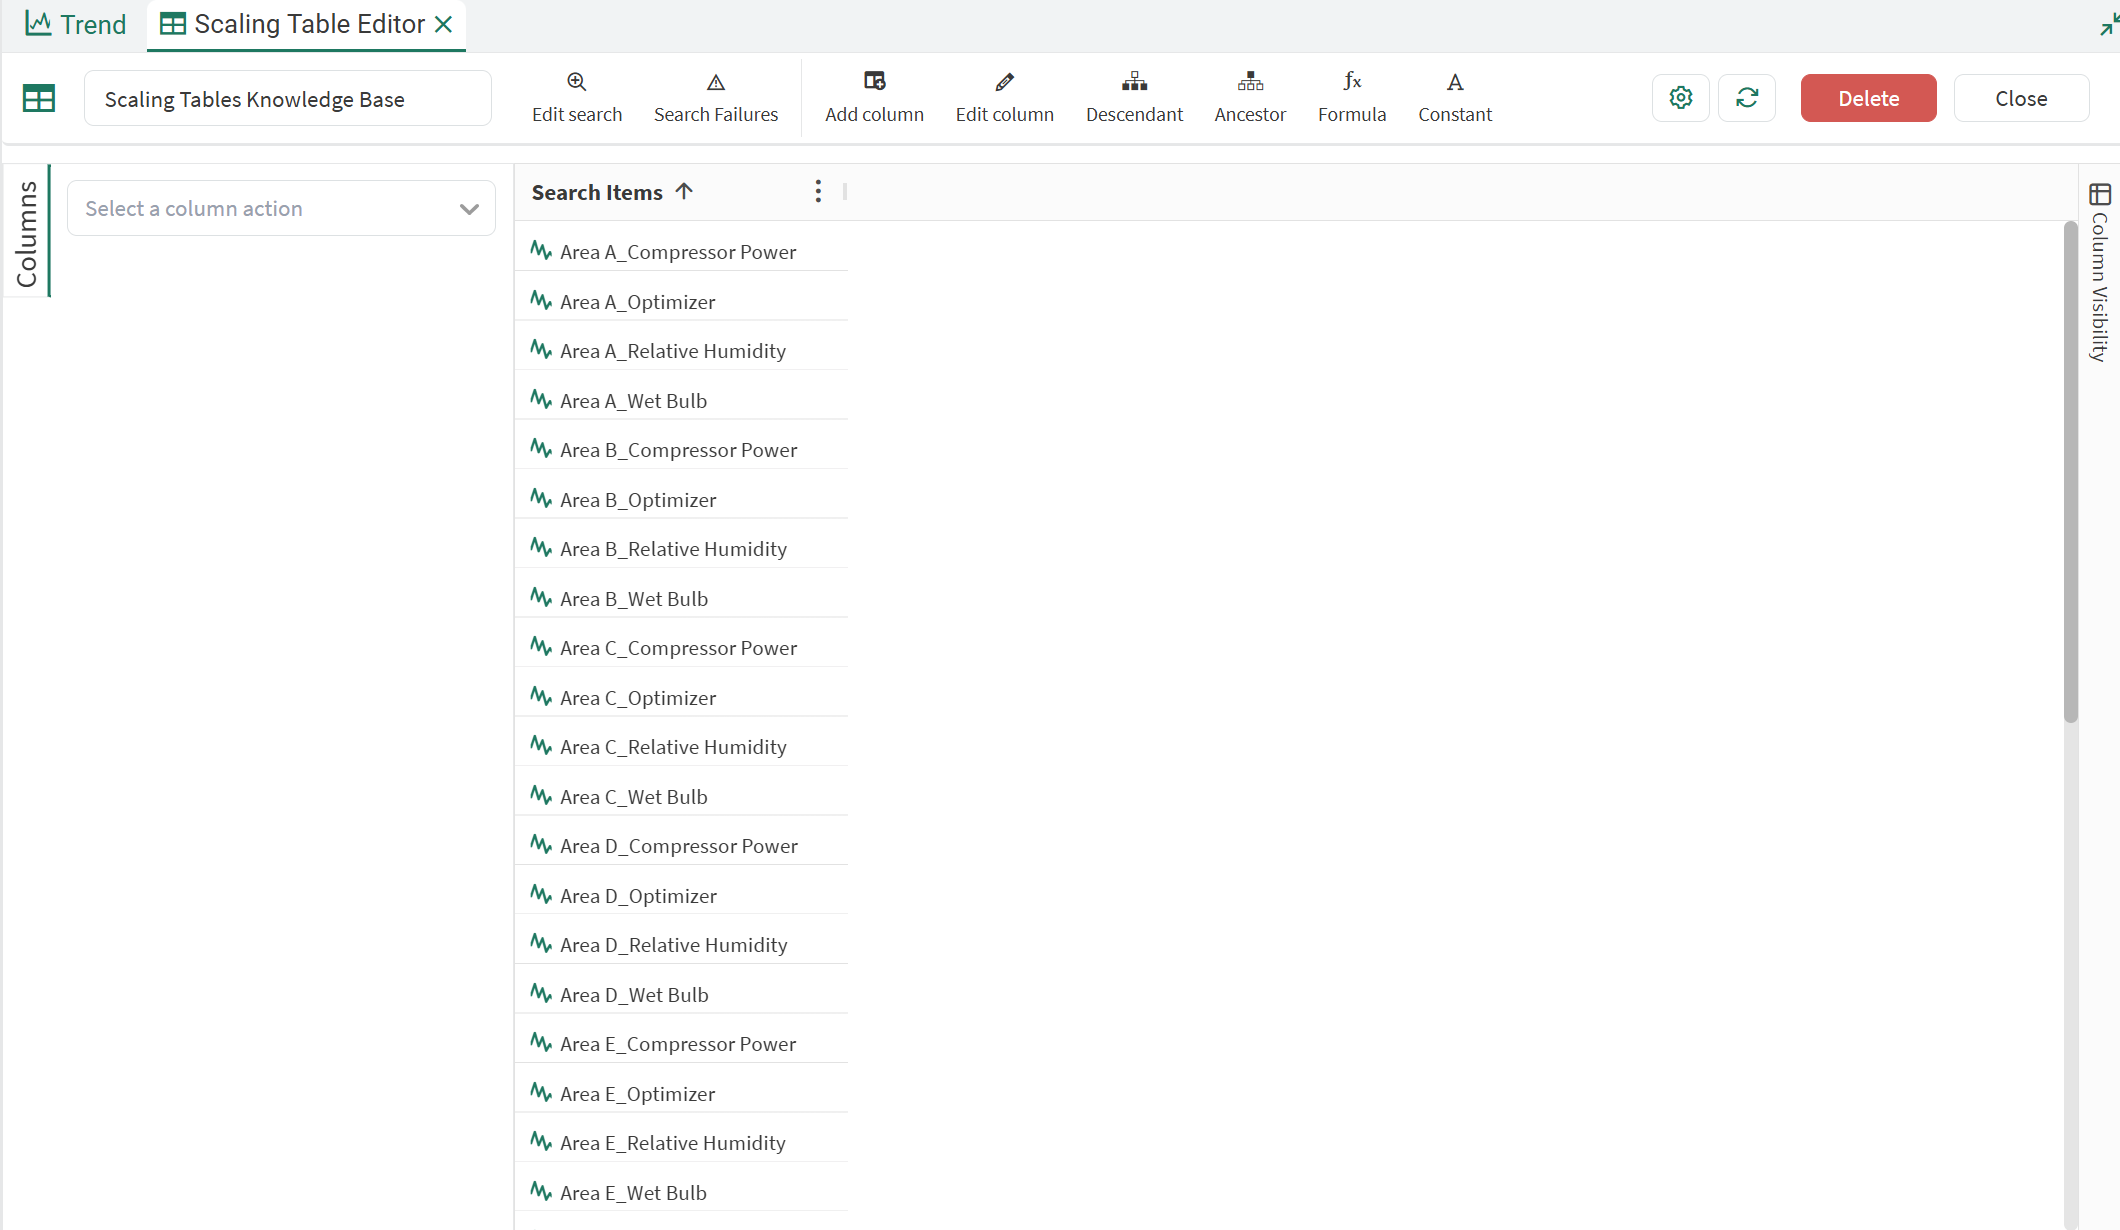
If the user selected to find items with the column name “Search Name,” the following table would be produced:
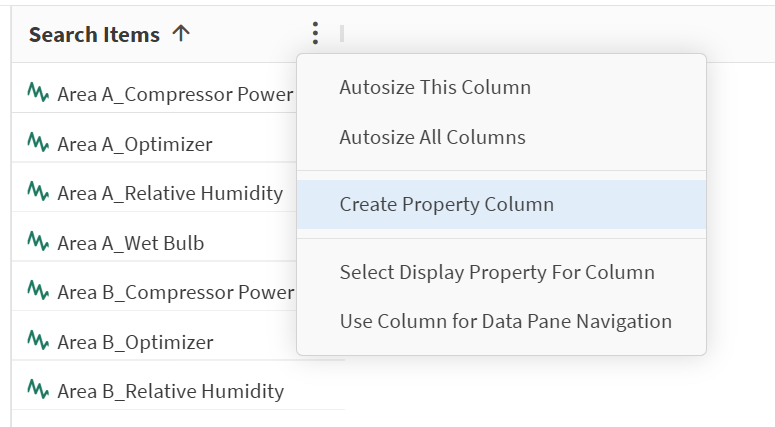
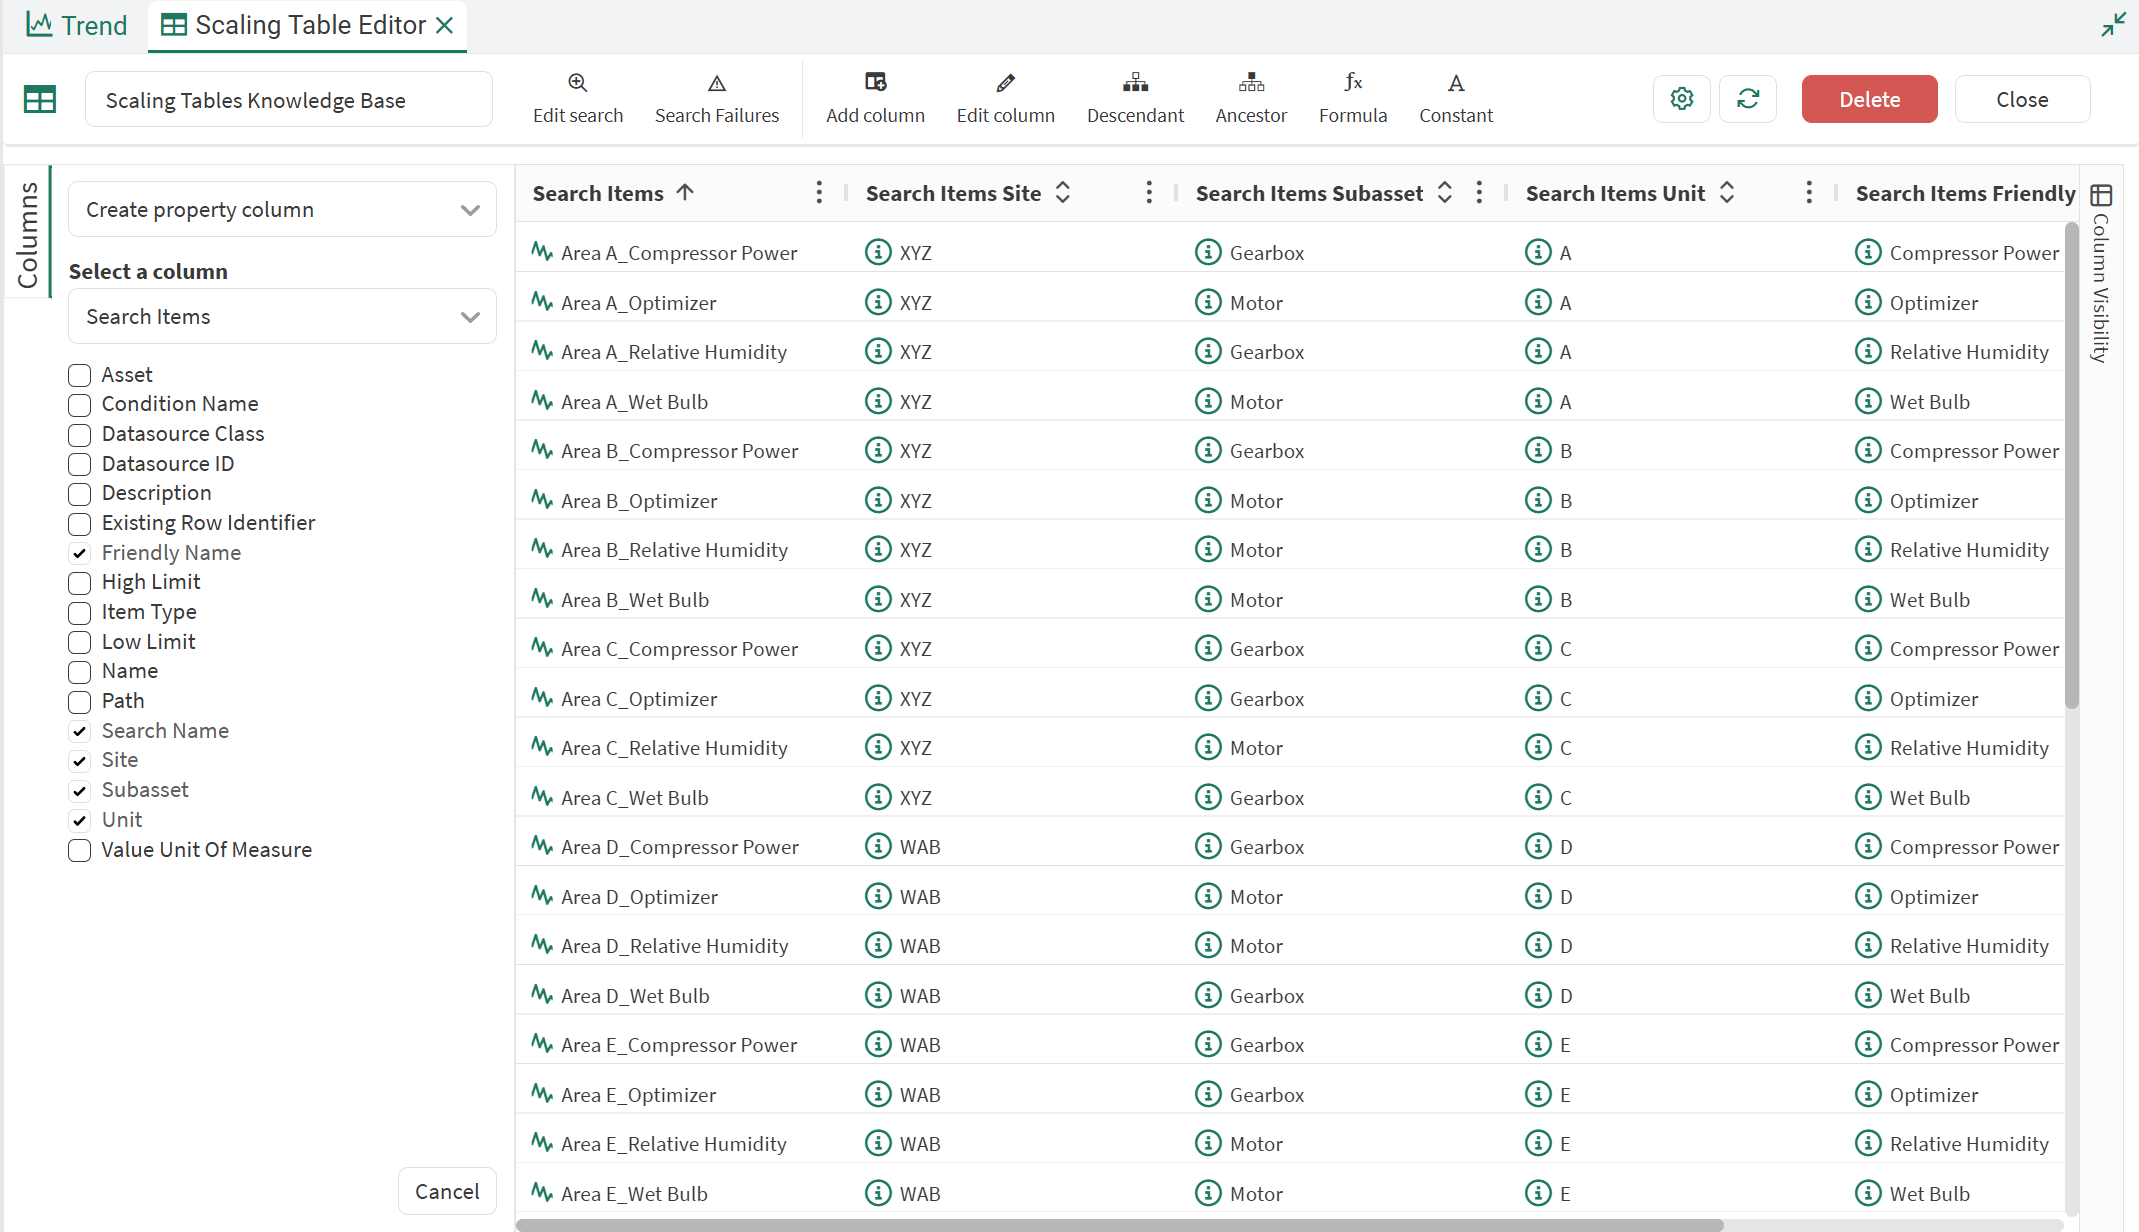
To import the additional columns from the original CSV file, you can use the three-dot menu in the column header to access “Create Property Column”:
And selectively choose the columns you’d like to add:
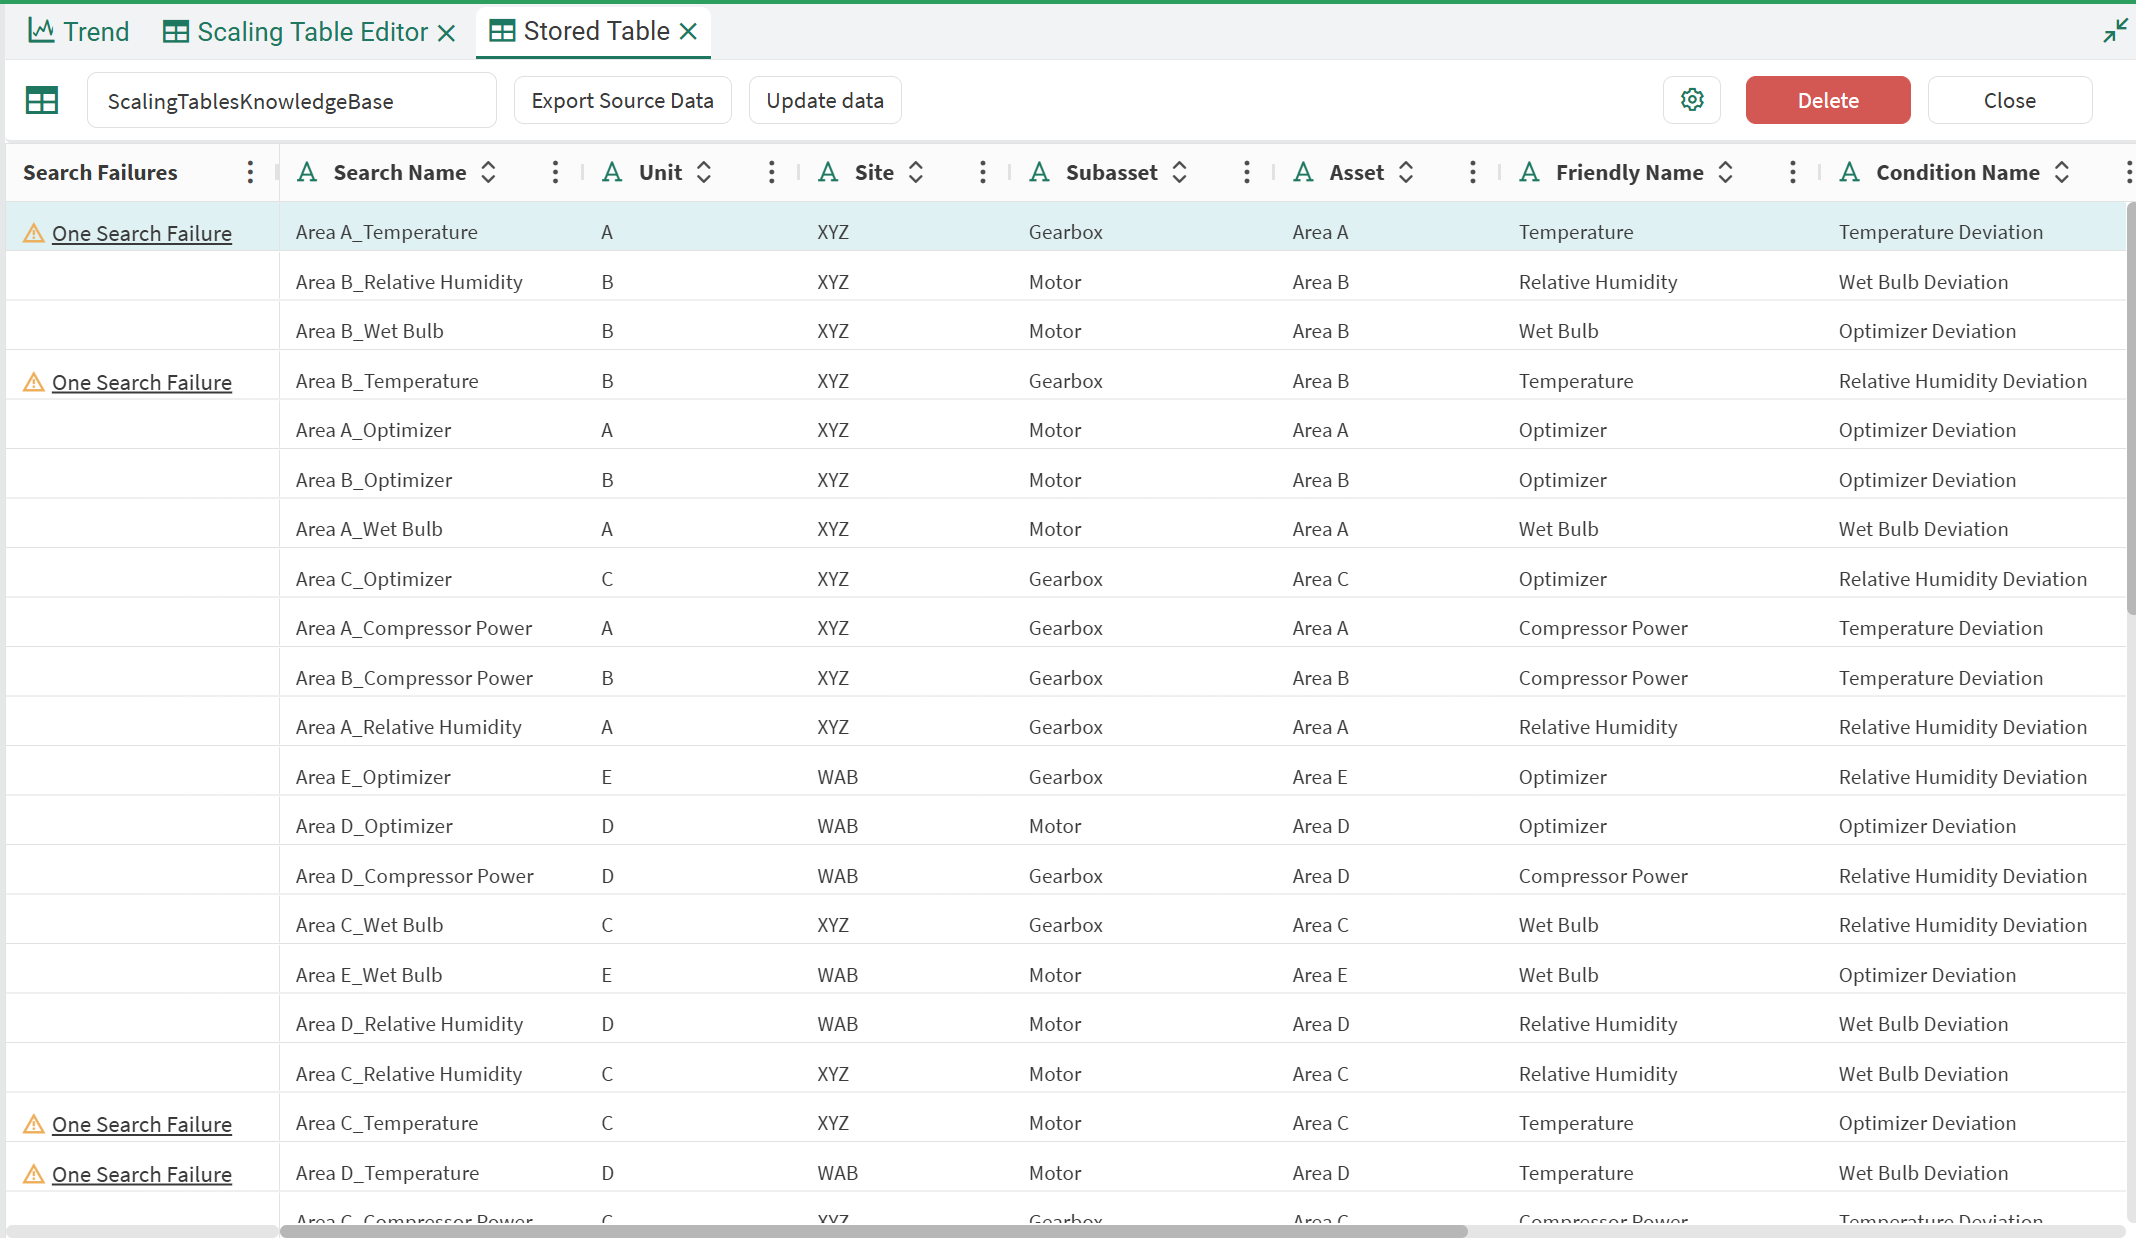
When a table has been generated using the Stored Table option, the user can further refine how to find items with the “Edit search” icon or review errors (if any) with the “Search Failures” modal and subsequently clicking the link in the warning message:

Clicking the link will open a new tab, “Stored Table”, with details for each row if the search was unsuccessful. Clicking the corresponding “Search Failures” cell for each failure will open a modal with the search failure details. In this page, you can also make adjustments to your stored table as well as export or overwrite the CSV file used:
Editing an Existing Stored Table
For tables generated through property-based or manually selected search options, users can refine the search by clicking the "Edit Search" button in the toolbar. This feature allows users to customize how rows are generated by adding new searches, modifying existing ones, or removing unnecessary searches.
For tables created via Stored Table option, users can update their data by clicking the "Update Data" button in the toolbar of the “Stored Table” tab. This option enables users to upload a new CSV file and adjust any associated fields as needed.

When changes are made to either search method, the table will automatically refresh to display only the rows relevant to the updated search criteria. Any rows that no longer meet the revised criteria will be removed, ensuring the table stays accurate and up-to-date.
Combining Searches
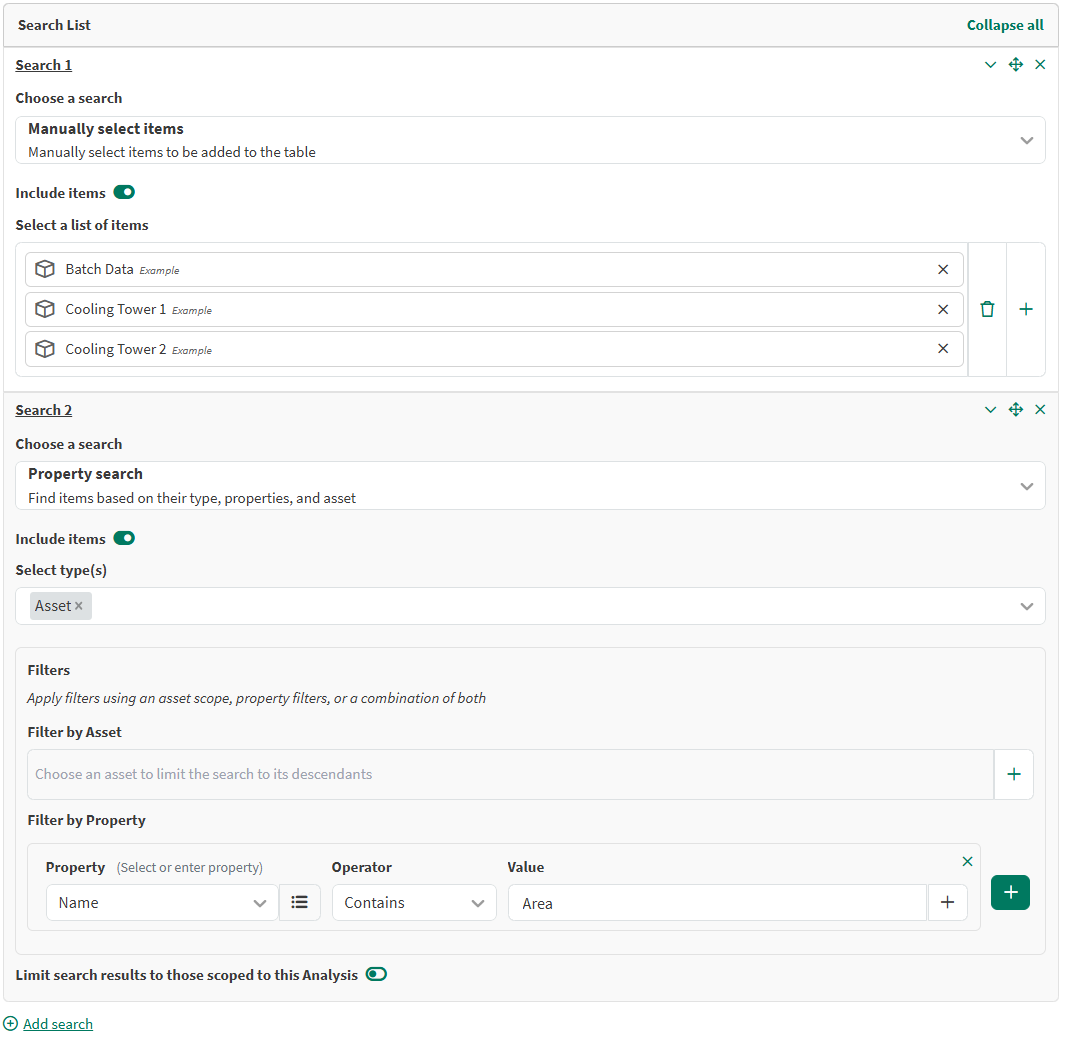
Searches can be combined together to create a desired list of resulting items using the “Add search” link.

For instance, the following property and manually selected searches result in a table that contains the items from the list of manually selected items, as well as Assets that have a name that contains “Area”:
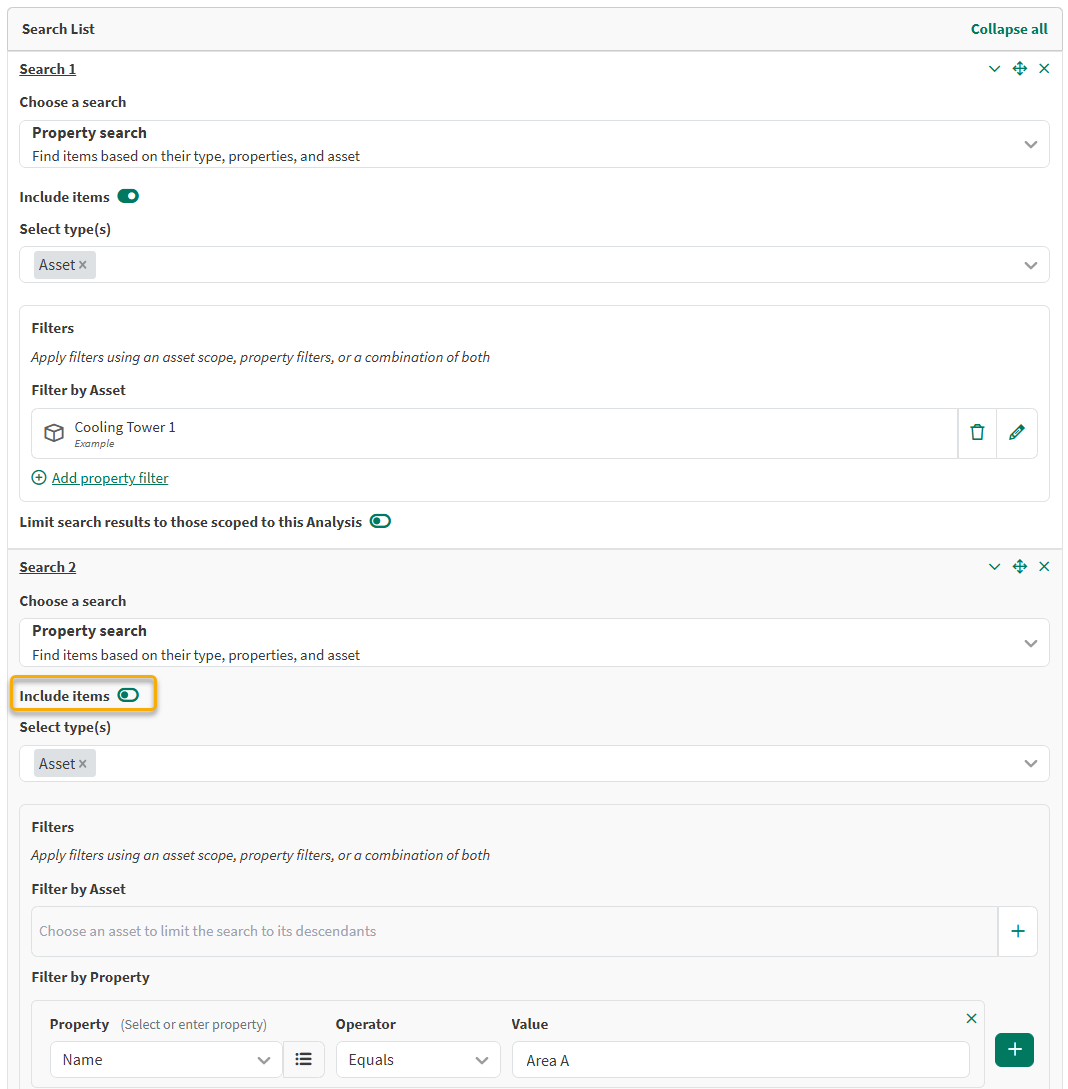
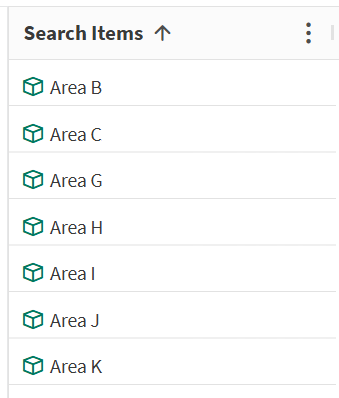
Including and Excluding Searches
Each search also has the option to either be included or excluded:

If a property search was made to find all Assets under Cooling Tower 1 and another search was adding to exclude Area A from that list, the following table would be shown when executing:
Scheduling a Search
Users have the option of adding a schedule to the search. This feature allows users to automate the process of finding new items based on a defined schedule. When configured, the system will run searches at regular intervals, checking for and retrieving items that match specified criteria. The default behavior is no schedule, meaning searches are only performed manually or triggered explicitly.
To enable a schedule, this can be done by clicking on the schedule input in the property or manually selected search interface:

When editing a schedule, the following will be shown:
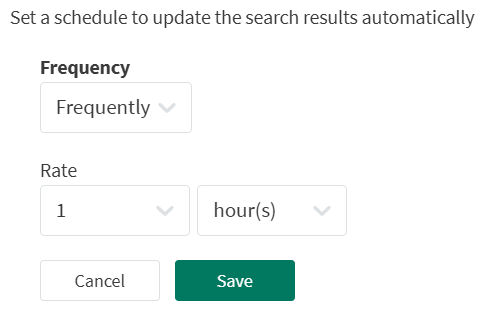
From here, a schedule can be specified and saved to the search. When a schedule is set on a search, a message will be displayed above the table:

Setting a schedule on a search is ideal if it is expected that new items will be generated based on the search criteria. If this is not expected, the schedule can remain unset.