Overview
Asset Groups give users the ability to create fit for purpose groups which can be used just like Asset Trees in other areas of the product (such as Treemap, Tables, and Asset Swapping). Users can start from an existing Asset Tree or start from scratch and build up the Asset Group by searching for signals or other items.
Asset Trees vs. Asset Groups
Use Asset functionality in Seeq through Asset Trees and Asset Groups. Asset Trees can be multi-level, are created and altered outside of Workbench (such as in Seeq Data Lab), and can be scoped locally (only accessible from a given Workbench) or globally (accessible in any Workbench by anyone with appropriate access on the server). Create an Asset Tree using Python in Seeq Data Lab or via access to restricted IT systems. Conversely, Asset Groups are single-level, created and edited directly in Workbench in the Data Tab, and are only scoped to the active Workbench. There is no need to know Python or have access to restricted IT systems to build or alter an Asset Group. Asset Trees and Asset Groups have functionally identical capabilities relating to the types of analysis that can be performed on them in Workbench (e.g., you can ‘swap’ an analysis between Assets, regardless of whether the Asset was built as a Tree or a Group).
Getting Started
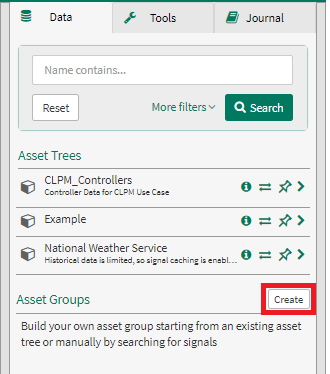
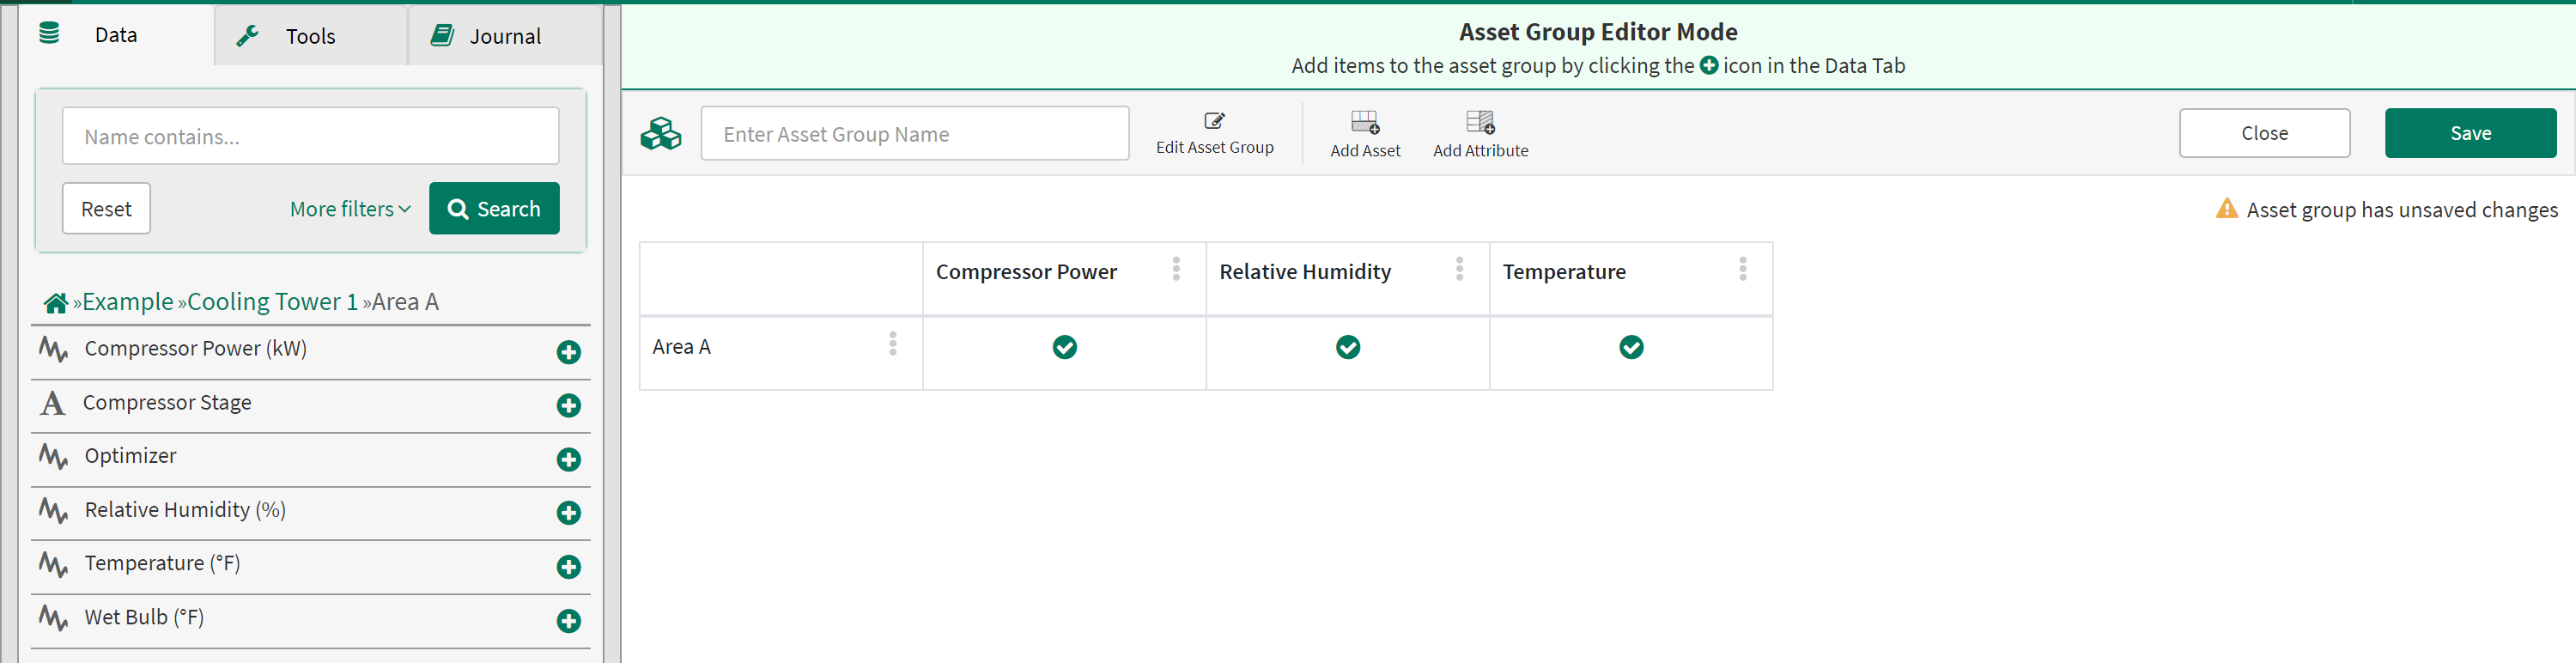
To create an Asset Group, start in the Data tab and click the "Create" button to the right of the Asset Groups section. This will put you in Asset Group Editor Mode.
Adding Items to an Asset Group
There are two ways to add items to your asset group: start from an existing asset tree or start from scratch and manually build an asset group from signals, conditions, etc.
Start from an existing Asset Tree
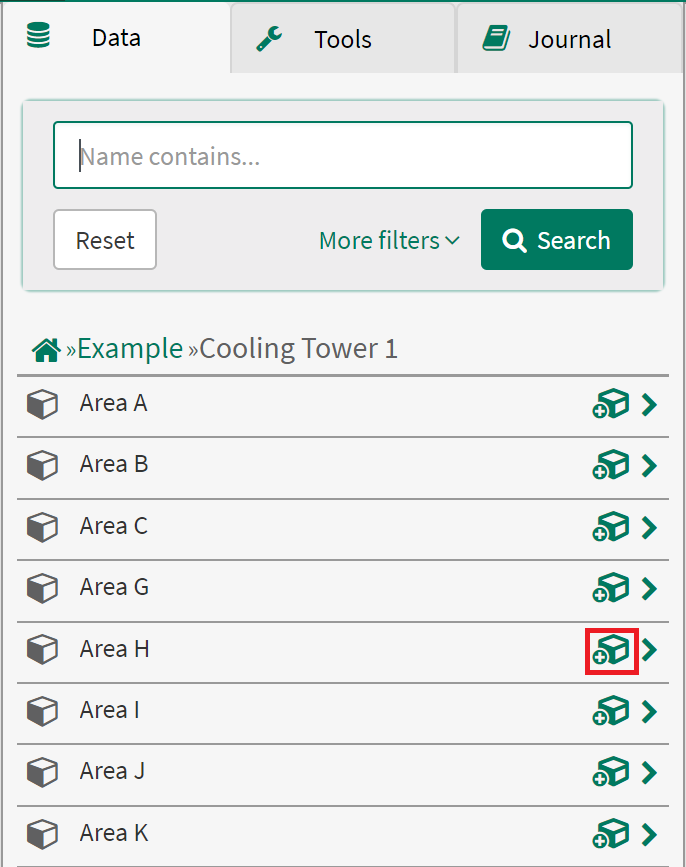
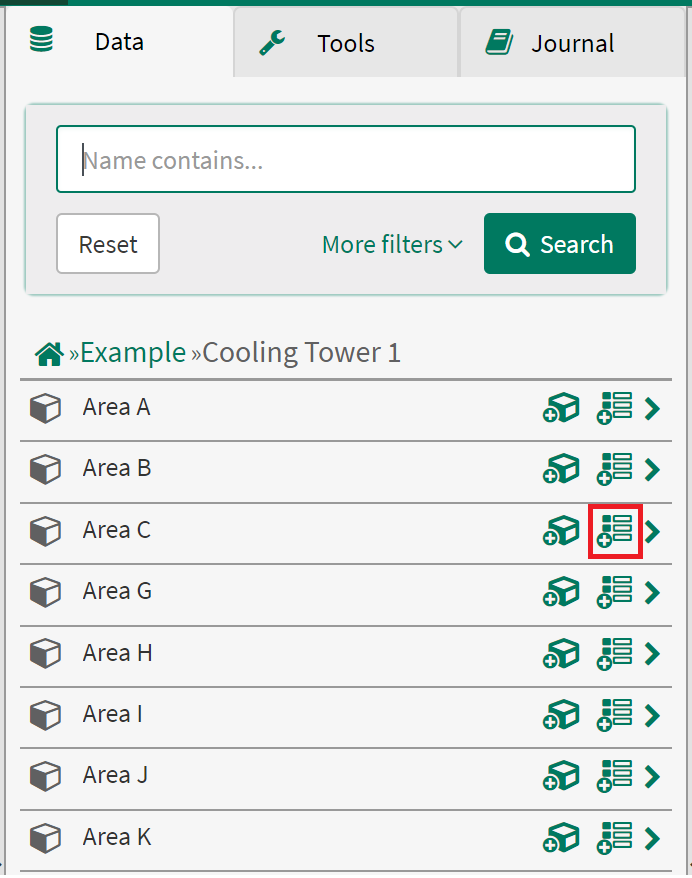
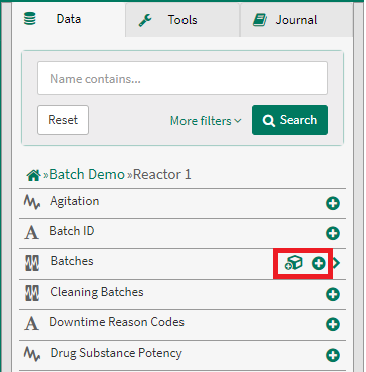
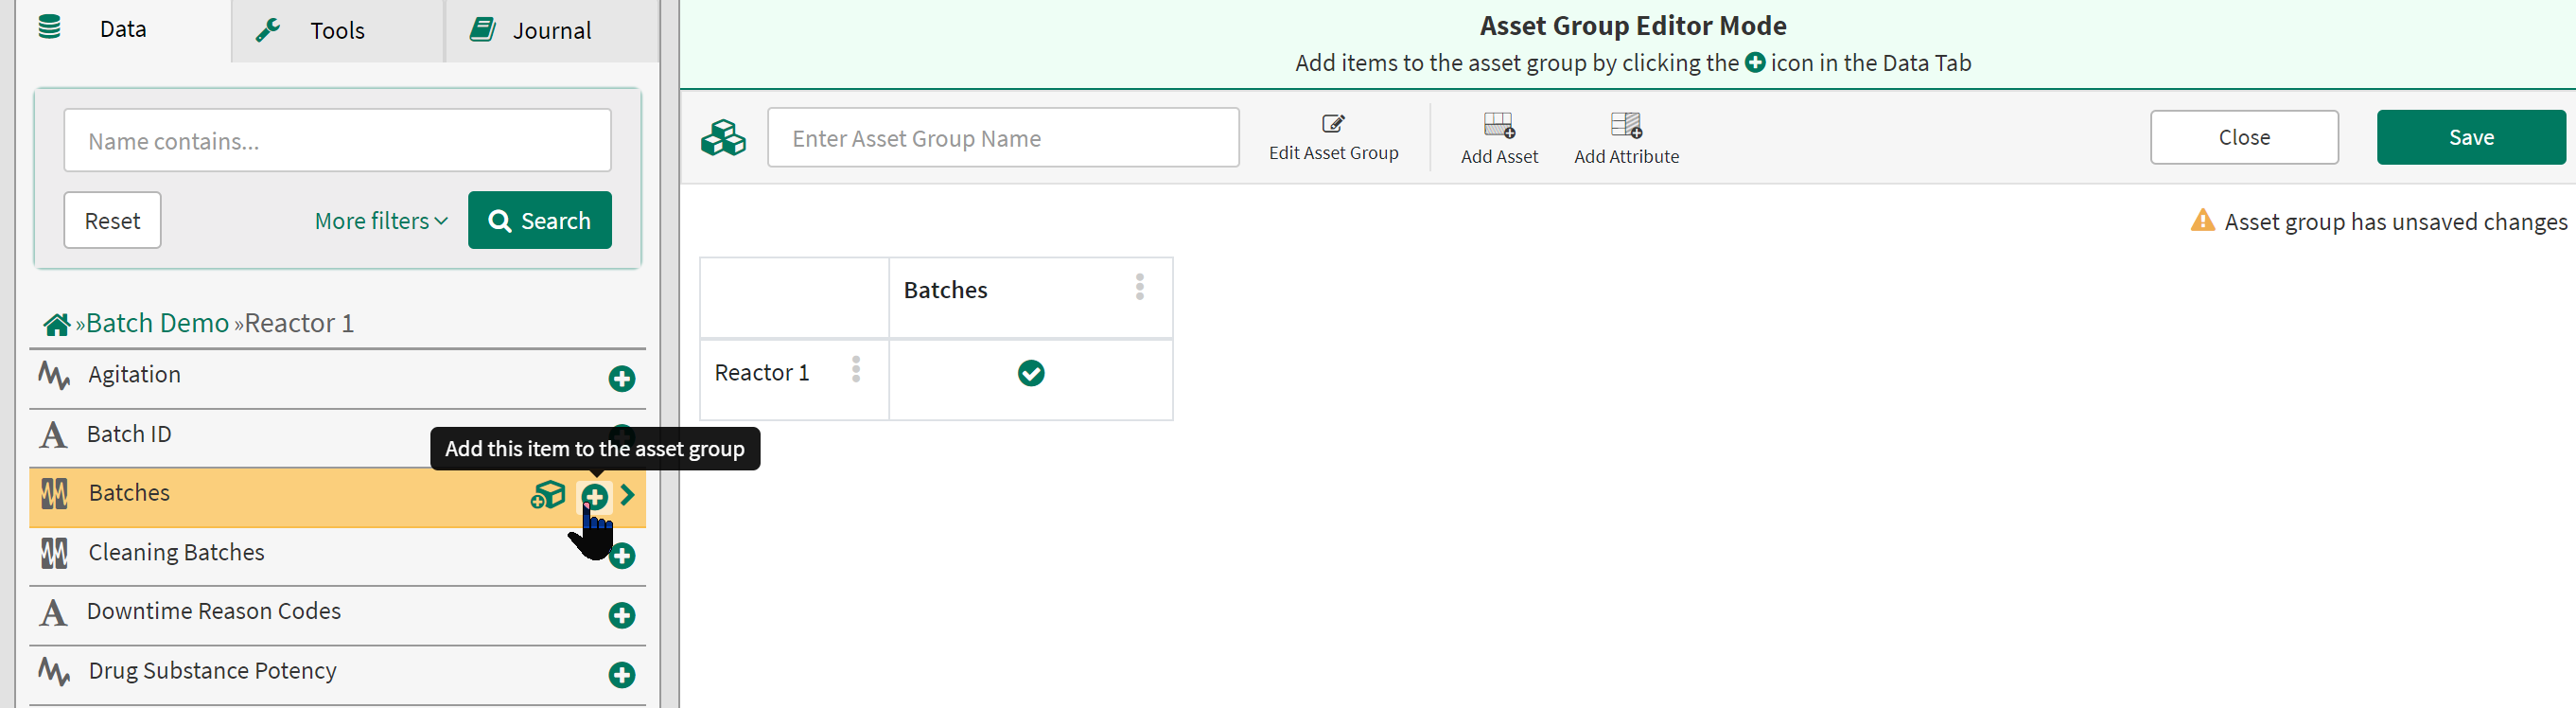
Once you are in Asset Group Editor Mode, when you navigate an asset tree in the Data tab you will see different buttons to the right of each item in an asset tree.
Click the ![]()

Continue until you have added all the assets you want to analyze.
Give your asset group a name and hit the Save button on the top right.
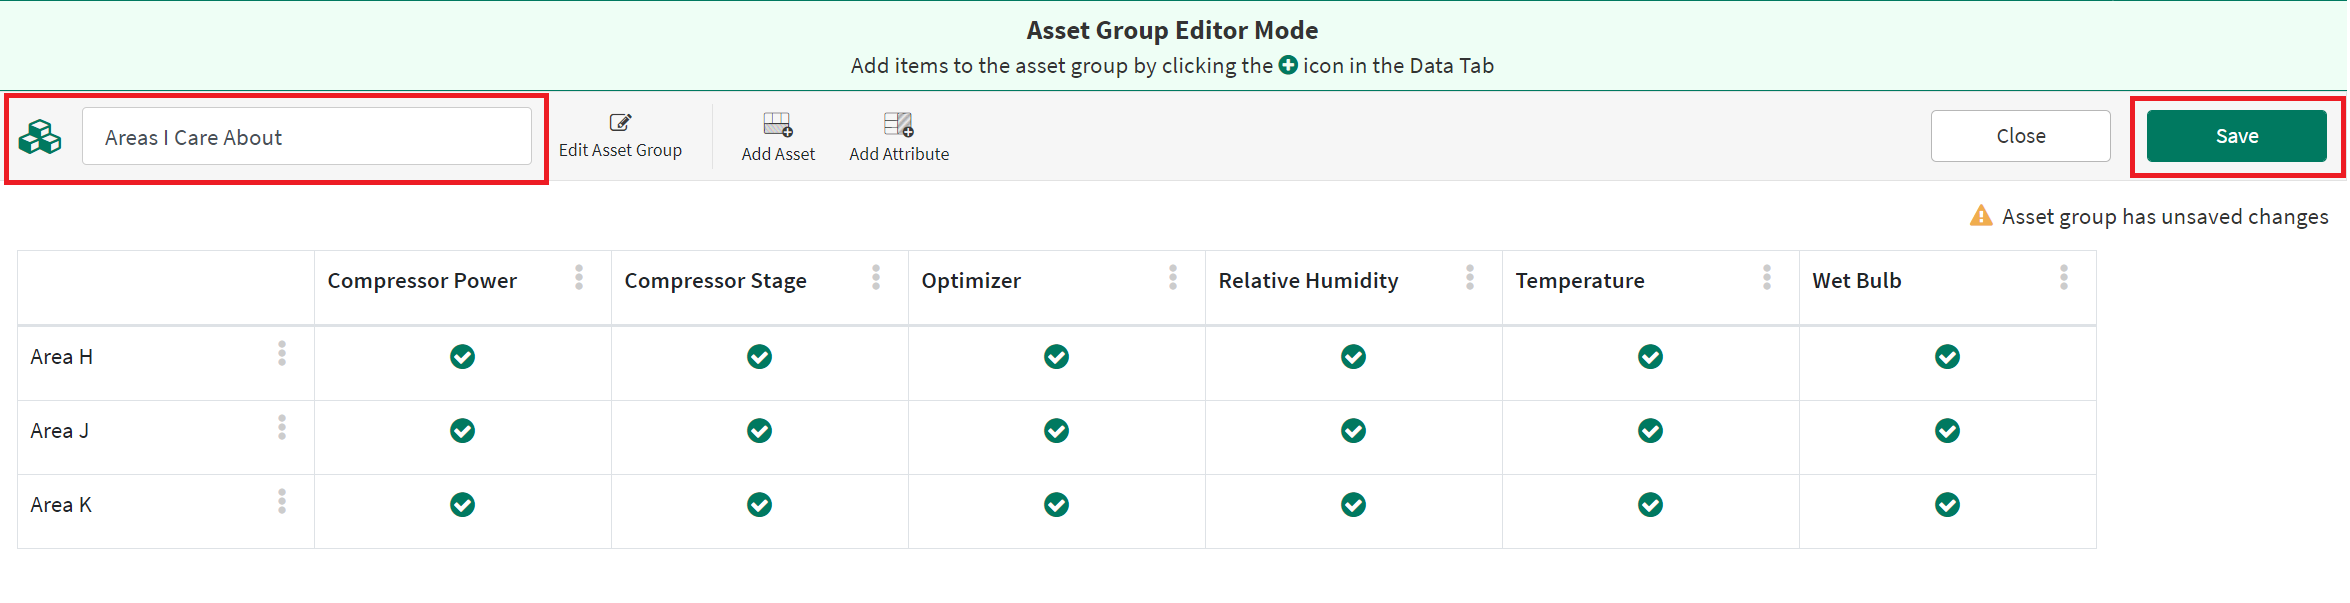
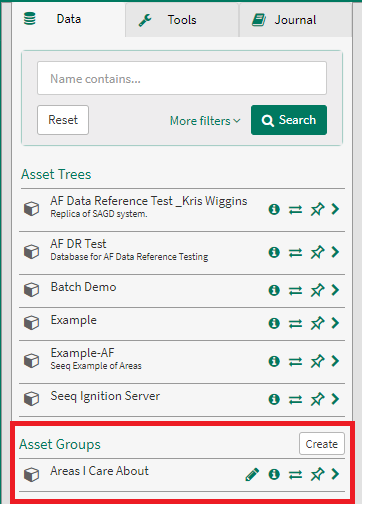
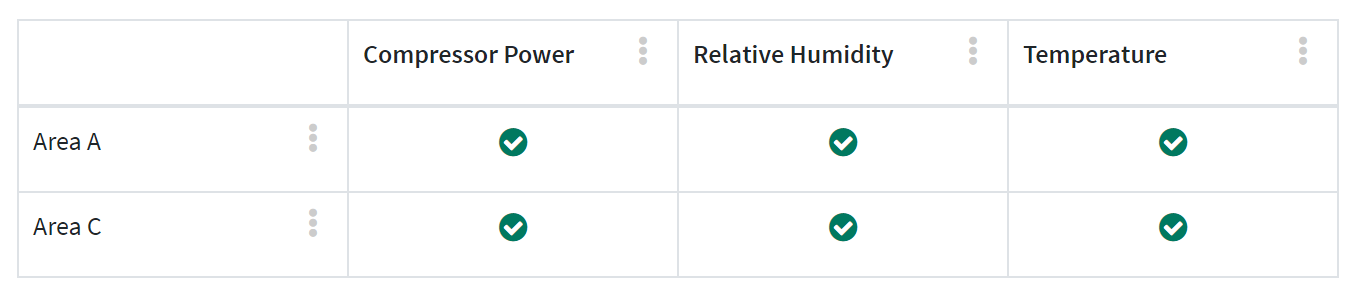
Your newly created asset group will appear in the Asset Groups section of the Data tab. You can use this Asset Group in other parts of Seeq just like you can use Asset Trees (for example, asset swapping, treemap, and tables across assets).
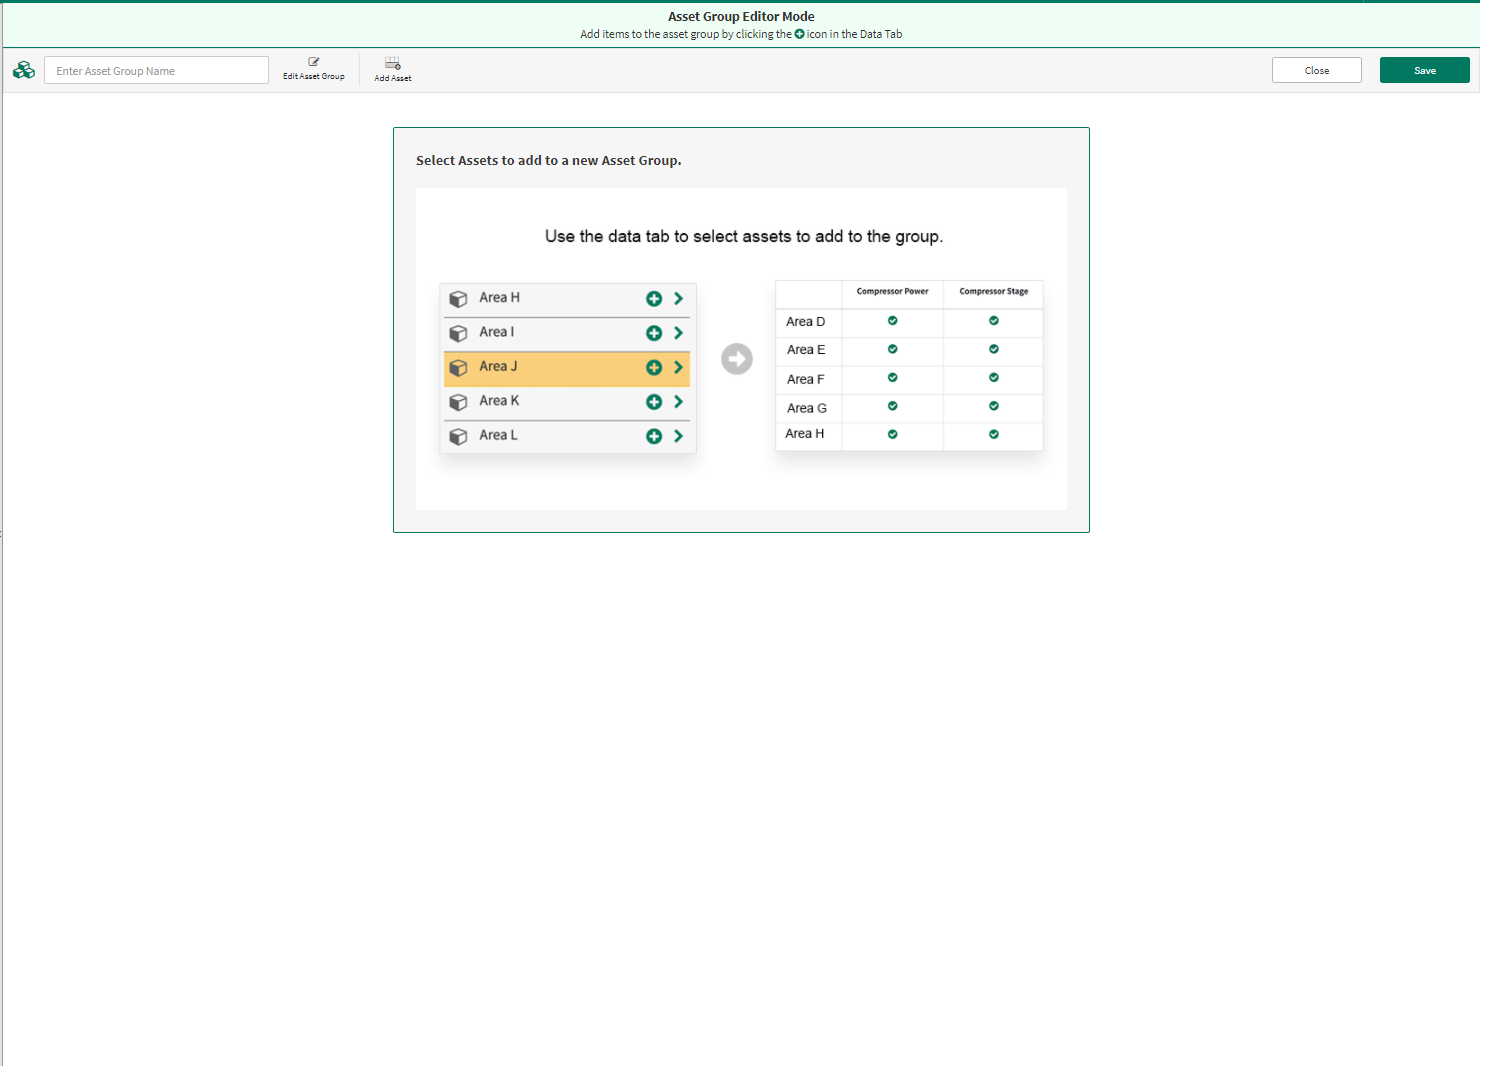
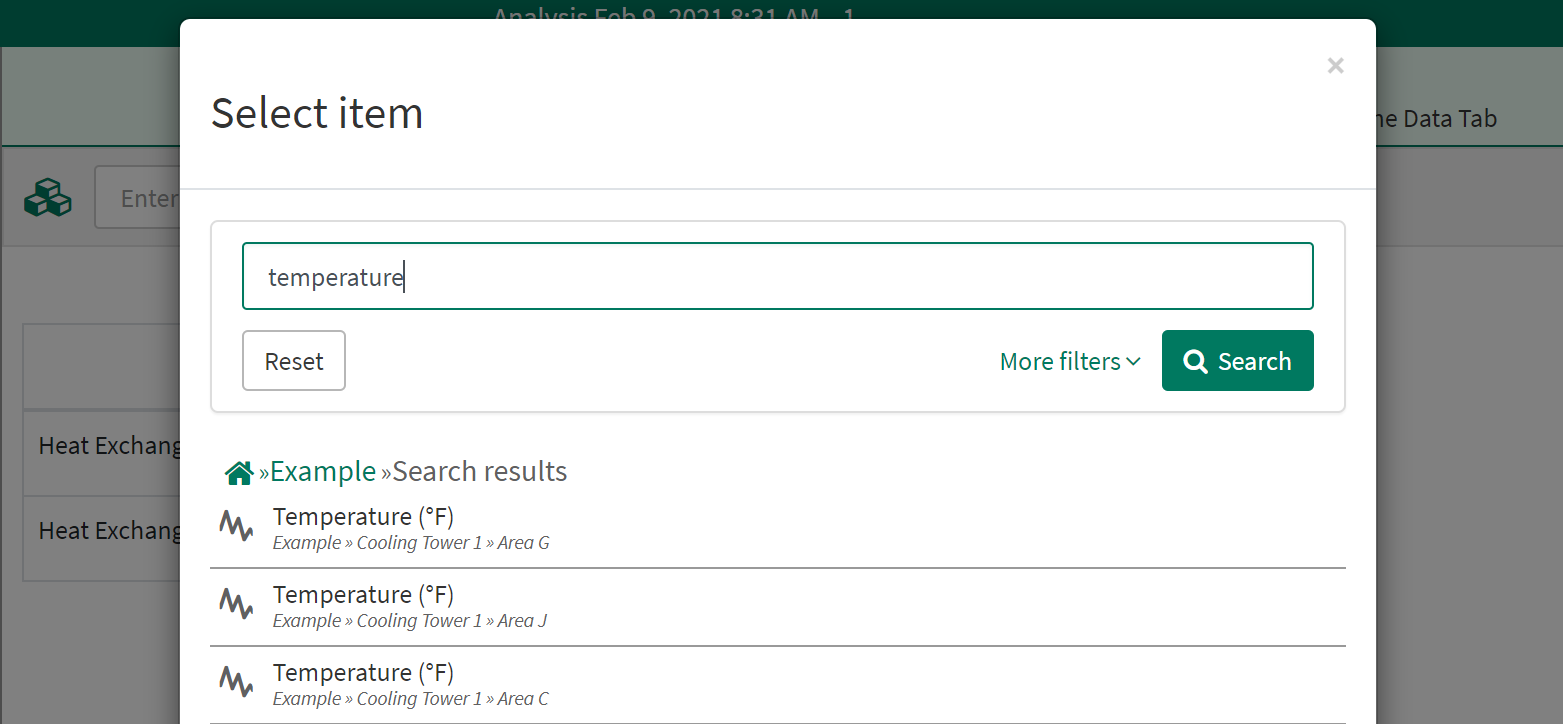
Start from scratch and manually build an asset group from signals, conditions, etc.
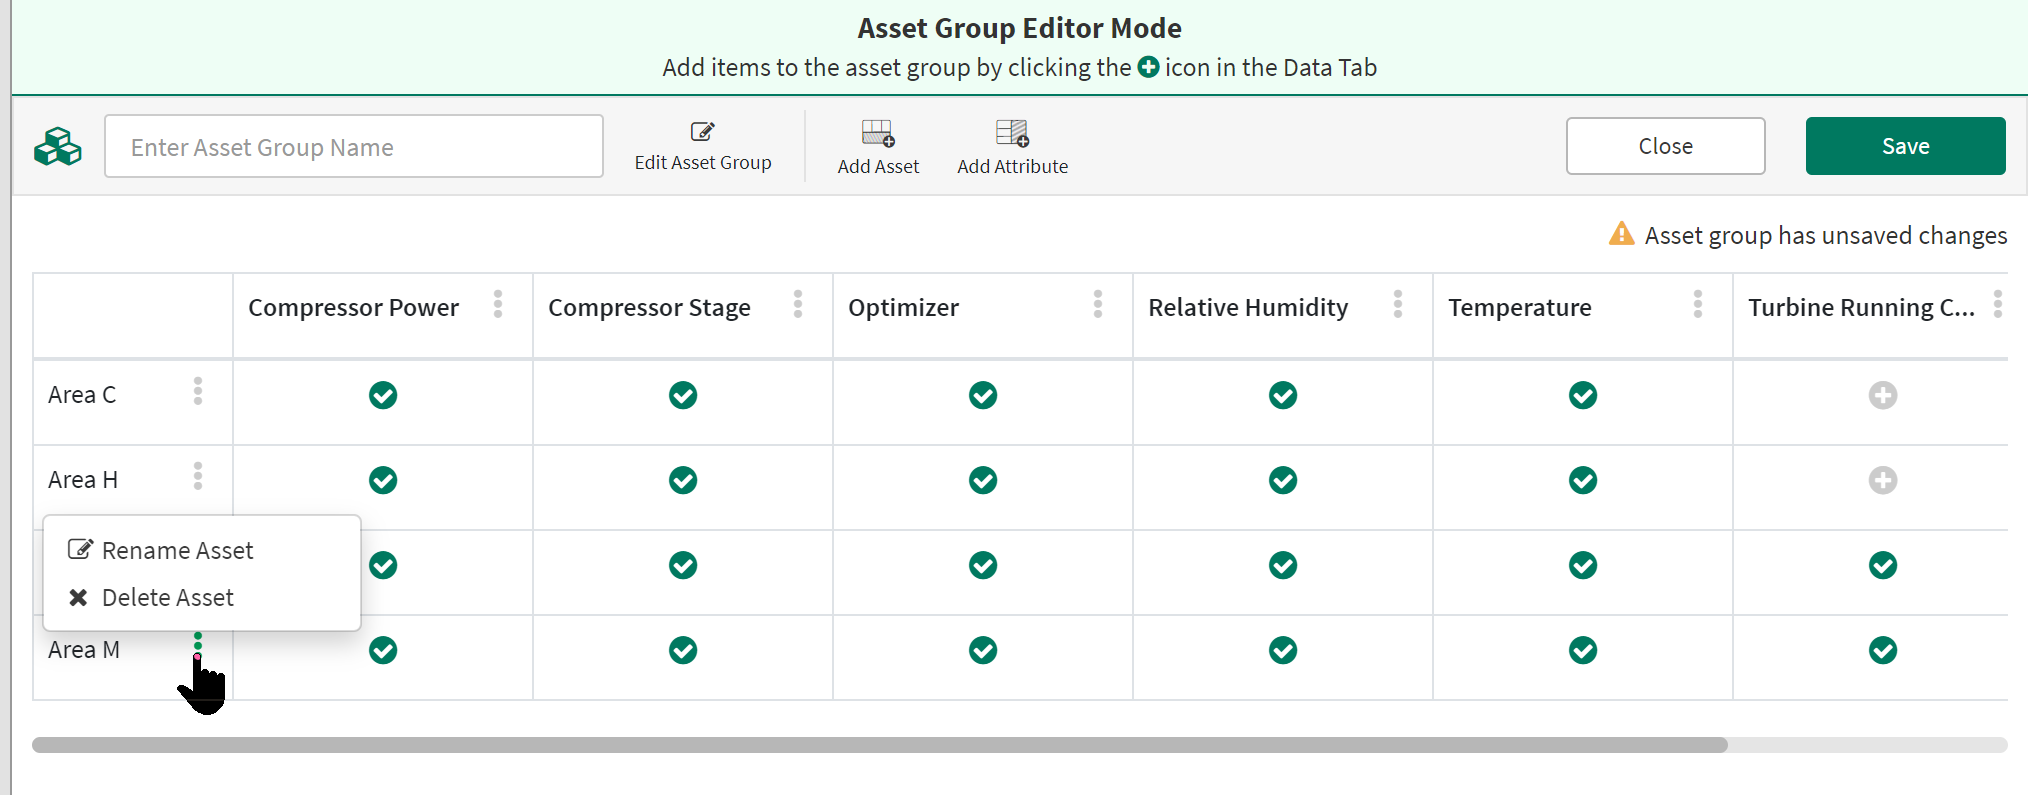
There are buttons in the tool bar at the top of the screen which allow you to build your own asset by searching for signals and conditions. The Add Asset button will add a row and the Add Attribute button will add a column.
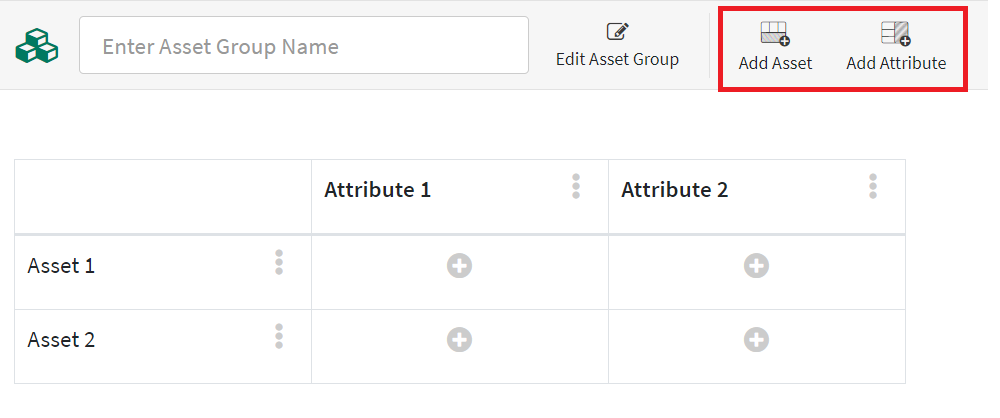
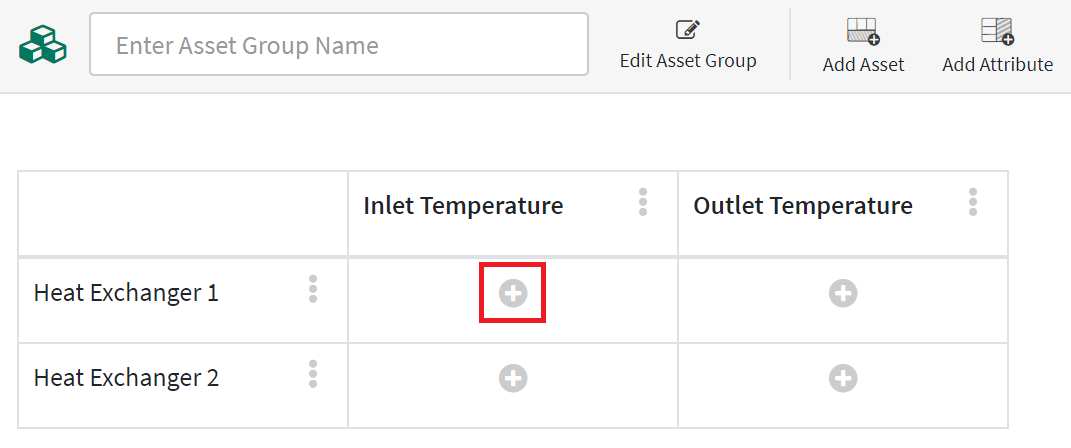
Name your Assets and Attributes by clicking on the headers. Click the ![]()
Additional Options
Editing and Deleting an Asset or Attribute
You can edit the name of an asset or attribute by clicking on the name or by clicking the 3 dot menu and clicking Rename Asset or Rename Attribute. You can delete an asset or attribute by clicking the 3 dot menu next to its name and clicking Delete Asset or Delete Attribute.
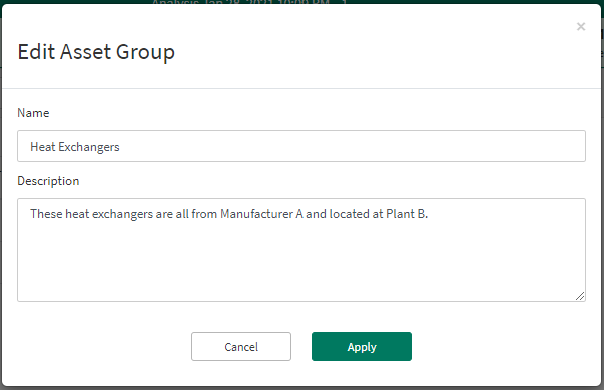
Adding a Description to your Asset Group
You can add a description to your asset group by clicking the Edit Asset Group icon to the right of the name field.

Advanced Options
Adding Only Certain Items from an Asset Tree
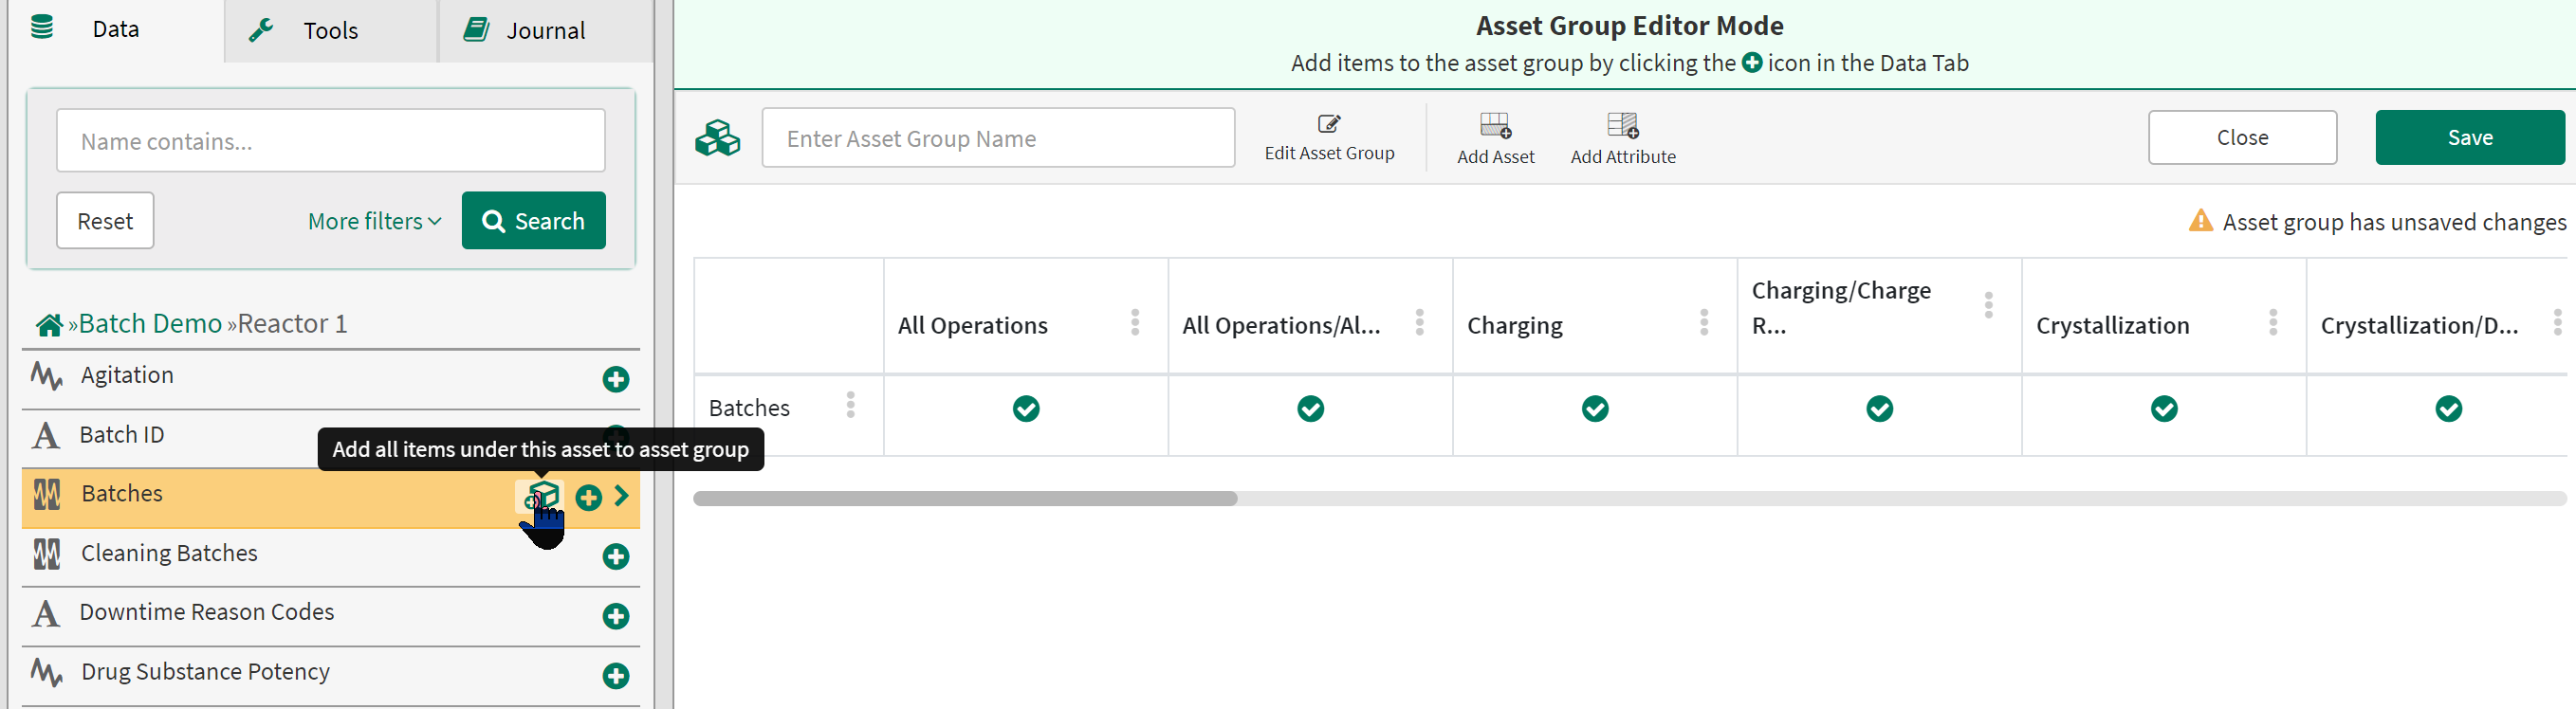
Often asset trees have many more items than you are interested in. You can build an asset group with only the items that you want to analyze. Start by drilling down to the level where the signals or conditions are. Click the ![]()

Add all the signals you want as part of this asset using this method.
Once you have added all desired attributes for one asset, go up to the level with the other assets you want to add. You will notice that another button appears ![]()
Editing Attribute Mapping
When starting from an existing asset tree there may be times when you would like to replace what the original asset tree had with another item. Clicking on the ![]()
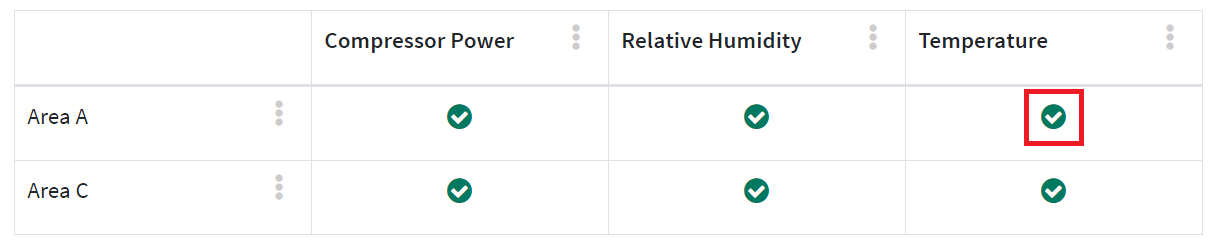
From here you can click the edit icon to change the item mapped to this attribute or remove the mapping so that there is no item for this attribute on this asset.
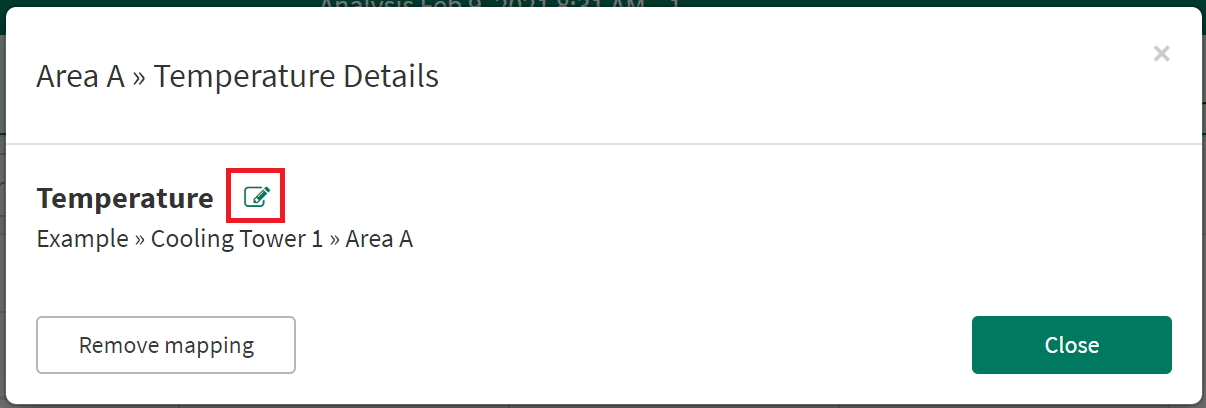
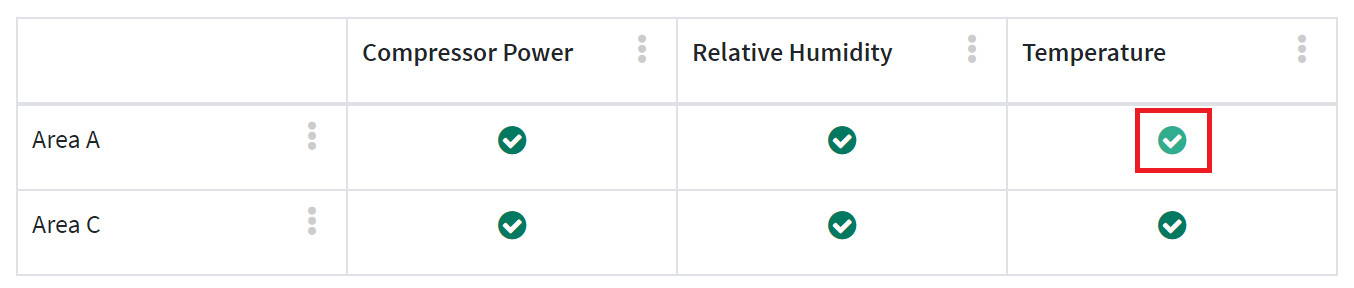
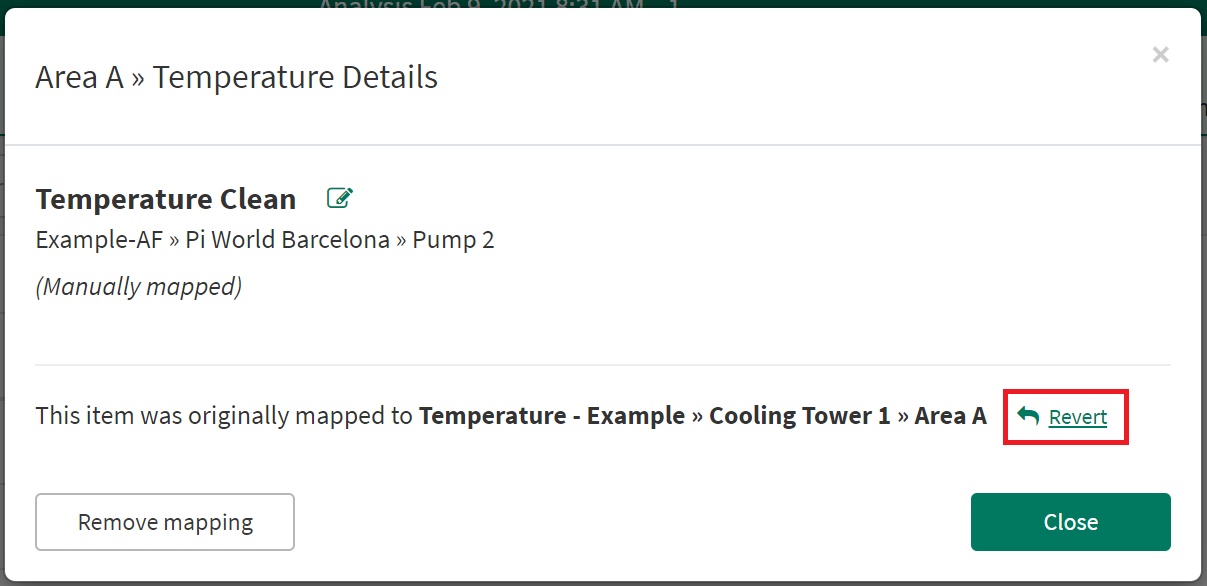
If you manually change the mapping by clicking the edit icon, clicking the check mark will show you the manually mapped item as well as the original mapping.
You can revert to the original mapping by clicking the Revert button.
Asset Trees with items under other items rather than assets
If you are starting from an asset tree which has items under items rather than under assets (i.e. a condition which has sub-conditions or a signal which has signals underneath it), you will notice that you have two options:
Clicking the ![]()
Clicking the ![]()