Request and install Seeq SSL certificate under Windows
his article will guide you through generating a Certificate Signing Request (CSR), installing the certificate in Windows and extracting the public and private key for use with Seeq.
Once you have these two files generated (“seeq-key.pem” and “seeq-cert.pem”), please refer to this document for the next steps.
Generate Certificate Signing Request (CSR)
A certificate Signing Request is a message sent from an applicant to a certificate authority (CA) in order to apply for a digital identity certificate. The request contain identifying information such as domain name(s), company name, location etc along with a public key which will be used when issuing the certificate. During the generation of a Certificate Signing Request, a new private key, which matches the public key in the CSR, will also be generated automatically. To generate a CSR, follow the steps below.
Click Start > Run. Enter MMC and click OK | 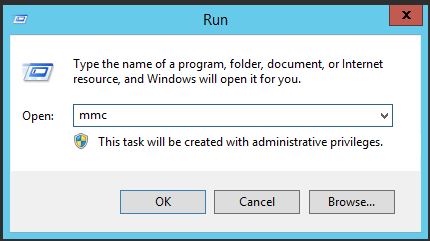 |
Go to File > Add/Remove Snap-in | 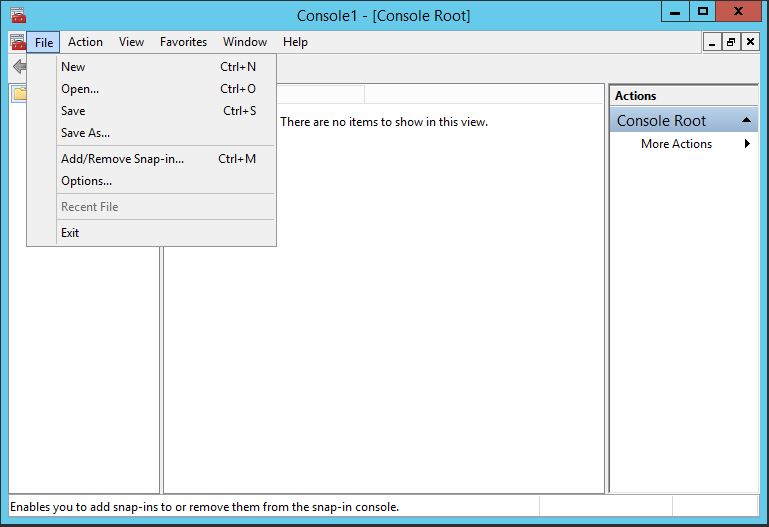 |
Select Certificates and click Add | 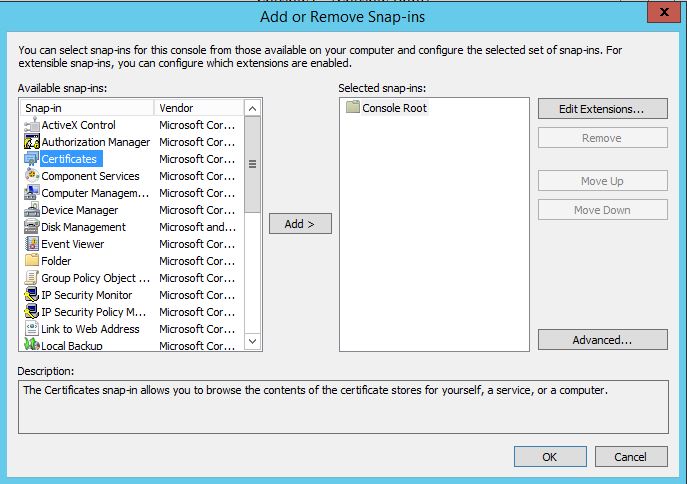 |
Select Computer account and click Next | 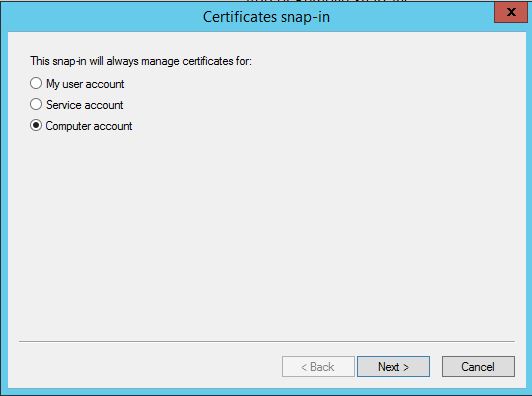 |
Select Local Computer and click Finish |  |
Click OK to close the Snap-ins window | |
Double-click on Certificates (Local Computer) to expand its view | |
Click on the Personal folder, then right-click and select All Tasks > Advanced Options > Create Custom Request... | 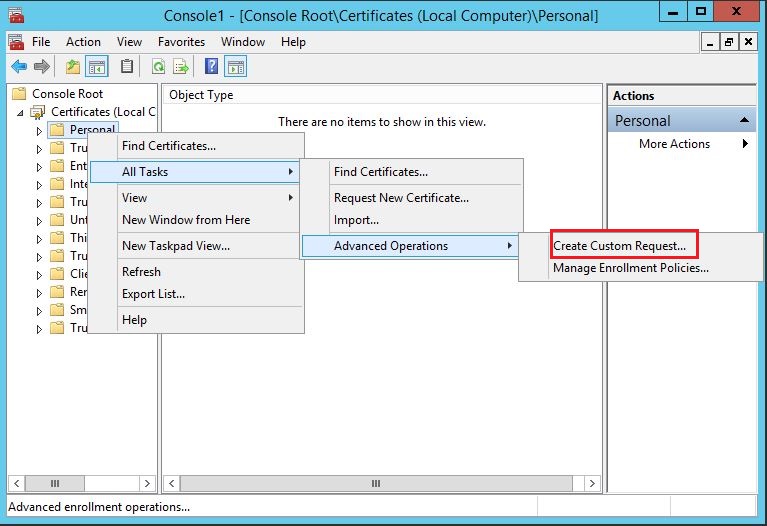 |
Click Next on the Certificate Enrollment wizard |  |
Select the option Proceed without enrollment policy and click Next to continue | 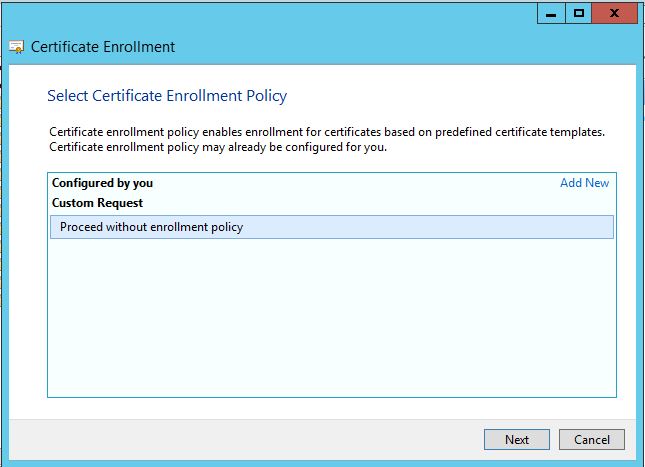 |
Click the template dropdown and select (No template) Legacy key, select PKCS #10 under Request format and click Next to continue | 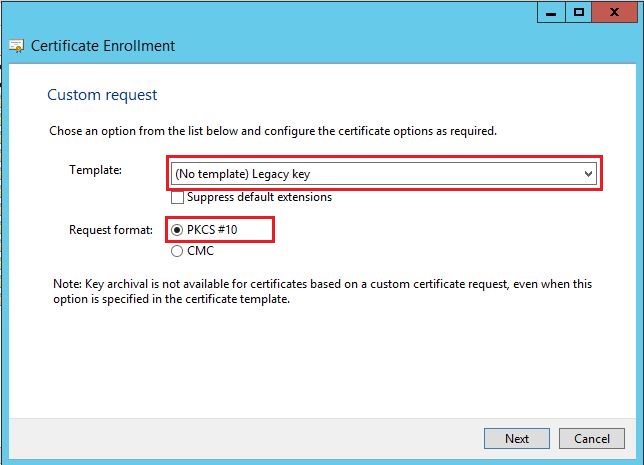 |
Expand the Details section by clicking on the arrow pointing down and then click on the Properties button | 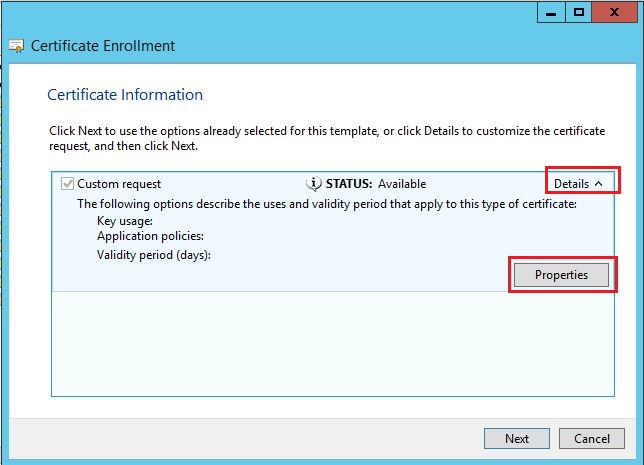 |
On the General tab, type in a friendly name for the SSL certificate and (optionally) a description. We recommend using the domain name as the friendly name. |  |
Click on the Subject tab, then select Common name in drop down list under Type. In the value field, enter the fully qualified domain name (FQDN) for the server which will be used for accessing Seeq. Make sure the fully qualified domain name is all lowercase, then click the Add button. | 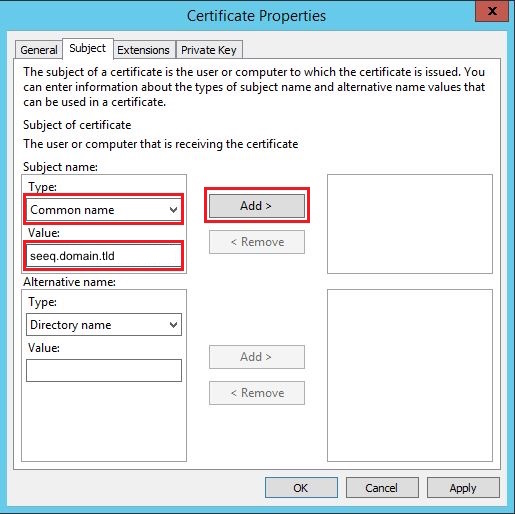 |
Continue with the same step above for the following fields: Organization: the organization's legal business name | |
Add an Alternative name by selecting DNS as the Type and entering an alternative domain name in the value field and then clicking the Add button. Alternative names can be any way that this server might be accessed: different hostnames, IP address, etc. Add the FQDN and all other hostnames (or IP addresses) that users will use to access this server. If a user attempts to connect to a server via a name or IP address that isn't listed in the certificate, they will receive a certificate error and the connection will fail. Some browsers (e.g. Google Chrome) will reject a certificate if this field is not present. Multiple alternative names can be added, but should be kept to a maximum of 5. If the certificate is rejected because of | 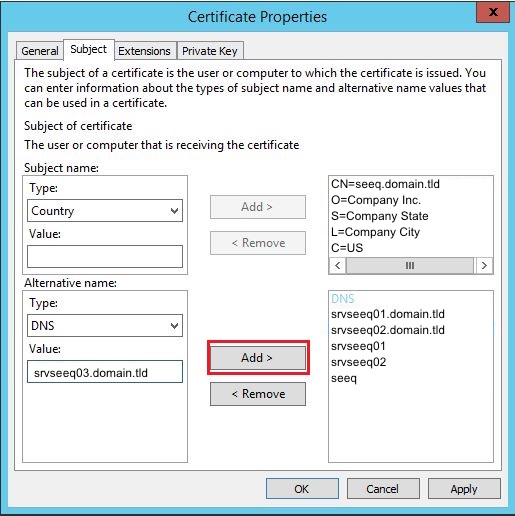 |
Click on the Private Key tab, then make sure only Microsoft RSA SChannel Cryptographic Provider (Encryption) is checked in the list. There's a bug in this part of the certificate properties, so sometimes other cryptographic service providers suddenly appear checked, which will cause the following steps to fail (other fields either disappear or are disabled), so make sure you scroll up and down the list of cryptographic service providers and make sure to continue only when Microsoft RSA SChannel Cryptographic Provider (Encryption) is checked. | 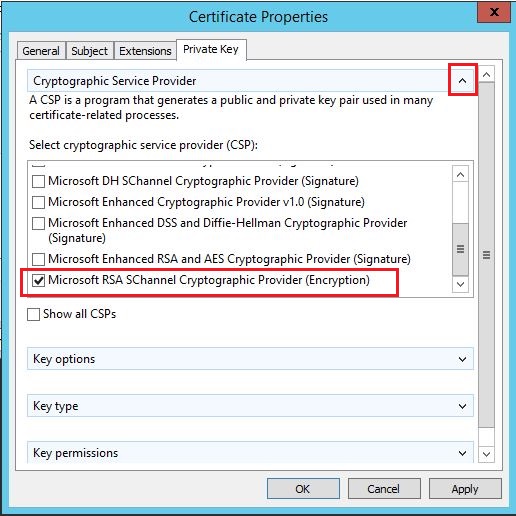 |
Expand the Key options section by clicking the down arrow. Set the Key size to at least 2048 and make sure to check the box to Make private key exportable | 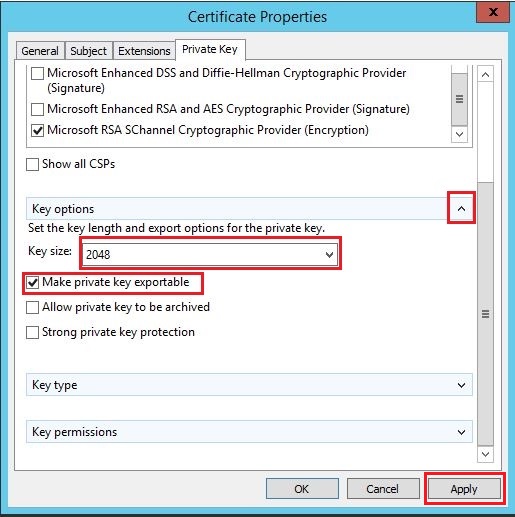 |
Expand the Key type section, then select the Exchange option. Click Apply, then OK followed by the Next button to continue. |  |
Click on the Browse... button to select the location where the Certificate Signing Request (CSR) should be saved. (You may get a Save As pop-up dialog box. Enter the file name and desired location here and click "Save", then you'll see the below screen and can continue. The "Save As" screen won't show the option about "Base 64". You just have to give the directory and file name first to get to this below screen where you can choose the File Format.) Make sure to set the File format to Base 64, then click the Finish button. | 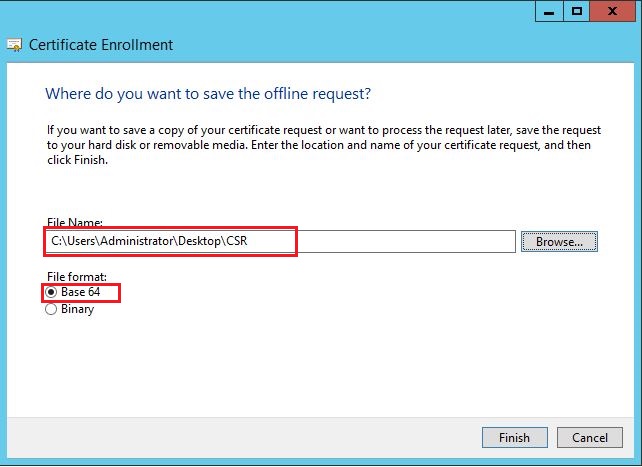 |
Now the CSR can be sent/emailed to either an official Certificate Authority (CA) or to the local IT department. (To generate a Self Signed Certificate using OpenSSL, use the steps listed here.) Proceed to the section below once the certificate has been received/generated. |
Installing the received certificate
Once the issued certificate has been received, install it by following the instructions below.
Click Start > Run. Enter MMC and click OK | |
Go to File > Add/Remove Snap-in | |
Select Certificates and click Add | |
Select Computer account and click Next | |
Select Local Computer and click Finish | |
Click OK to close the Snap-ins window | |
Double-click on Certificates (Local Computer) to expand its view | |
Click on the Personal folder, then right-click and select All Tasks > Import... | |
Start the wizard by clicking Next | |
Make sure "Place all certificates in the following store" is selected and make sure the certificate store is set to Personal, then click Next. | |
Click Browse... and select the received certificate, then click Next to continue the import wizard. | |
Enter the password for the private key and make sure "Mark this key as exportable" is checked, then click Next. | |
The certificate should now be successfully imported. You should be able to see the certificate in the list and it should have a golden key on the icon. |
Exporting the public and private key for use with Seeq
Seeq does not currently support the Windows Certificate Store, so to be able to use the certificate with Seeq, the certificate and private key have to be exported using the following instructions.
Click Start > Run. Enter MMC and click OK. | |
Go to File > Add/Remove Snap-in | |
Select Certificates and click Add | |
Select Computer account and click Next | |
Select Local Computer and click Finish | |
Click OK to close the Snap-ins window | |
Double-click on Certificates (Local Computer) to expand its view | |
Click on the Personal folder, then right-click on the certificate to export and select All Tasks > Export to open the Certificate Export Wizard | |
Make sure "Yes, export the private key" is selected, then click Next | |
Make sure the export format is set to "Personal Information Exchange - PKCS #12 (.PFX)", that "Include all certificates in the certification path if possible" is selected and that "Delete the private key if the export is successful" and "Export all extended properties" are not selected, then click Next. | |
On the Security page, enter and confirm a password, then click Next. | |
On the File to Export page, enter a path and file name of the file you want to save to, then click Next. | |
Verify that all export settings are connect, then click Finish. | |
The .pfx file should now be in the location selected. |
The exported PFX file contains both the private key and the certificate, and possibly intermediate certificates and a certificate authority certificate.
Converting a PFX file to seeq-key.pem and seeq-cert.pem
Seeq requires the private key and all the certificates to be in two separate files, so the exported PFX file has to be converted to seeq-key.pem (the private key) and seeq-cert.pem (the certificate, intermediate certificates and certificate authority certificate if not issued by a known certificate authority). OpenSSL is an excellent tool for converting between different certificate formats, and it's included in OSX/Mac OS and Linux. OpenSSL for Windows can be downloaded from https://wiki.openssl.org/index.php/Binaries .
Extracting the private key
Run the following OpenSSL command to extract the private key from a PFX file to a PEM file:
openssl pkcs12 -in yourpfxfile.pfx -nocerts -out seeq-key.pem -nodesIf there is a password on the .pfx file, add the -passin parameter:
openssl pkcs12 -in yourpfxfile.pfx -nocerts -out seeq-key.pem -nodes -passin pass:yourpasswordExtracting all certificates
Run the following OpenSSL command to extract the certificate from a PFX file to a PEM file:
openssl pkcs12 -in yourpfxfile.pfx -nokeys -out seeq-cert.pem -nodesIf there is a password on the .pfx file, add the -passin parameter:
openssl pkcs12 -in yourpfxfile.pfx -nokeys -out seeq-cert.pem -nodes -passin pass:yourpasswordThis will extract all the certificates found in the PFX file, but unfortunately there's no guarantee that they are in the right order. The order should be server/client certificate first, then any intermediate certificate and finally CA certificate, but if the certificate is issued by an official/trusted certificate authority, only the server/client certificate needs to be in the seeq-cert.pem file. After extracting the certificates, open the seeq-cert.pem file in a text editor and make sure it only contains certificate blocks (beginning with a -----BEGIN CERTIFICATE----- marker and ending with a -----END CERTIFICATE----- marker). If there's any text between the marker for the end one certificate and the marker for the beginning of another certificate (this could for example be a description of the certificate, bag attributes, information about certificate subject or issuer etc), it must be deleted.
The generated seeq-cert.pem file can be verified using the methods described in Verifying the seeq-cert.pem certificate file.
Extracting only the client certificate (Advanced)
To only extract the client certificate from the PFX file, use the following command. Note that this command should only be used if you want to manually assemble the final seeq-cert.pem file.
openssl pkcs12 -in yourpfxfile.pfx -nokeys -out seeq-cert-client.pem -nodes -clcertsExtracting only the CA certificate (Advanced)
To only extract the CA certificate from the PFX file, use the following command. Note that this command should only be used if you want to manually assemble the final seeq-cert.pem file.
openssl pkcs12 -in yourpfxfile.pfx -nokeys -out seeq-cert-ca.pem -nodes -cacertsOnce you have these two files generated (“seeq-key.pem” and “seeq-cert.pem”), you must now place these two files in the keys folder under the Seeq global folder then restart Seeq. (please refer to this document for the next detailed steps.)
Keys Folder
The keys folder where the two certificate files are to be copied is not created by default. You to create it manually. To get the Seeq Global Folder you need to run the command below in the Seeq command prompt:
seeq config get foldersFrom the output, get the value for
Folders/Global
Navigate to the folder and create a folder named “keys” then copy the two cert files into it. Upon restarting Seeq, the certificate should be picked by the system and valid.
Troubleshooting
For troubleshooting and verification information, see Troubleshooting Secure Configuration (SSL/TLS)