How to Develop a Simple Interactive Add-on Tool using Seeq Data Lab
Overview
Seeq Data Lab uses Jupyter to write code and develop scripts. Jupyter is a web-based interactive computing platform that allows for the creation of documents that contain live code, equations, visualizations, and narrative text. These documents are called notebooks and are ideal for prototyping, data analysis, teaching, and more. Voila is the library that Seeq Data Lab uses that allows you to turn your Jupyter notebooks into an Add-on, making it easy to share your work with others.
In this document, we will show you how to develop a simple Add-on Tool that interacts with a Seeq Workbench. This Add-on Tool utilizes a Jupyter notebook, along with ipywidgets and ipyvuetify libraries, and it operates in Add-on Mode. All the packages used (ipywidgets and ipyvuetify) come preinstalled with Seeq Data Lab. More information on how to install packages can be found here — Seeq Data Lab | Installing-Python-Modules
Steps
Create a Data Lab Project and Jupyter notebook
Write the code for your Add-on Tool
Launch your Notebook as an Add-on using Add-on Mode
1. Create a Data Lab Project and Jupyter Notebook
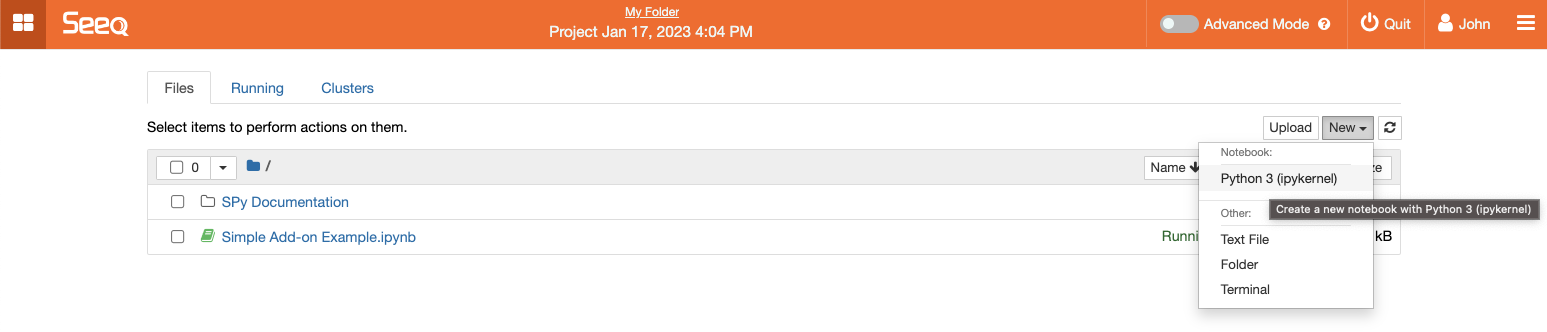
To create a Jupyter notebook, follow these steps:
Open a new Data Lab Project.
Select "New".
Select "Notebook".
Choose a programming language for your notebook (e.g. Python). If you are interested in using R please check out this article on how to add the R kernel to Seeq Data Lab - Enabling R Language Support
2. Write the Code for Your Add-on
In your Jupyter notebook, write the code for your Add-on using Python. For this example, we will create a simple Add-on Tool that retrieves the signals from a worksheet, allows the user to perform a couple basic arithmetic operations, and push the new signal back to the worksheet. The operations are broken up into multiple sections.
Import the packages
Define the widgets (This example uses ipyvuetify, but ipywidgets is a good alternative)
Perform some actions with the inputs
Output the results
The example notebook can be downloaded here:
Add-on with SPy interaction with workbench.ipynb
3. Launch Your Jupyter Notebook as an Add-on
To launch your Jupyter notebook as an Add-on, follow these steps:
In Data Lab (Notebook or Advanced Mode), click the "Add-on Mode" button in the upper-right corner of the interface.
Voila will convert your Jupyter notebook to a standalone web application.
Common Code Snippets for use in Add-on Tools
The following snippets can be used by Add-on Tool creators to extract and make use of the query parameters or otherwise modify the state of the Add-on Tool.
Retrieve parameters (e.g. workbook ID, worksheet ID) from Target URL:
import urllib.parse as urlparse
from urllib.parse import parse_qs

url = jupyter_notebook_url
parsed = urlparse.urlparse(url)
workbook_id = parse_qs(parsed.query)['workbookId'][0]
worksheet_id = parse_qs(parsed.query)['worksheetId'][0]
Retrieve all items on current workbook display:
from seeq import spy
import urllib.parse as urlparse
from urllib.parse import parse_qs

url = jupyter_notebook_url
parsed = urlparse.urlparse(url)
workbook_id = parse_qs(parsed.query)['workbookId'][0]
worksheet_id = parse_qs(parsed.query)['worksheetId'][0]
host = spy.client.host[:-3]
URL = host+'workbook/'+workbook_id+'/worksheet/'+worksheet_id
worksheet_items = spy.search(URL)
Retrieve start and end timestamps from current workbook display and store as values in ipydatetime widgets:
from seeq import sdk
import urllib.parse as urlparse
from urllib.parse import parse_qs
import ipydatetime

url = jupyter_notebook_url
parsed = urlparse.urlparse(url)
workbook_id = parse_qs(parsed.query)['workbookId'][0]
worksheet_id = parse_qs(parsed.query)['worksheetId'][0]
workstep_id = parse_qs(parsed.query)['workstepId'][0]

# Pull the workbook
wb = spy.workbooks.pull(workbook_id)

# Find the current worksheet based on the worksheetId in the query parameters
current_worksheet = [ws for ws in wb[0].worksheets if ws.id ==worksheet_id][0]

# Get Display Range
display_range = current_worksheet.display_range

# Insert values into ipydatetime widget
start_select = ipydatetime.DatetimePicker(description='Start Time: ', value=display_range['Start'])
end_select = ipydatetime.DatetimePicker(description='End Time: ', value=display_range['End'])