Updating Remote Agents from Seeq Server
This article explains how Seeq admins can use the Seeq UI to update remote agents' Seeq version.
Prerequisites
The user must have access to the ‘Agents’ tab to perform remote agent updates.
Remote agents must have the following configurations and Seeq must be restarted after changing this configuration.
seeq config set Features/RemoteAgentUpdates/Enabled True
seeq config set Installation/ServerType Agent
seeq config set Installation/RunAsService TrueRemote Agents' versions previous to R56 should make sure that the Network/Hostname configuration parameter value is the same as the computer name of the remote agent.
seeq config get Network
Check if the value of Network/Hostname is the same as the machine name. If so, no further steps are needed.
If not, execute the below commands.seeq config set Network/Hostname {machine name}
The above command will modify the Network/Webserver/Url configuration too. Make sure to set it back to the original value (you can get it from the output of the previous commandseeq config get Network)seeq config set Network/Webserver/Url {url_to_server}Firewall settings for the remote agent machine must allow HTTP access to the server.
Agent Version Support Warnings
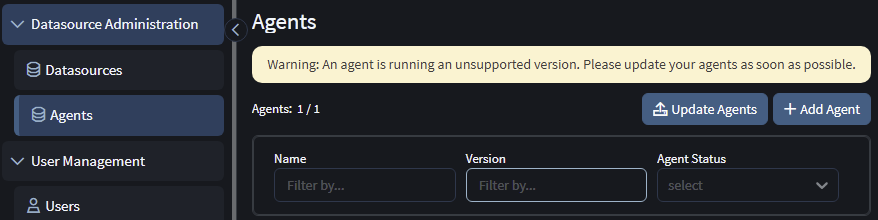
Warning messages will appear on the Datasources and Agents tabs when you have Agents running on versions that are no longer supported by Seeq. Versions that are 1 year older than the latest release will be marked as unsupported, and those that are within 90 days of becoming unsupported will be marked as nearing unsupported.
While these messages have no direct affect on your agents and unsupported version will continue to run as before, it’s important to be aware that there is no guarantee that these versions will be compatible with newer releases of the Seeq Server and this can cause unpredictable behavior and failures. Please upgrade any unsupported agents at the earliest opportunity to ensure continued correct operations.
Warning Messages
"Warning: An agent is/# agents are running a version that will be unsupported in less than 90 days. Please update your agent as soon as possible."
"Warning: An agent is/# agents are running an unsupported version. Please update your agent as soon as possible."
Instructions
Log in to the Seeq as an admin.
From the hamburger menu at the top right of the page, click ‘Administration’.
Select ‘Datasource Administration’ > ‘Agents’ from the list of options at the left of the page.
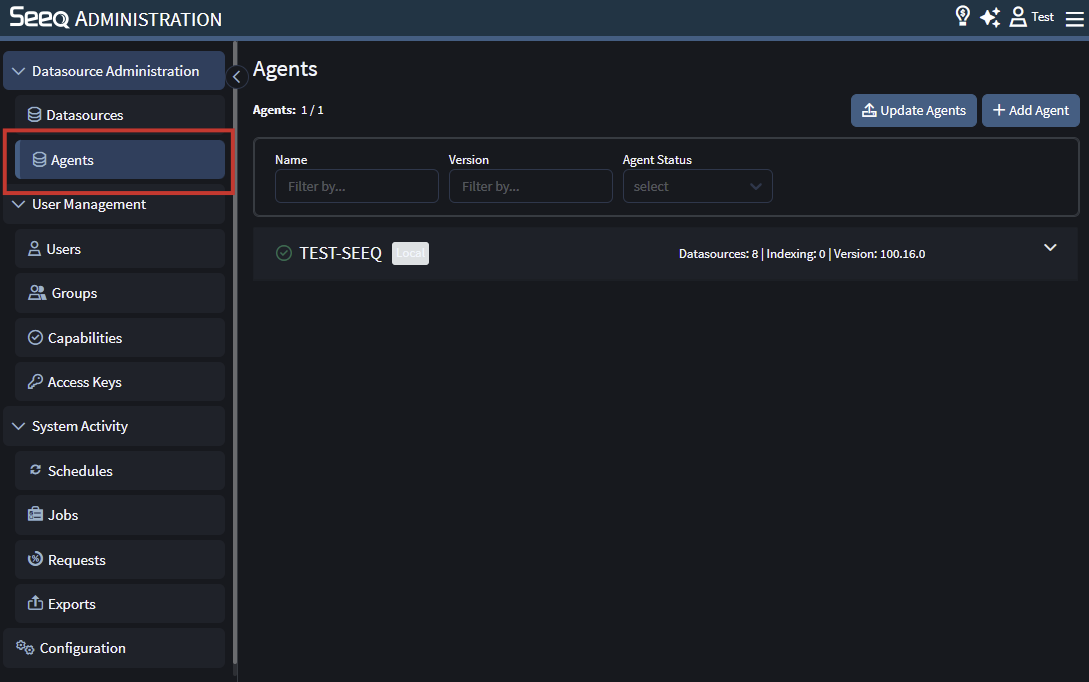
On this page, you can see the provisioned Remote Agents as well as their status and version information.
Remote Agent version update functionality is available for all remote agents which have
Features/RemoteAgentUpdates/Enabledset to true. To update your agents, click the ‘Update Agents’ button at the top right of the page.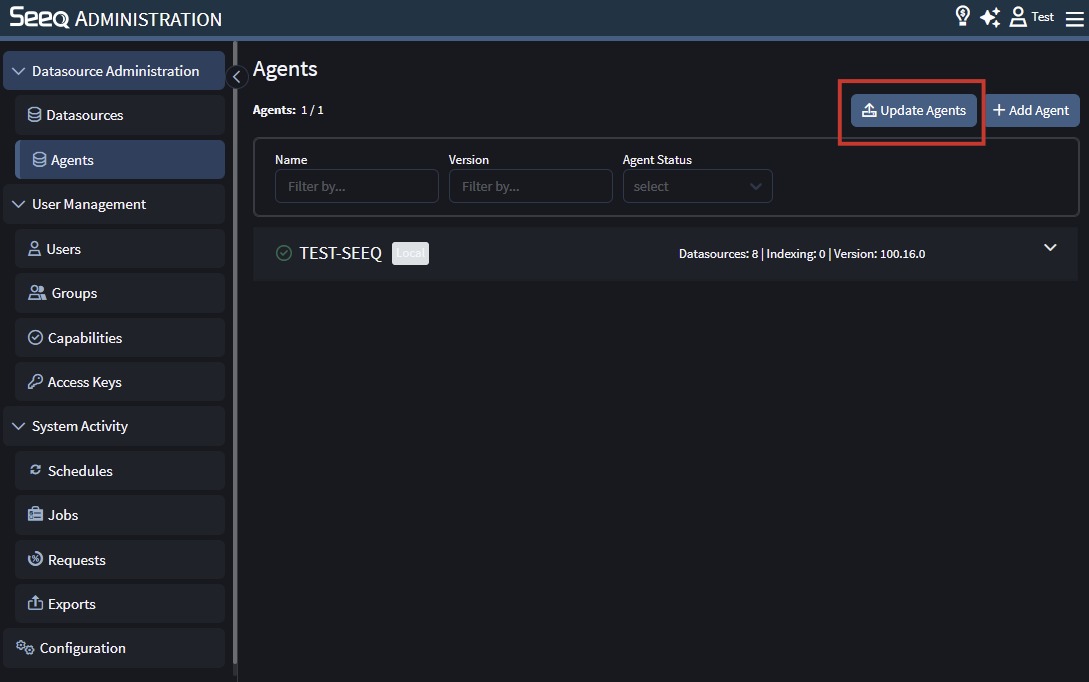
The 'Update Agents' window will appear. This window lists all remote agents along with their version number and any in-progress update status reports. It also provides an overall status summary of how up-to-date your collection of agents is and provides the interface for initiating upgrades across all agents.
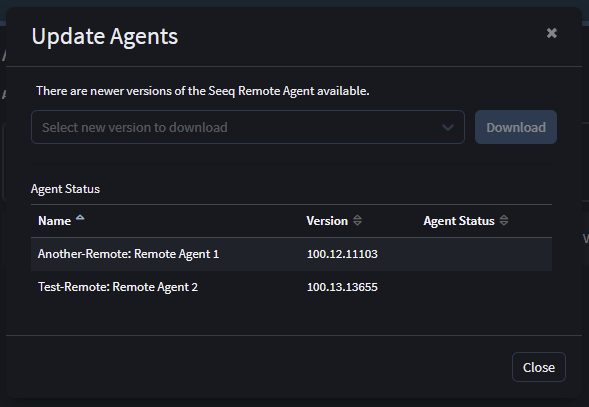
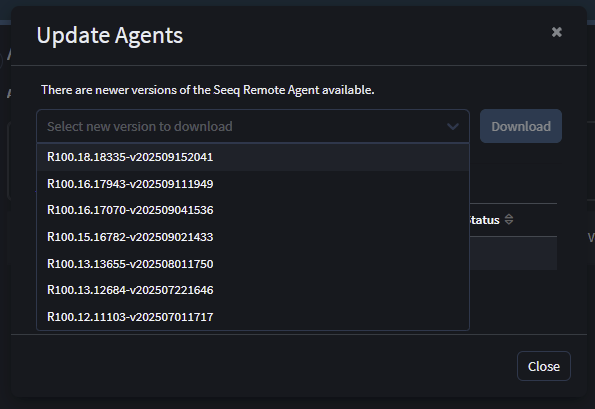
The dropdown list on the ‘Update Agents’ window displays available Seeq Remote Agent versions that are more recent than your oldest installed version. Select the version you want to upgrade the agents to and then click the ‘Download’ button.
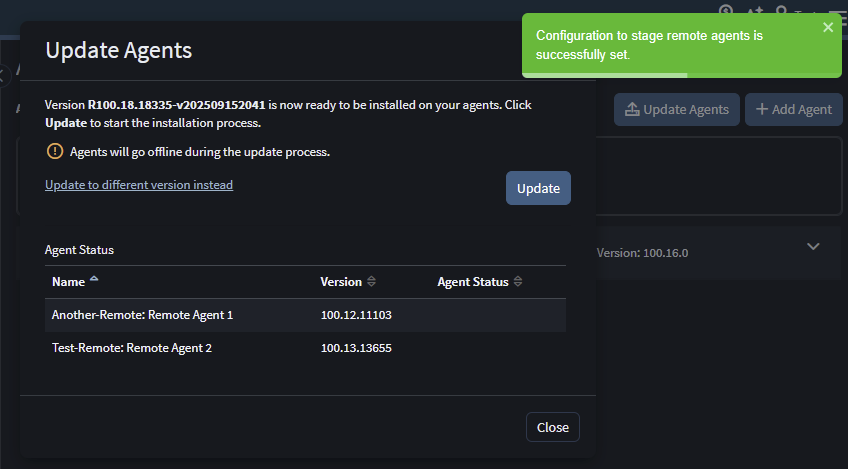
At this point, the Seeq Server will begin downloading this version and then distributing it to your Remote Agents. The status messages will indicate when this download is in progress on your remote agents. You may wait for any downloads to complete before initiating the upgrade or your can click the ‘Update’ button to have the upgrades automatically start as soon as the downloads complete.
Note that the Remote Agents will need to detect that new version Download and Update commands have been issued on the server and that this checking is performed periodically every 10 minutes by default. This can cause a delay between initiating an upgrade step and the process being reflected in the agent status.
If you decide, after downloading a Remote Agent version, that you want to install a different version, you can click the ‘Update to different version instead’ link and select a new version to download.
After clicking ‘Update’, the ‘Update Agents’ window will display the upgrade progress of your Remote Agents.

Note: The ‘Updates Agents’ window can be closed while the upgrade is progress without interrupting it.
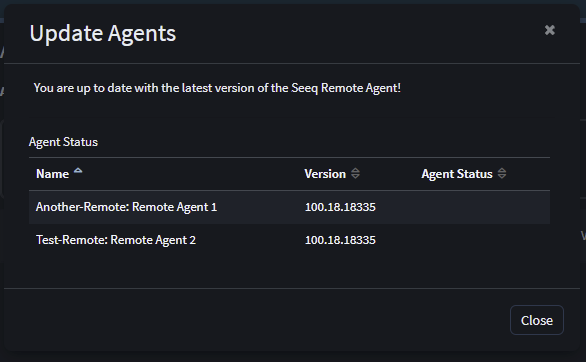
The ‘Update Agents' window will update when all upgrades are complete.
Troubleshooting
Debugging tip: this method of updating the remote agents will install Seeq to a new “Installations” directory within the data folder (i.e.
ProgramData\Seeq\Data\Installations\R5X.X.X)Remote agents send the status message to the server periodically which is logged in appserver.log on the server. Look for “agents/remote-updates/<agent_name>/directives” in
appserver.logto find the communication sent by the remote agent to the server. No log found for an agent suggests that either there is a problem in the connection between RAU and server (could be this CRAB) or the update process is not running on the remote agent. Check the configurations suggested in the prerequisites. Seeq on the remote agent should be restarted after the configuration change.When
Features/DatasourceManagement/Enabledis updated from command prompt or from Administration UI User needs manually refresh the browser page in order to see the Agents tab appeared/hidden.When
Features/RemoteAgentUpdates/Enabledset to False on the Agent side and User requests to stage or upgrade agents via Administration - Agents UI Seeq would show a green banner with a confirmation text for the successful request placing. The confirmation is only relevant to the fact that the required setting is performed on the server-side and that it has started asking for staging/update through the API. On the Agent, staging or update won’t be performed unless the configuration parameterFeatures/RemoteAgentUpdates/Enabledis set to True.The automated upgrade feature is not preventing users from downgrading the Seeq version on agents' machines. And we do not recommend doing so.
ERRORin version update status column with a tooltip messagePlease contact Seeq Support. Remote Agent Update Path conflict detected.
Root Cause: This suggests that customer has moved global data directory. The path in<base_installation>/set-installation-path.batfile is not pointing to<data_folder>/installations.
Resolution: Open seeq command promopt and runseeq install --data <data-folder>command to correct the path conflict. Example for <data-folder>: D:\ProgramData\Seeq\dataJVM Agent did not connect to the server after the update
RCA: CAcert files were missing in the new install directory
Resolution: Manually copy cert files in the <data-folder>/installations/<current-version>. We have a CRAB that may fix it.
Agent did not restart with the new version and looped through a restart.
Investigation: Check remote-updates.log. Text ‘Restart to <version>’ is repeating. Compare the text/path in
set-installation-path.batin Seeq base folder with path of the data folder.RCA: Customer had done a couple of manual configurations and tweaks leading to inconsistencies in Seeq config paths. We checked paths using
seeq config get Installand a few of the values were referring to the folders inF:\whereas only one (global data) was pointing toC:Manual copy and paste of data folders can be the reason for the inconsistencies.Resolution: Running the command
seeq install --datashould correct the paths. Else updateset-installation-path.batin base install of Seeq to point to the correct folder i.e. /seeq/data/installations/<new version folder>.
Moving the
datadirectory after a remote agent update isn't possible without resetting the base because the installation is actually running from within thedata\installationsfolder already
In that case, since you're already on the system and can make changes, a suggestion is to run the installer for the same version. That will reset the base version to the current version and allow the command to completeRemote agent update doesn't connect because of bad proxy settings. Root Cause: By default, the Proxy Auto-Configuration (PAC) script is resolved from the
PAC_URLenvironment variable. If this is not provided, it tries to resolve the PAC URL using the OS settings. If nothing has been provided in the OS settings, the updater attempts to resolve the PAC URL using the WPAD protocol. To disable resolution via the WPAD protocol, set the configuration parameterNetwork/Http/WpadPacDiscoveryEnabledtoFalse.