Planning Seeq Access for External Users
Introduction
The information in this document requires additional licensing. Please contact your Seeq representative for more information.
There are many situations where a rich information exchange would benefit our customers. Joint ventures, partnerships, or virtual operation centers are cases where a Seeq Customer would want to share some of their data with external users. This article explains how to configure Seeq to make this possible.
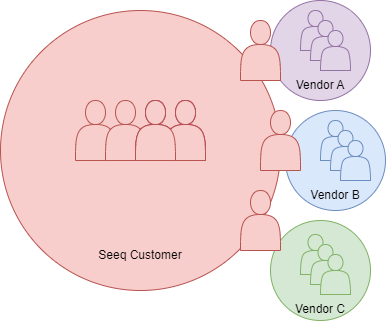
The goal of external user access is to allow for frictionless sharing for users within the Seeq Customer while providing controlled bi-directional data exchange with external users. The membership structure is reflected in the image below. There is an Everyone group that automatically includes all users internal to the Seeq Customer. Additionally, external groups can interact with a subset of internal users. These external groups have users that are not part of the customer's organization but are the customer's vendors, partners, or customers.
Planning
Authentication
To enable external access, administrators should plan their deployment accordingly. First, your Seeq instance needs to be connected to an identity provider. This can be through our LDAP, Windows Authentication, or OpenID Connect connectors. Vendors can be connected with their users using a separate authentication connection (LDAP, Windows Auth, or OpenID Connect) or by creating the users directly in the Seeq Directory.
Option 1
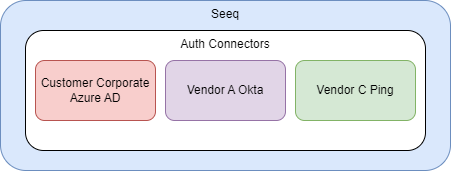
Each vendor has their own authentication connection. In this case, the users served by the Customer Corporate Azure AD would be added to the Everyone group. However, the users served by Vendor A Okta or Vendor C Ping would not. This means Vendor A and C users need to be added to a group with the appropriate rights before accessing or sharing content with others.
Option 2
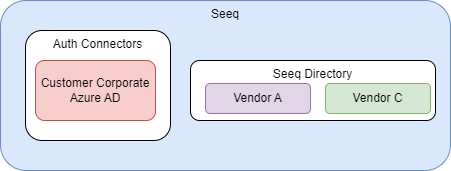
Vendors are created as users within the Seeq Directory and placed into individual groups. In this case, the groups within the Seeq Directory would not be part of the Everyone group. Vendor A and C users must be placed into a group with the appropriate rights before accessing data or sharing content.
Group Creation
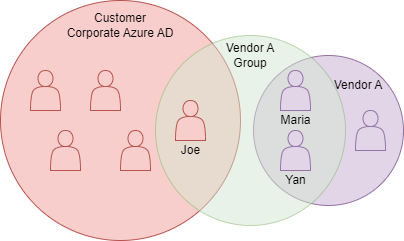
For data to be effectively accessed or content to be shared, groups must be created. It is suggested that groups of collaborators be created. For example, if Joe from the Customer Corporate Azure AD needs to work with Maria and Yan from Vendor A, a group should be created to facilitate this.
In the image above, the group Vendor A Group is created to facilitate interaction between Joe, Maria, and Yan. This will allow for sharing of content between the three individuals. Note Yan and Maria will need access to the content's data in addition to the content. Data can be shared on a signal by signal, asset, or datasource, depending on what the use case requires.
Configuration
Configuring Which Authentication Connections' Users are Added to the Everyone Group
Authentication Connectors
If Authentication is provided by a connector (for example, the Windows Authentication, LDAP, or OpenID Connect), providing users to the Everyone group can be configured from the Datasource Administration tab within the Administrator UI.
As a Seeq Administrator, click on the menu and click on Administration.
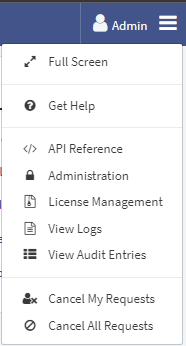
From the list of data sources, click on the desired authentication connector to expand it.

Click on the blue Manage button. This will pop up a modal that can turn on or off the including of identities in the everyone group.
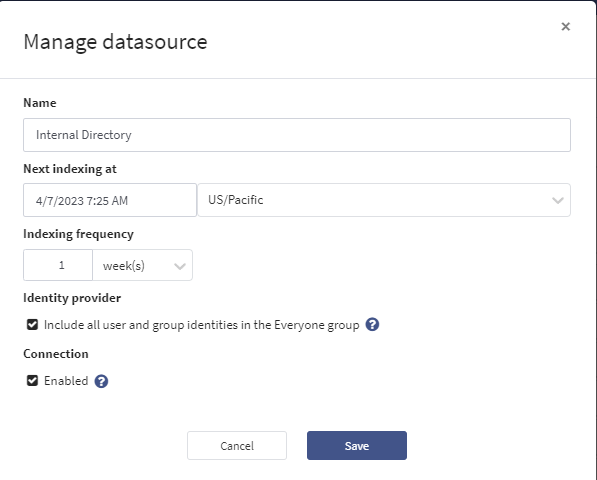
Check the box to Include all user and group identities in the Everyone group if it is an internal authentication source, or uncheck it if it is external. Click Save.
Authentication Connectors with Group Synchronization
If the Authentication source supports group synchronization (For example, OpenID Connect for Azure AD and LDAP) and the source contains external users, a property transform must be applied to ensure that groups can be managed.
As a Seeq Administrator, click on the menu and click on Administration.

From the list of data sources, click on the desired authentication connector to expand it.

Click on the Configure button, and paste the following JSON into the Transforms text box in the Modify connection modal that appears.
[
    {
        "Inputs": [
            {
                "Property": "Name",
                "Value": ".*"
            }
        ],
        "Outputs": [
            {
                "Property": "Remote Group Editable",
                "Value": true,
                "UnitOfMeasure": null
            }
        ],
        "Enabled": true,
        "Log": false
    }
]
The modal should now look like the screenshot below.
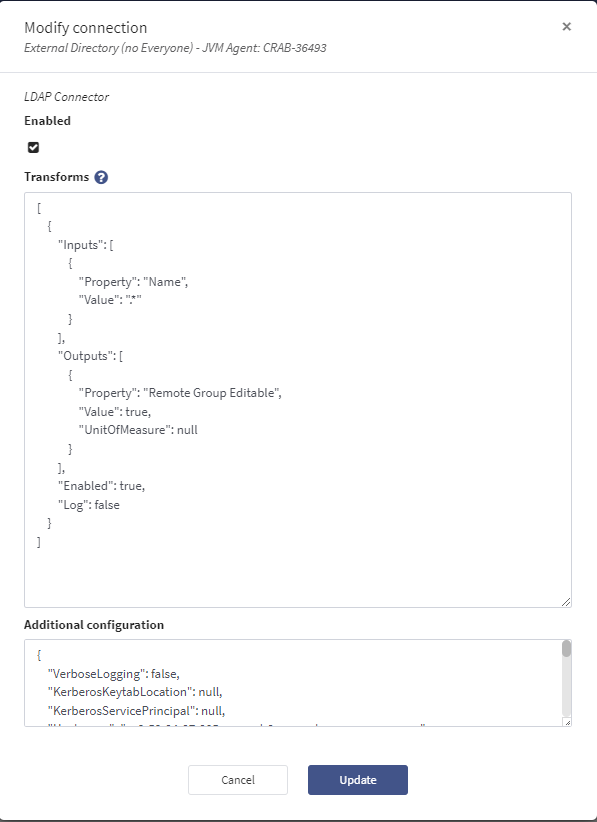
Click Update.
Disabling Automatic Inclusion of Seeq Directory users in Everyone group
By default, the Seeq Directory users will have access to the Everyone group. To disable this, a Seeq Administrator must click on the menu and go to API Reference.
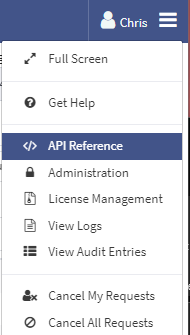
Click on Auth to expand the section and expand GET /auth/providers. Click Execute.
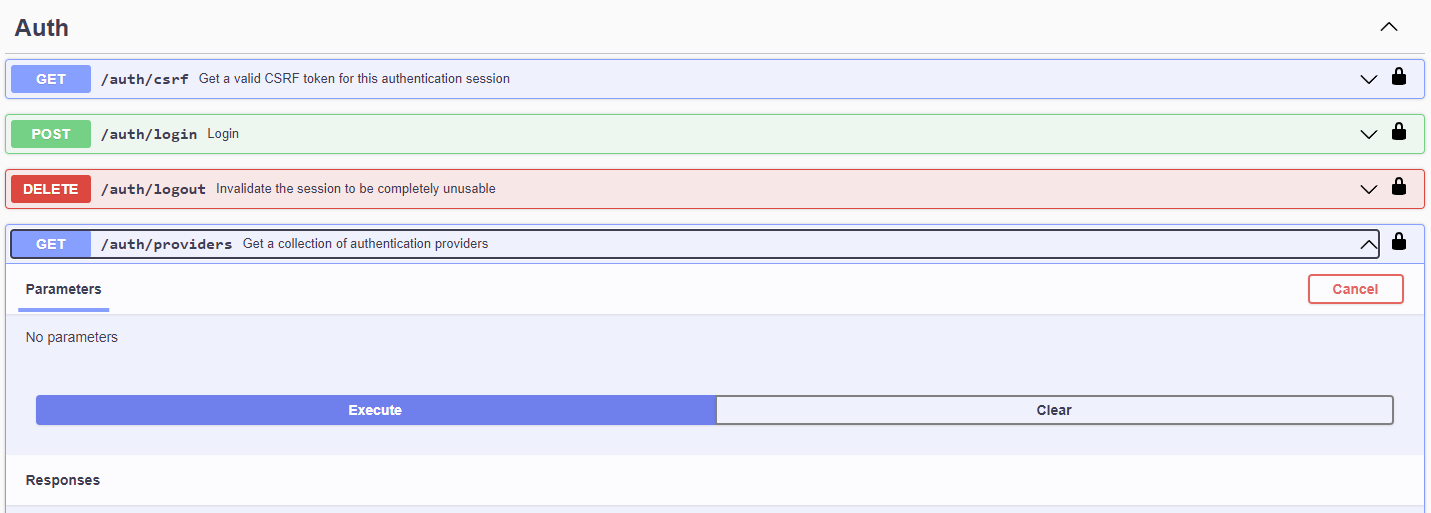
In the Response Body, you should see the authProviders listed there. You want to look for the authProvider named Seeq.
{
      "id": "EFD324C2-B6FE-4639-B255-DD7CB8AB58F6",
      "name": "Seeq",
      "type": "Datasource",
      "effectivePermissions": {
        "read": true,
        "write": true,
        "manage": true
      },
      <snip>
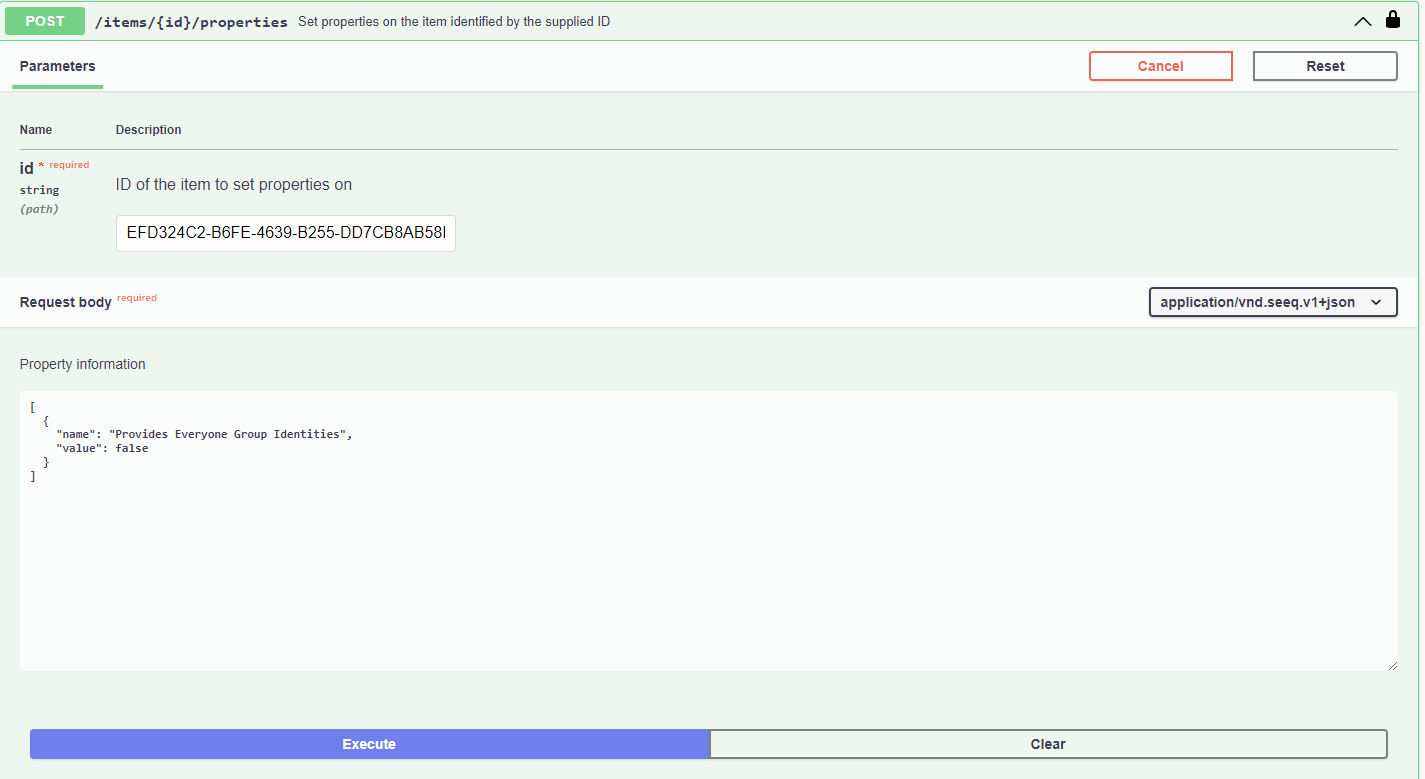
Copy the id value from the response. Scroll down and click on Items to expand the section. Click on POST /items/{id}/properties, and paste the id copied from the JSON response above. Within the Property Information box, paste the JSON content shown below.
[
  {
    "name": "Provides Everyone Group Identities",
    "value": false
  }
]
The form should look like the screenshot below.
Click Execute.
The Seeq Directory no longer puts users in the Everyone group. Additionally, all users and groups from the Seeq Directory that are currently in the Everyone group will be removed.

