Example: Accessing Tabular Data
ADX Data
For this example we will index a simple table with individual columns for the signals and a single TimeStamp.
TS | Compressor_Power | Optimizer | Relative_Humidity | Temperature | Wet_Bulb |
2022-11-03T12:19:00 | 0.0029228 | 0 | 62.35181596 | 79.64134287 | 70.29920291 |
2022-11-03T12:20:00 | 0.0029228 | 0 | 62.38810345 | 79.63862069 | 70.30710957 |
2022-11-03T12:21:00 | 0.0029228 | 0 | 62.4371127 | 79.63413962 | 70.31706517 |
2022-11-03T12:22:00 | 0.0029228 | 0 | 62.48612195 | 79.62965854 | 70.32702076 |
2022-11-03T12:23:00 | 0.0029228 | 0 | 62.51398056 | 79.62615095 | 70.33182319 |
We will start out with an ADX table as pictured above (this table was generated using the ADX ingestion tools from the CSV file below, if you would like to replicate in your environment). This table is named AreaA within the database called Documentation.
Within the Azure ADX Portal Page this is what a take 10 would look like:
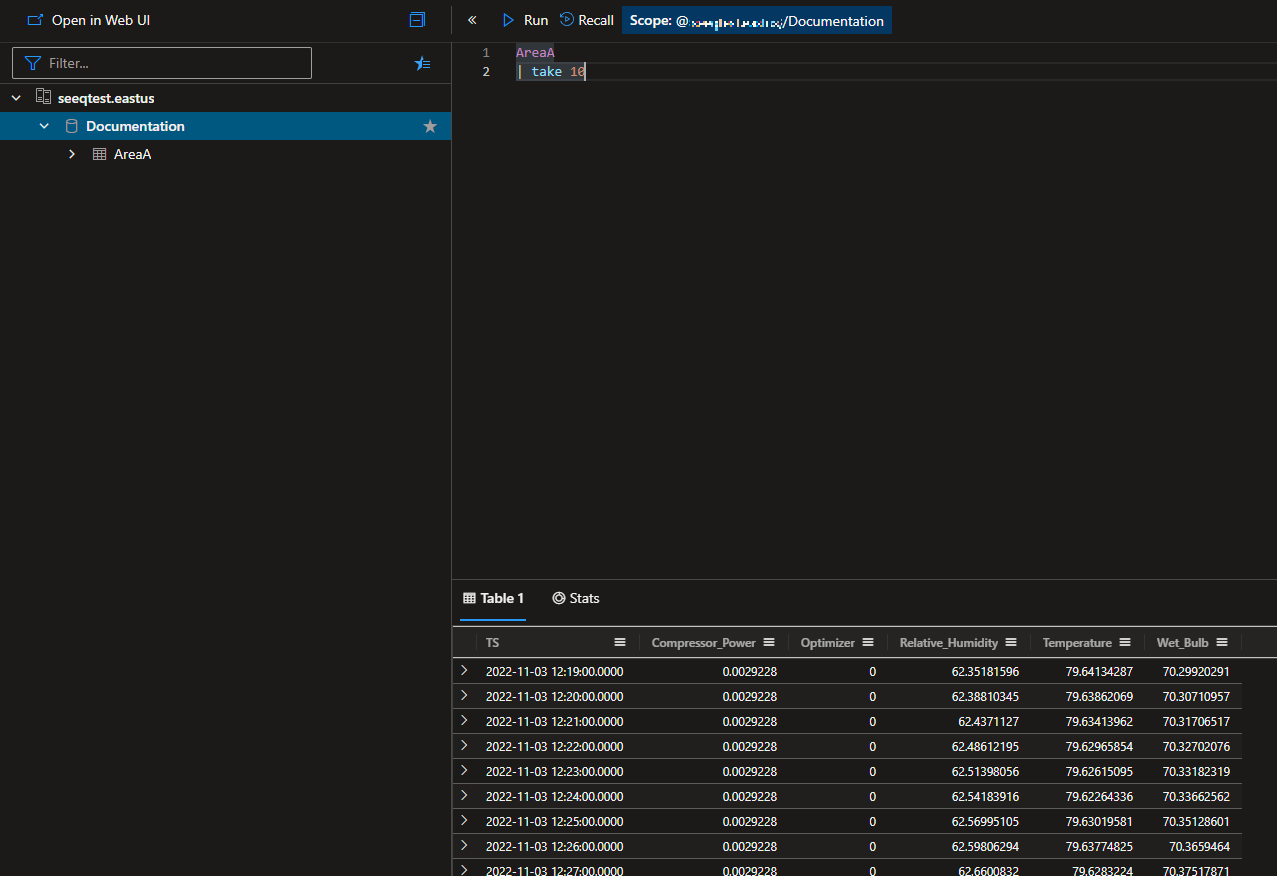
Within Seeq we would like to reflect each column as a separate signal. In order to achieve this we will configure a new ADX connection.
Creating the ADX connection
Proceed to the Administration page and click on the blue Add Connection button in the upper right.

From here, you will select an appropriate JVM agent from the drop down list, and then select the ADX connector. You can then select the default Template Connection (ADX Connection) to populate the Additional configuration box with a template for ADX-specific configuration.
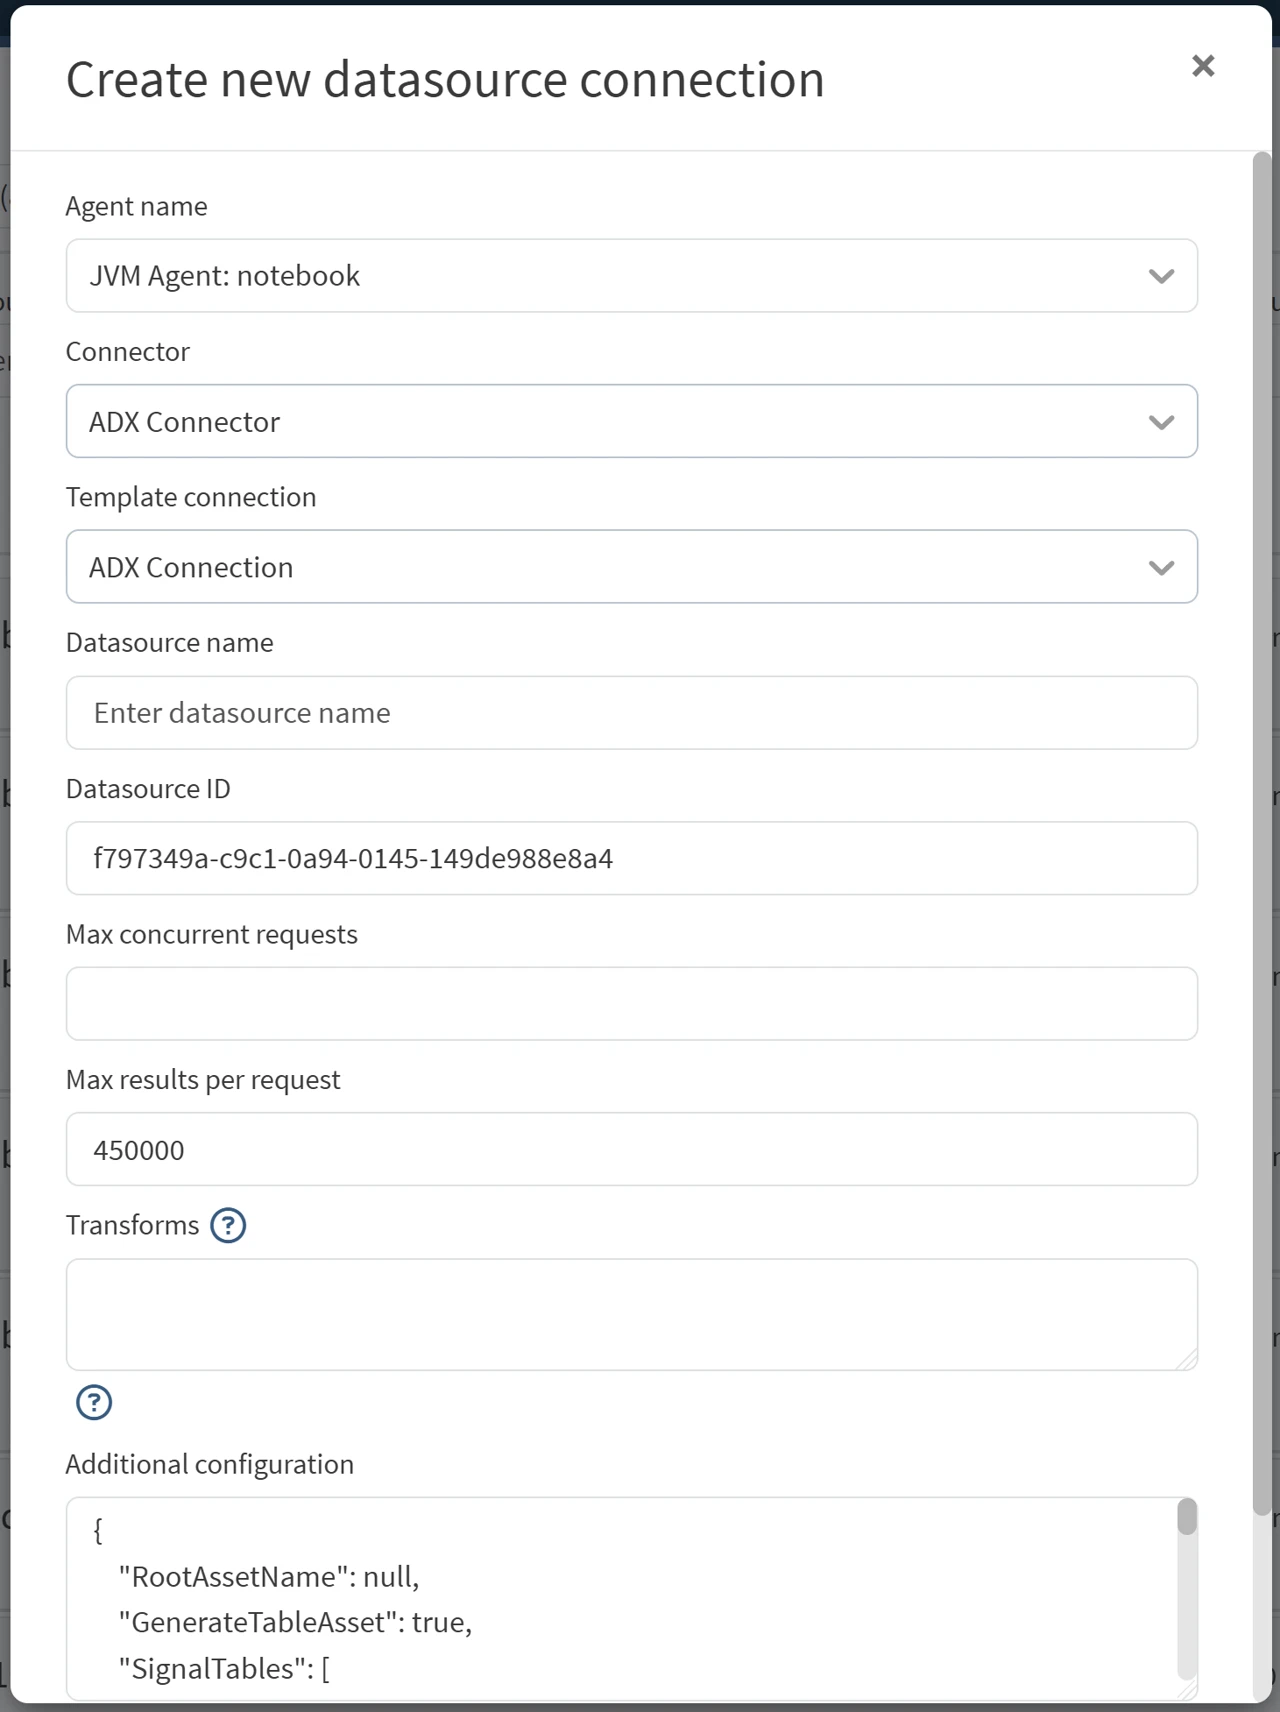
For a detailed description of the configuration file please see this document.
For this connection we are going to use the following configuration:
{
    "RootAssetName": null,
    "GenerateTableAsset": true,
    "SignalTables": [
        {
            "Id": "Simple Table 1",
            "Name": "AreaA",
            "NameQuery": null,
            "GroupBy": null,
            "GroupByLimit": 0,
            "DataColumns": [
                "Compressor_Power",
                "Optimizer",
                "Relative_Humidity",
                "Temperature",
                "Wet_Bulb"
            ],
            "DataColumnQuery": null,
            "TimeColumn": "TS",
            "LastGroupAsSignalName": false,
            "TransformQuery": null,
            "TimeUnit": null,
            "ComputedGroupByResult": null,
            "GroupByRequestProperties": null,
            "DataRequestProperties": null,
            "MetadataQuery": {
                "TableName": null,
                "Filters": null,
                "Columns": null
            },
            "MetadataIdColumn": null,
            "SignalPropertiesMap": null
        }
    ],
    "ConditionTables": [],
    "ApplicationId": "<example application Id>",
    "AccessKey": "<example access Key>",
    "TenantId": "<example tenant ID>",
    "UserName": null,
    "UserPassword": null,
    "Cluster": "https://<cluster name>.<cluster region>.kusto.windows.net",
    "Database": "Documentation"
}
Make sure to replace the Cluster, ApplicationId, AccessKey, and TenantId with appropriate values. Once this configuration is saved, the connection will automatically index and show something similar to the image below.
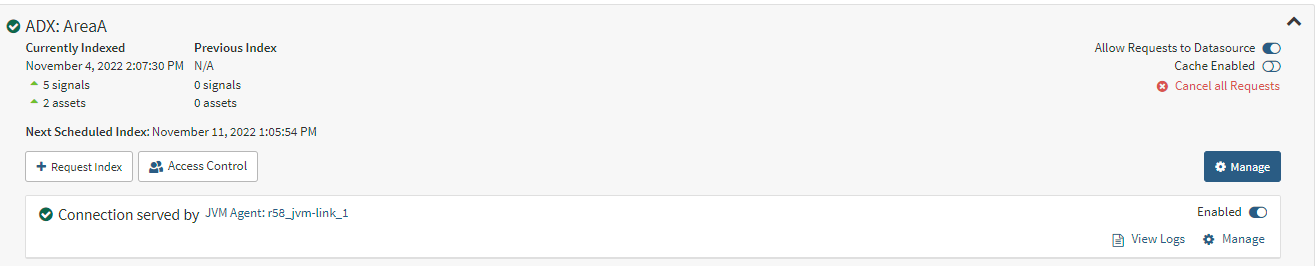
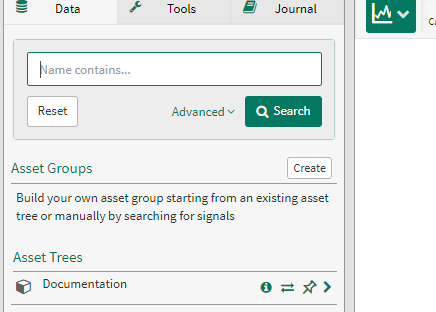
Navigating to a new workbench shows that there is now a new Asset tree with a root named Documentation.
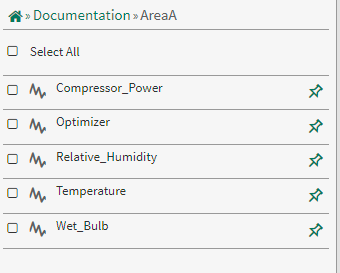
Within that tree we see the table and the associated signals
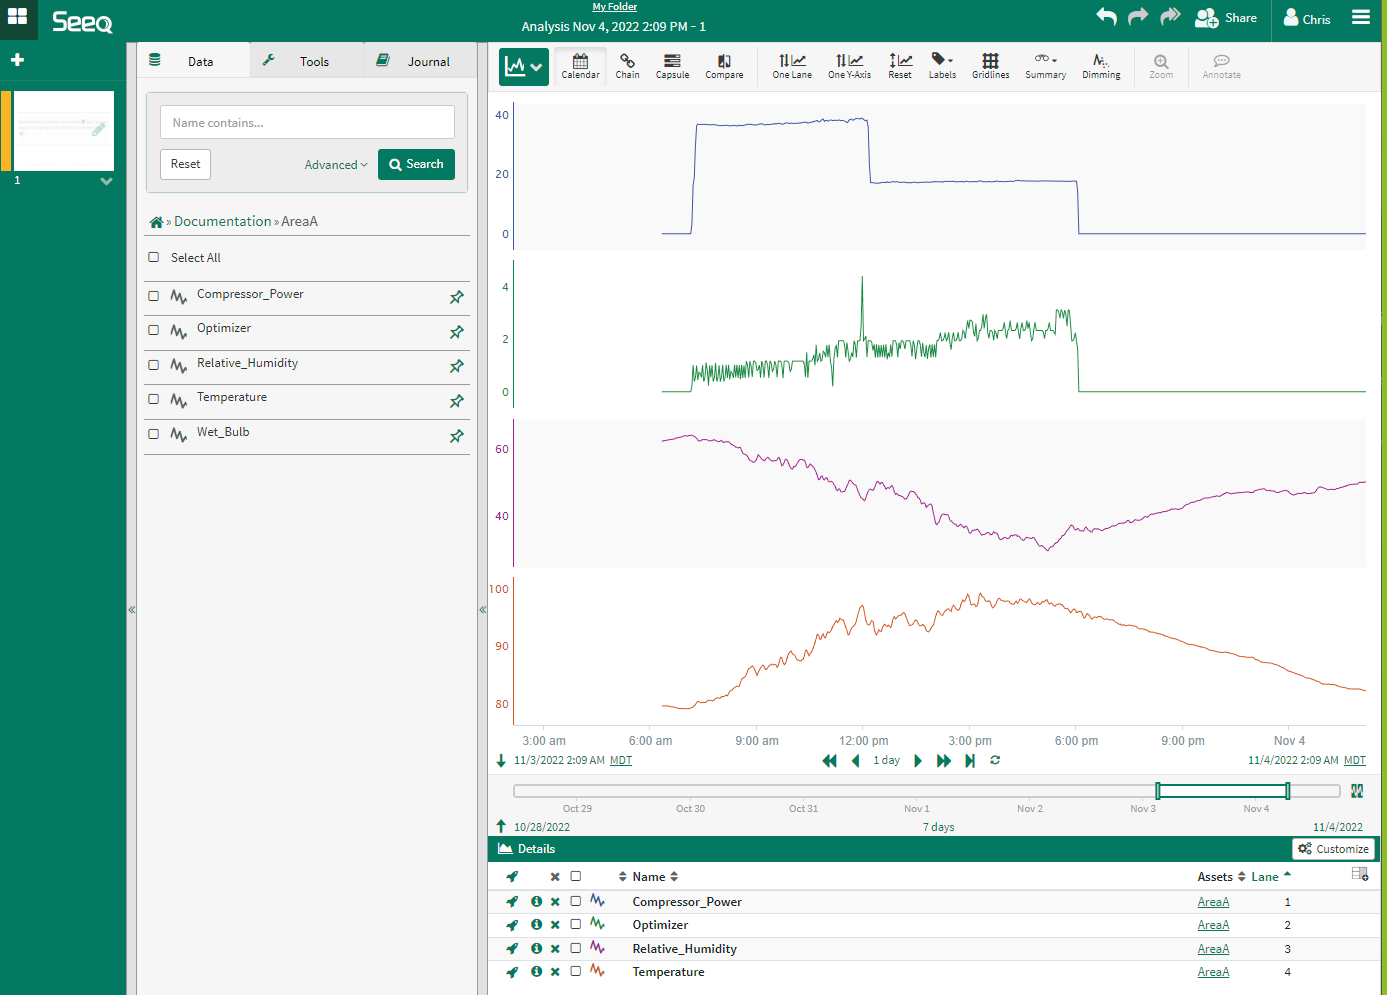
We can now begin to trend those signals by clicking on them.
Customization of the Asset Tree
In the example above, the database name was used as well as the name of the table within the tree. There are situations where this might not be acceptable. For example, you might want to have multiple connections to the same database, leading to multiple tree roots with the same name, or it is possible that the table name within the ADX database is not a human-understandable name. For these reasons there are two properties that can define how these assets are generated or not:
RootAssetName
GenerateTableAsset
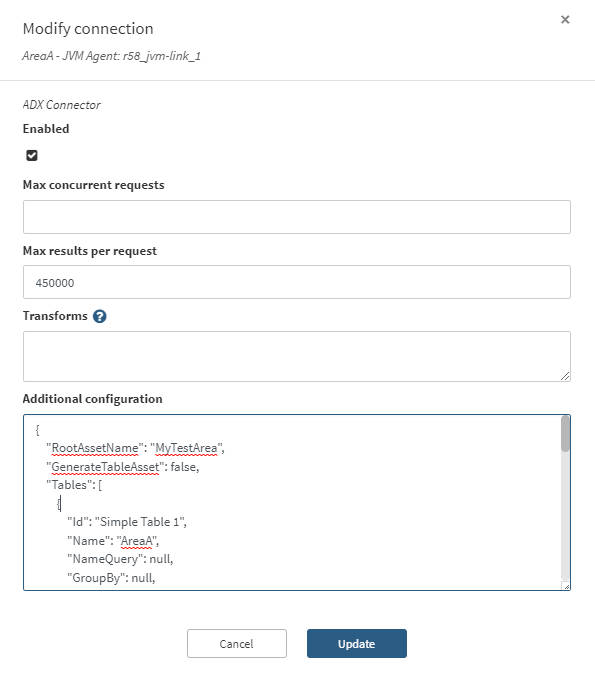
We will now modify the configuration above by going back into the Datasource tab within the Adminstration page in Seeq and click the Manage button (see below).

This will bring up the Modify Connection modal. We will modify the RootAssetName to be MyTestArea and we will set GenerateTableAsset to false. Click Update.
The connector will automatically re-index and you will notice that the asset count dropped by 1.

This is because we are no longer generating an asset for the table (in this example, AreaA).

Additionally, if we go back to Workbench we will see that the Documentation root asset has been replaced with MyTestArea.
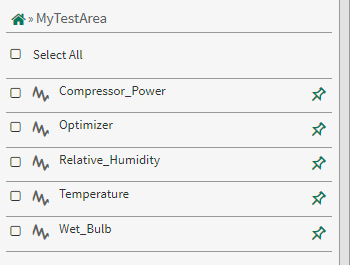
The signals are also parented directly to the root asset since no asset was generated for the table.