Overview
If you have not yet chosen a model, please see the implications section at the bottom of this guide before proceeding with this type of data model.
Often there will be additional layers of hierarchical information that will be stored along with the actual data. This guide will describe how to surface this hierarchical data as an Asset Tree within Seeq.
Accessing Asset Tree Data from Within Seeq
Prerequisites
Data in ADX
This guide will be using similar data to that which was used in Example: Accessing Data from an Entity-Timestamp-Value Data Model; however, we will be adding hierarchy information to that data as well. Our data will look like the table below:
|
TS |
siteId |
machineId |
lineId |
tag |
Value |
|
2022-11-03T21:27:47 |
Site 1 |
Line 1 |
MachineA |
Temperature |
-47.4309 |
|
2022-11-03T21:27:47 |
Site 1 |
Line 1 |
MachineA |
Pressure |
25.50104 |
|
2022-11-03T21:27:47 |
Site 1 |
Line 1 |
MachineA |
Power |
-14.0308 |
|
2022-11-03T21:27:47 |
Site 1 |
Line 1 |
MachineB |
Temperature |
79.60899 |
|
2022-11-03T21:27:47 |
Site 1 |
Line 1 |
MachineB |
Pressure |
-27.629 |
|
2022-11-03T21:27:47 |
Site 1 |
Line 1 |
MachineB |
Power |
99.64653 |
|
2022-11-03T21:27:47 |
Site 1 |
Line 1 |
MachineC |
Temperature |
32.08159 |
|
2022-11-03T21:27:47 |
Site 1 |
Line 1 |
MachineC |
Pressure |
79.92259 |
|
2022-11-03T21:27:47 |
Site 1 |
Line 1 |
MachineC |
Power |
162.3627 |
|
2022-11-03T21:27:47 |
Site 1 |
|
MachineA |
Temperature |
146.625 |
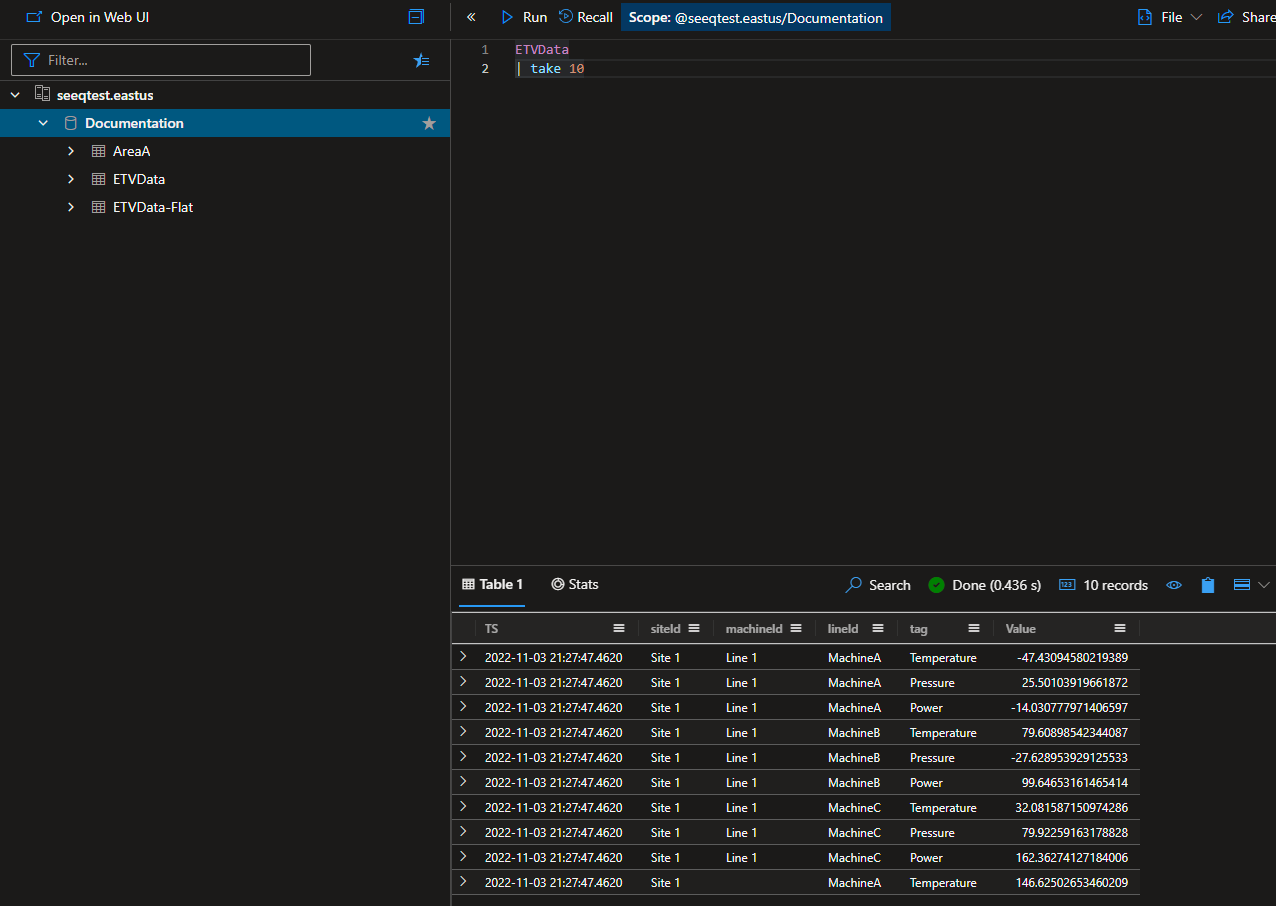
Once this data is ingested into the same ADX Database called Documentation as we were using in Getting Started, It will look like the image to the right. You will notice that there are some empty values for some of the asset levels, we will show how the connector handles this.
The goal of this connection is to build an asset hierarchy which represents the following structure:
-
Site
-
Line
-
Machine
-
tag
-
-
-
When this is reflected as an Asset Tree within Seeq it will be
-
Root Node Name
-
Site
-
Line
-
Machine
-
tag
-
tag
-
-
-
-
Creating the ADX connection
Proceed to the Administration page and click on the blue Add Connection button in the upper right.

From here, you will select an appropriate JVM agent from the drop down list, and then select the ADX connector. You can then select the default Template Connection (ADX Connection) to populate the Additional configuration box with a template for ADX-specific configuration.
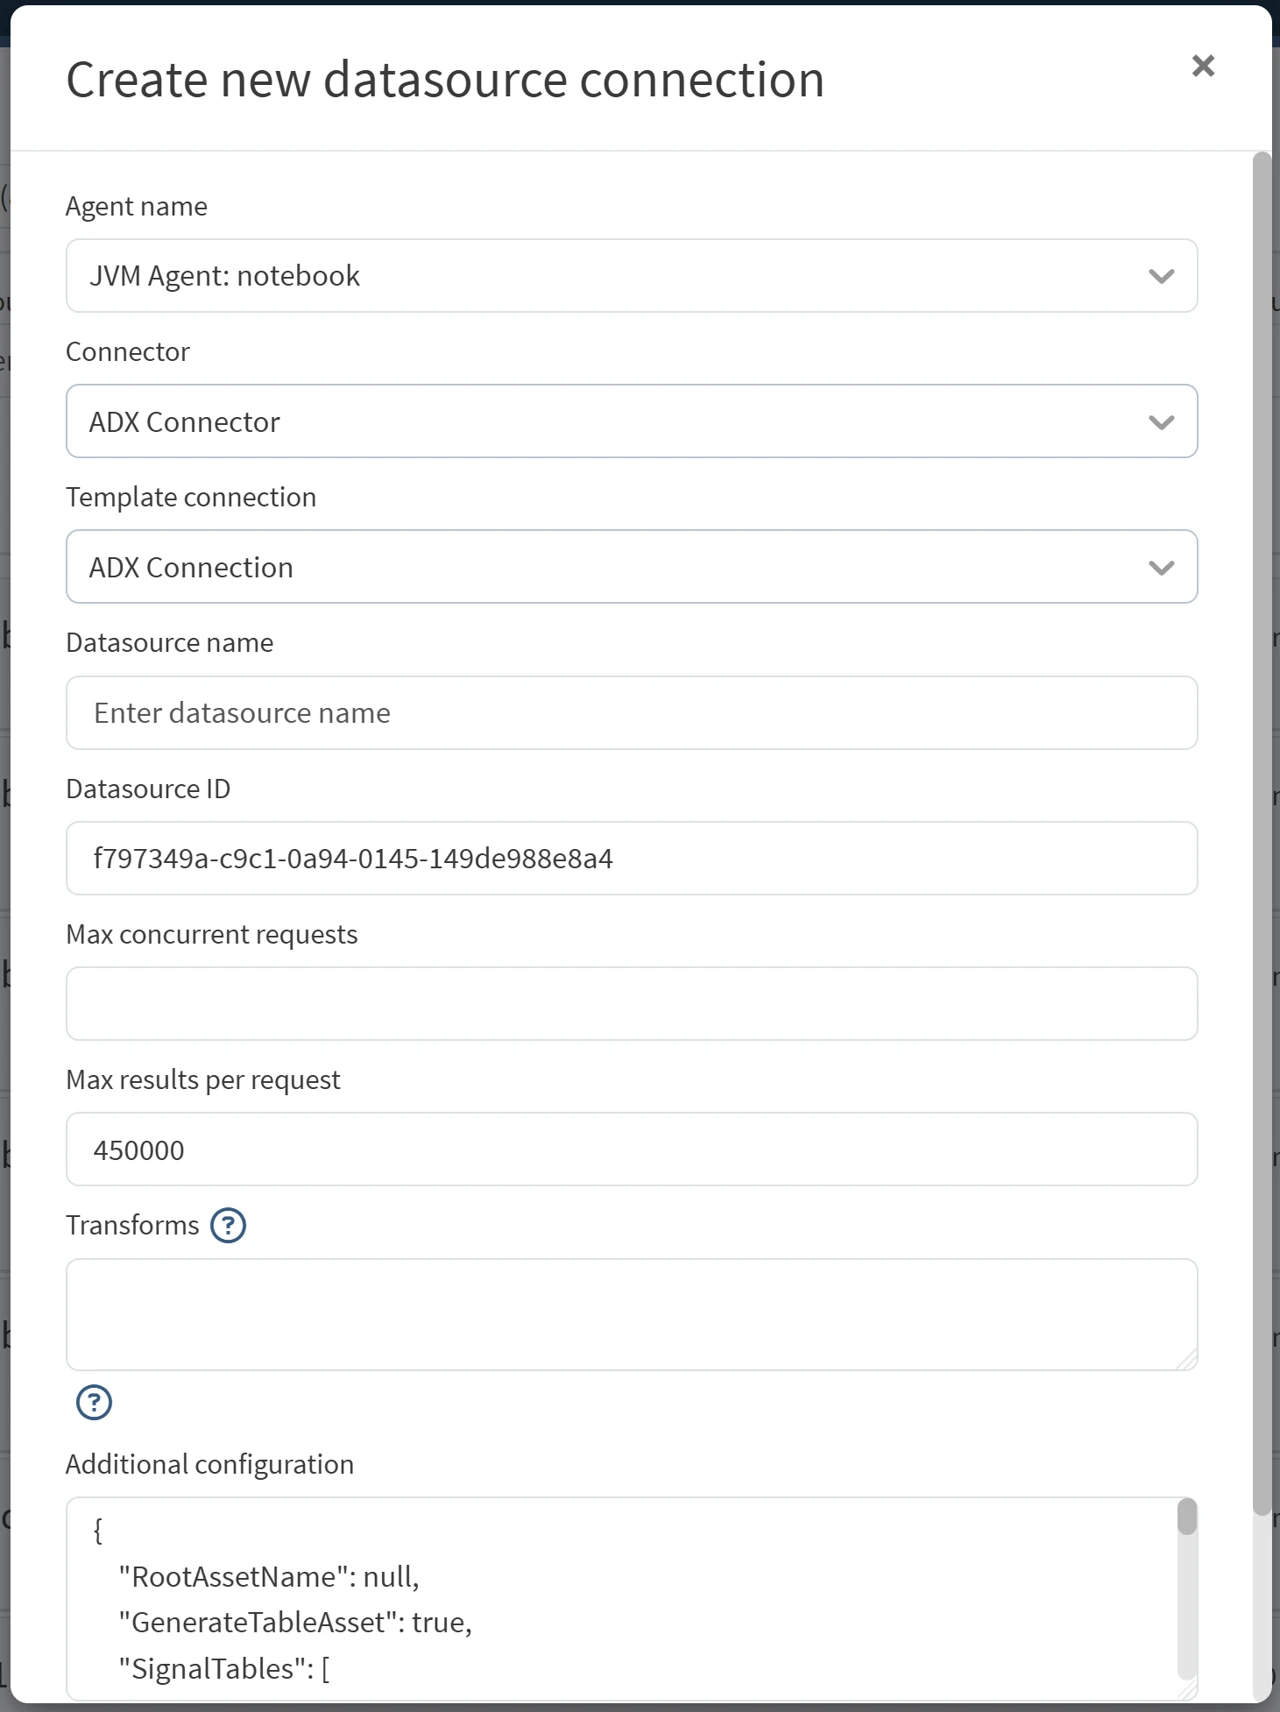
For a detailed description of the configuration file please see this document.
For this connection we are going to use the following configuration:
{
    "RootAssetName": "Region A",
    "GenerateTableAsset": false,
    "SignalTables": [
        {
            "Id": "ETV Data 1",
            "Name": "ETVData",
            "NameQuery": null,
            "GroupBy": [
                "siteId",
                "lineId",
                "machineId",
                "tag"
            ],
            "GroupByLimit": 0,
            "DataColumns": [
                "Value"
            ],
            "DataColumnQuery": null,
            "TimeColumn": "TS",
            "LastGroupAsSignalName": true,
            "TransformQuery": null,
            "TimeUnit": null,
            "ComputedGroupByResult": null,
            "GroupByRequestProperties": null,
            "DataRequestProperties": null,
            "MetadataQuery": {
                "TableName": null,
                "Filters": null,
                "Columns": null
            },
            "MetadataIdColumn": null,
            "SignalPropertiesMap": null
        }
    ],
    "ConditionTables": [],
    "ApplicationId": "<example application Id>",
    "AccessKey": "<example access Key>",
    "TenantId": "<example tenant ID>",
    "UserName": null,
    "UserPassword": null,
    "Cluster": "https://<cluster name>.<cluster region>.kusto.windows.net",
    "Database": "Documentation"
}
Make sure to replace the Cluster, ApplicationId, AccessKey, and TenantId with appropriate values. Once this configuration is saved, the connection will automatically index and show something similar to the image below.
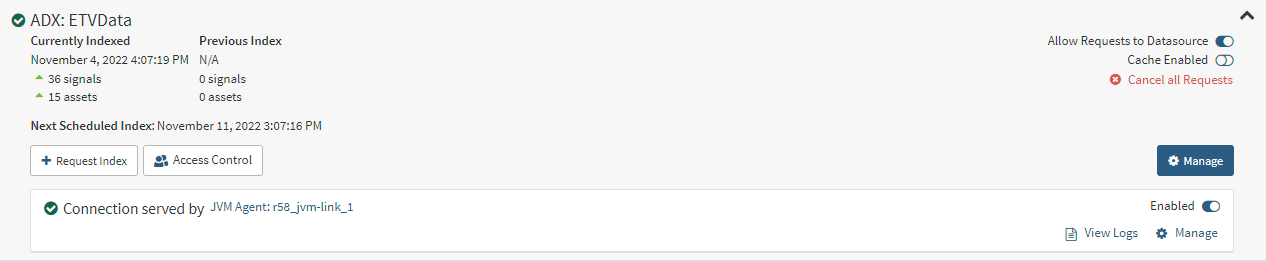
In this case we have significantly more assets than we did in previous examples as we are group by site, line, machine and tag columns.
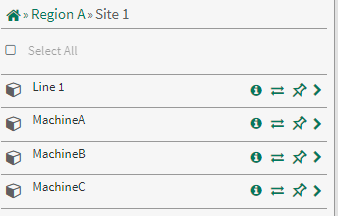
When we look at workbench now, we have named the root node Region A and there are Sites under Region A. Specifically, in the image to the right we see Region A, which is the root node, Site 1, and then Line 1 listed under the Site. We also see Machines under Site 1. This is because there are Machines that are not associated with a Line at Site 1. The ADX connector can handle unbalanced trees, this is why some of the cells for Line were blank in our input dataset.
The key properties that were set in the connector configuration here were RootAssetName, GenerateTableAsset, GroupBy and LastGroupAsSignalName. This allowed the Asset Tree in Seeq to be constructed as we desired in the section above.
Note: The GroupBy array order determines the order of the hierarchy of the Seeq Asset Tree.
Retrieving greater than 500,000 Assets
By default, ADX has a limit of 500,000 rows that it can return. when performing the distinct query for all of the columns listed in the GroupBy, there is a chance that a use case could exceed 500,000 rows. If that is the case the GroupByRequestProperties parameter will have to be set with a value of {"notruncation" : "true"}. This will allow ADX to return more than the default 500,000 rows per query.
Data Model Implications
This data model choice could negatively impact performance and model flexibility.
Flexibility
Because the asset hierarchy information is encoded in every row of the database, if this information changes, it would be difficult to update every historical value with this new information.
Performance
This hierarchy building is enabled by doing a multi-column distinct query. Depending on how many rows you have in your table, this query could time out in the default 4 minute timeout. However, if this is the model that you currently have, one solution is to create a materialized view that pre-computes the distinct values and populates a table. There is more information on that located here.