Example: Accessing Data from an Entity-Timestamp-Value Data Model
Overview
This guide will explain how to leverage ADX to access data that has been stored in an Entity-Timestamp-Value model. This model is most useful when there are a large number of signals that need to be accessed from a single table.
Accessing Entity-Timestamp-Value Data
Prerequisites
Note: This guide assumes you have performed the prerequisites (except for the data in ADX section) listed in Getting Started here.
Data in ADX
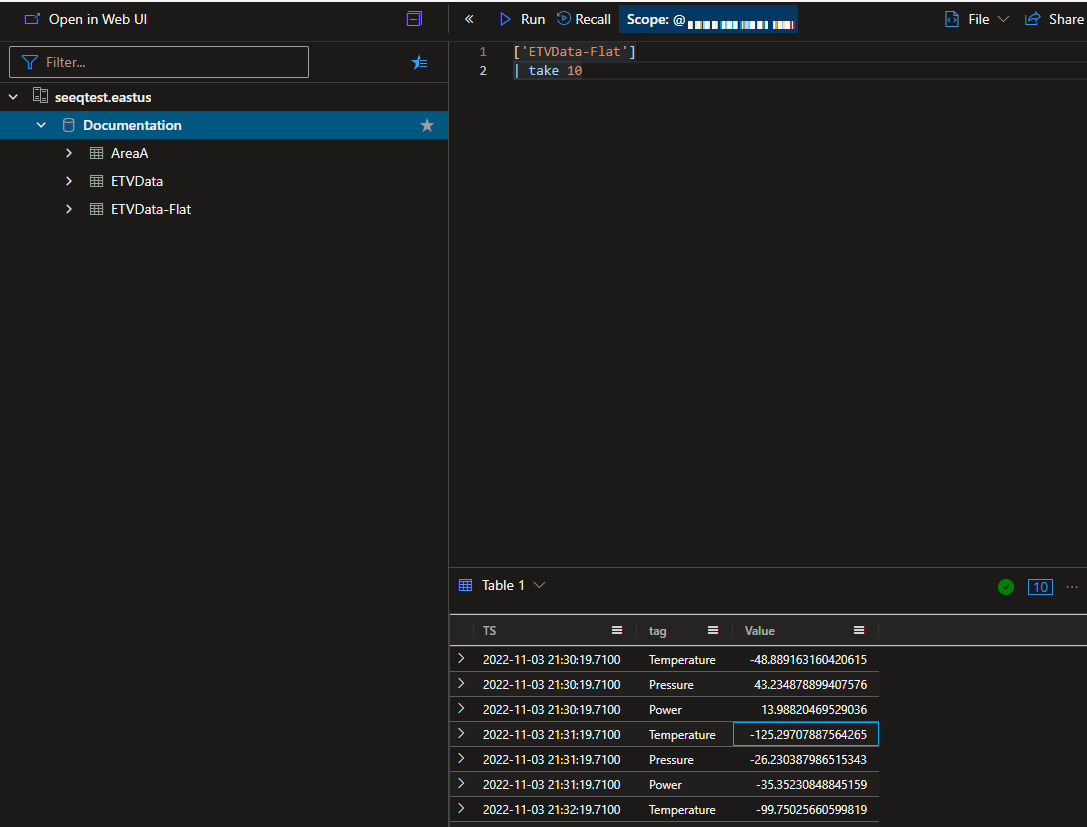
For this example we will be using data that is stored column-wise vs row-wise.
TS | tag | Value |
30:19.7 | Temperature | -48.88916316 |
30:19.7 | Pressure | 43.2348789 |
30:19.7 | Power | 13.9882047 |
31:19.7 | Temperature | -125.2970789 |
31:19.7 | Pressure | -26.23038799 |
31:19.7 | Power | -35.35230849 |

Once this data is ingested into the same ADX Database called Documentation as we were using in Getting Started, It will look like the image to the right. You will notice that this table has a - which will have to be escaped as well. The connector will perform this escaping automatically.
Creating the ADX connection
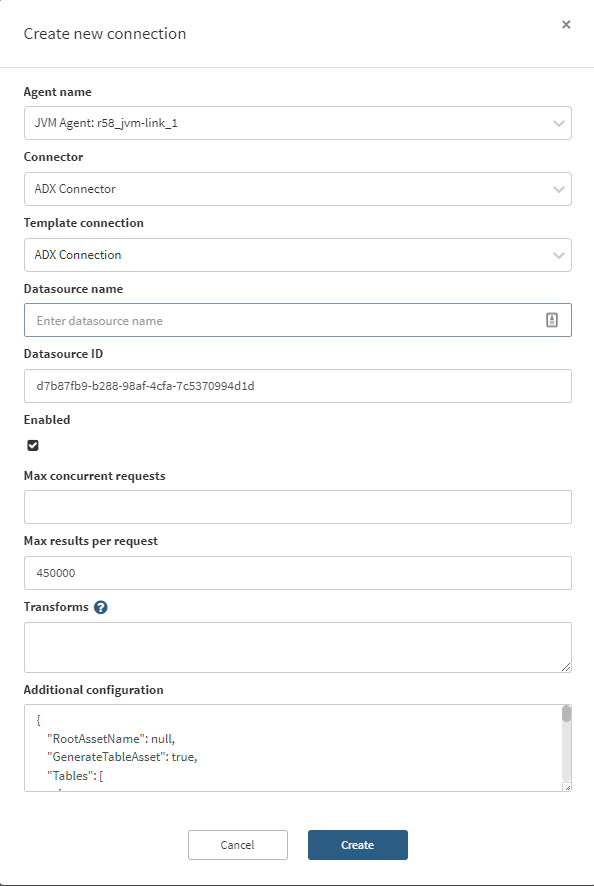
Proceed to the Administration page and click on the blue Add Connection button in the upper right.

From here, you will select an appropriate JVM agent from the drop down list, and then select the ADX connector. You can then select the default Template Connection (ADX Connection) to populate the Additional configuration box with a template for ADX-specific configuration.

For a detailed description of the configuration file please see this document.
For this connection we are going to use the following configuration:
{
    "RootAssetName": null,
    "GenerateTableAsset": true,
    "Tables": [
        {
            "Id": "ETV Data Flat 1",
            "Name": "ETVData-Flat",
            "NameQuery": null,
            "GroupBy": [
                "tag"
            ],
            "GroupByLimit": 0,
            "DataColumns": [
                "Value"
            ],
            "DataColumnQuery": null,
            "TimeColumn": "TS",
            "LastGroupAsSignalName": true,
            "TransformQuery": null,
            "TimeUnit": null,
            "ComputedGroupByResult": null,
            "GroupByRequestProperties": null,
            "DataRequestProperties": null,
            "MetadataQuery": {
                "TableName": null,
                "Filters": null,
                "Columns": null
            },
            "MetadataIdColumn": null,
            "SignalPropertiesMap": null
        }
    ],
    "ApplicationId": "<example application Id>",
    "AccessKey": "<example access Key>",
    "TenantId": "<example tenant ID>",
    "UserName": null,
    "UserPassword": null,
    "Cluster": "https://<cluster name>.<cluster region>.kusto.windows.net",
    "Database": "Documentation"
}
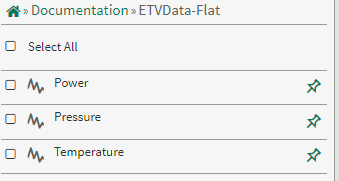
Make sure to replace the Cluster, ApplicationId, AccessKey, and TenantId with appropriate values. Once this configuration is saved, the connection will automatically index and show something similar to the image below.

Notice that we did not escape the table name in the configuration file. All of the table and column names are automatically escaped when the connector constructs the Kusto queries.
The key elements that enable this behavior are setting the GroupBy and LastGroupAsSignalName properties. The GroupBy property tells the connector to perform a distinct query on the tag column during the indexing phase of the connector, while the LastGroupAsSignalName property tells the connector to apply the value found in the tag column to the signal name.

When we navigate to a Workbench now, we can see that there is an Asset Tree called Documentation with a table asset named ETVData-Flat and the three distinct signals listed under it.
This asset tree could be customized in the same manner as we performed in the Getting Started section here.
